Building and Deploying an Application#
Clone and enter your containers.git:
$ git clone https://source.foundries.io/factories/<factory>/containers.git
$ cd containers
Your containers.git repository is initialized with a simple application example in shellhttpd.disabled.
Tip
Directory names ending with .disabled in containers.git are ignored by the FoundriesFactory™ Platform CI.
Move the entire application folder shellhttpd.disabled to shellhttpd:
$ git mv shellhttpd.disabled/ shellhttpd
Commit your changes with a message:
$ git commit -m "shellhttpd: add application"
Push all committed modifications to the remote repository:
$ git push

 Enumerating objects: 6, done.
 Counting objects: 100% (6/6), done.
 Delta compression using up to 16 threads
 Compressing objects: 100% (5/5), done.
 Writing objects: 100% (5/5), 795 bytes | 795.00 KiB/s, done.
 Total 5 (delta 0), reused 0 (delta 0), pack-reused 0
 remote: Trigger CI job...
 remote: CI job started: https://ci.foundries.io/projects/<factory>/lmp/builds/4/
 To https://source.foundries.io/factories/<factory>/containers.git
    daaca9c..d7bc382  main -> main
Note
The output of git push indicates the start of a new CI job.
Once your changes to the containers.git repository were pushed, the FoundriesFactory® CI automatically started a new container-main build.
Go to https://app.foundries.io, select your Factory and click on Targets:
The latest Target named containers-main should be the CI job you just created.
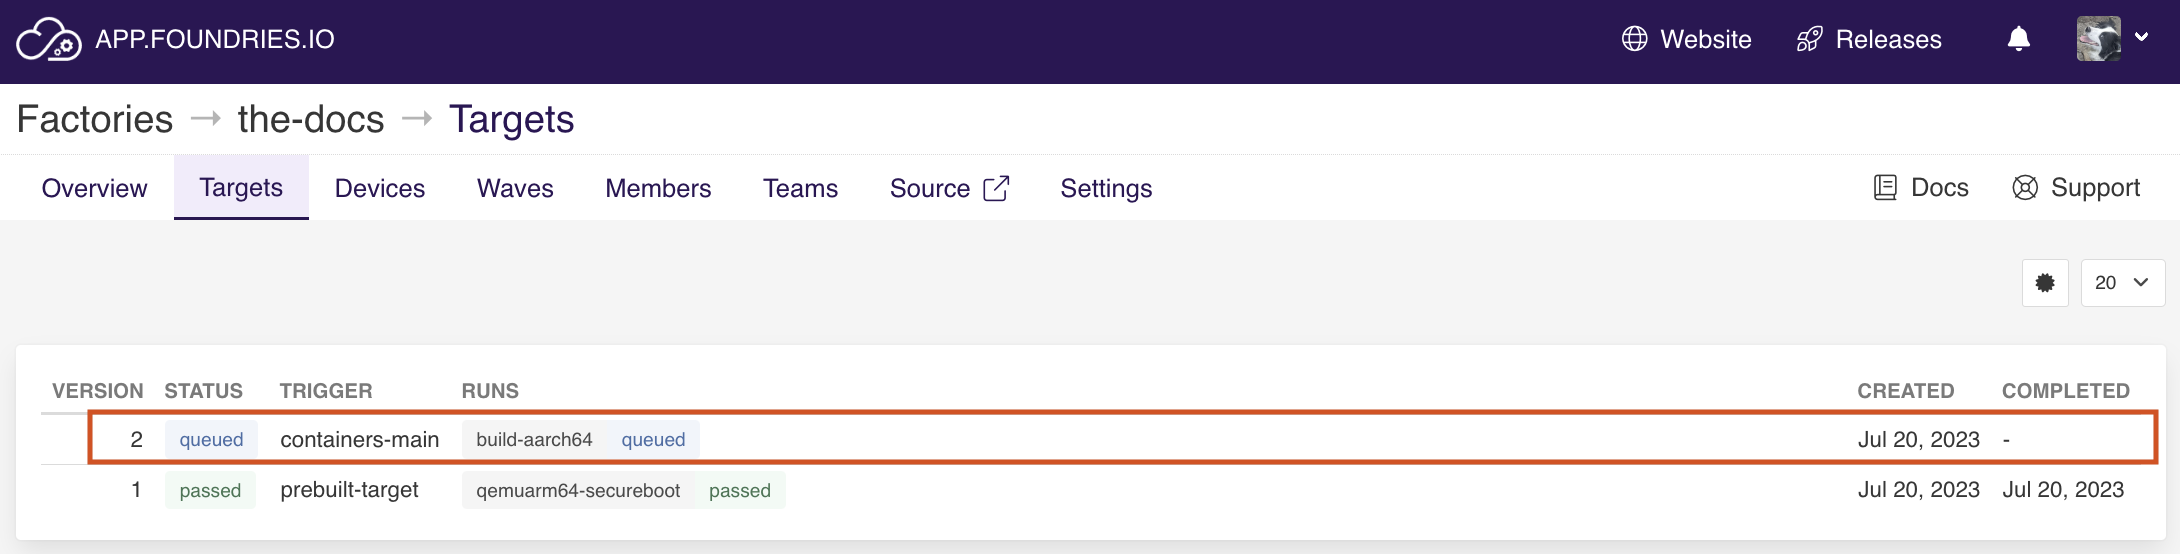
Fig. 14 FoundriesFactory Targets#
Your device is configured to always download the latest Target version with a specific tag.
By default, devices run all applications defined in the containers.git repo.
This behavior can be changed by enabling only specific applications.
This will be covered this in more detail later.
When the container build finishes, the device will download and start the shellhttpd application.
Check the device status on the devices page. Watch for the green light under STATUS.
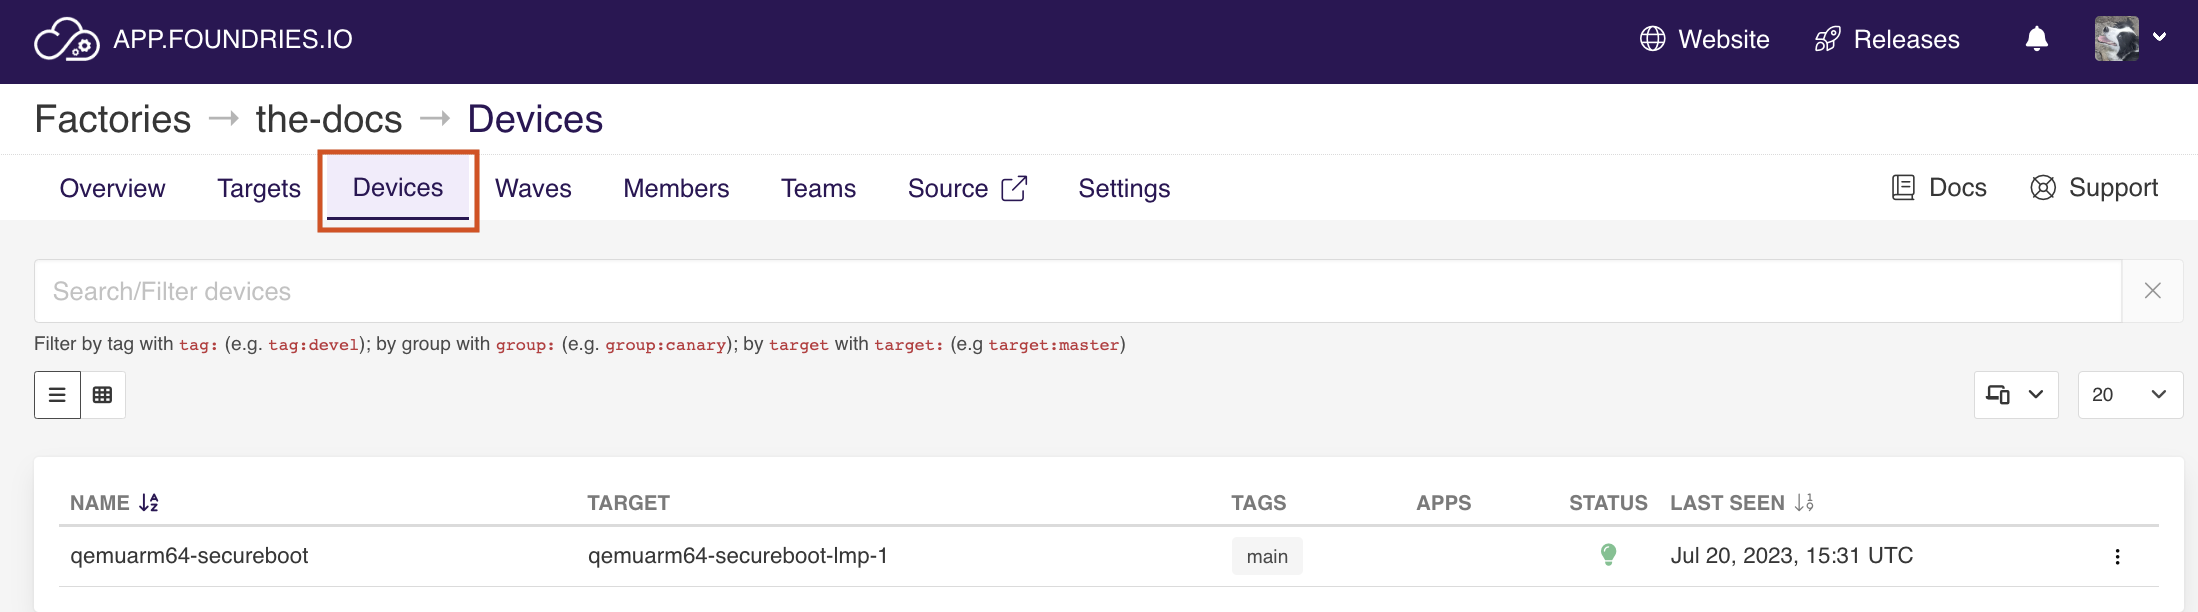
Fig. 15 Device List#
Testing the Container#
curl is not available on your device, instead run wget to test the container like so:
device:~$ wget -qO- 127.0.0.1:8080

 Hello world
You can also test the container from an external device connected to the same network, such as your computer.
$ #Example curl 192.168.15.11:8080
$ curl <device IP>:8080
  Hello world
You can get a more detailed guide by following the next section, Tutorials, starting with Getting Started With Docker.
See also
If you would like to learn about how to customize the platform, checkout both our tutorial, and the user guide on LmP Customization.