i.MX 8 ULP Evaluation Kit
Preparation
The instructions in this section show the preparation before the flashing procedure.
Ensure you replace the <factory> placeholder below with the name of your
Factory.
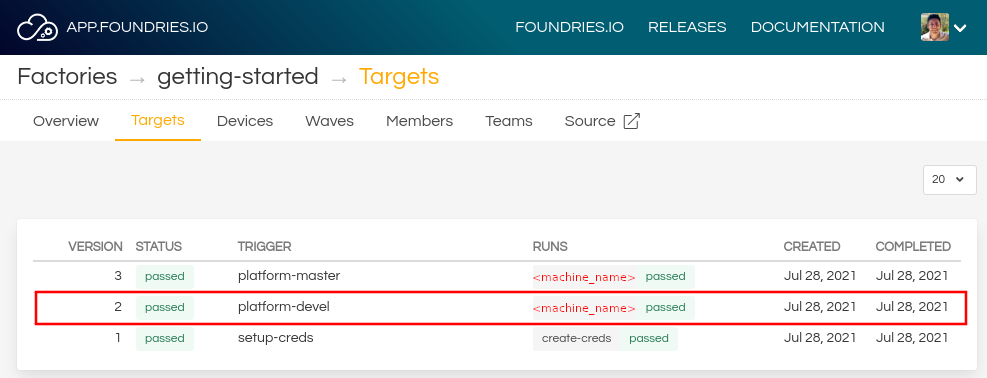
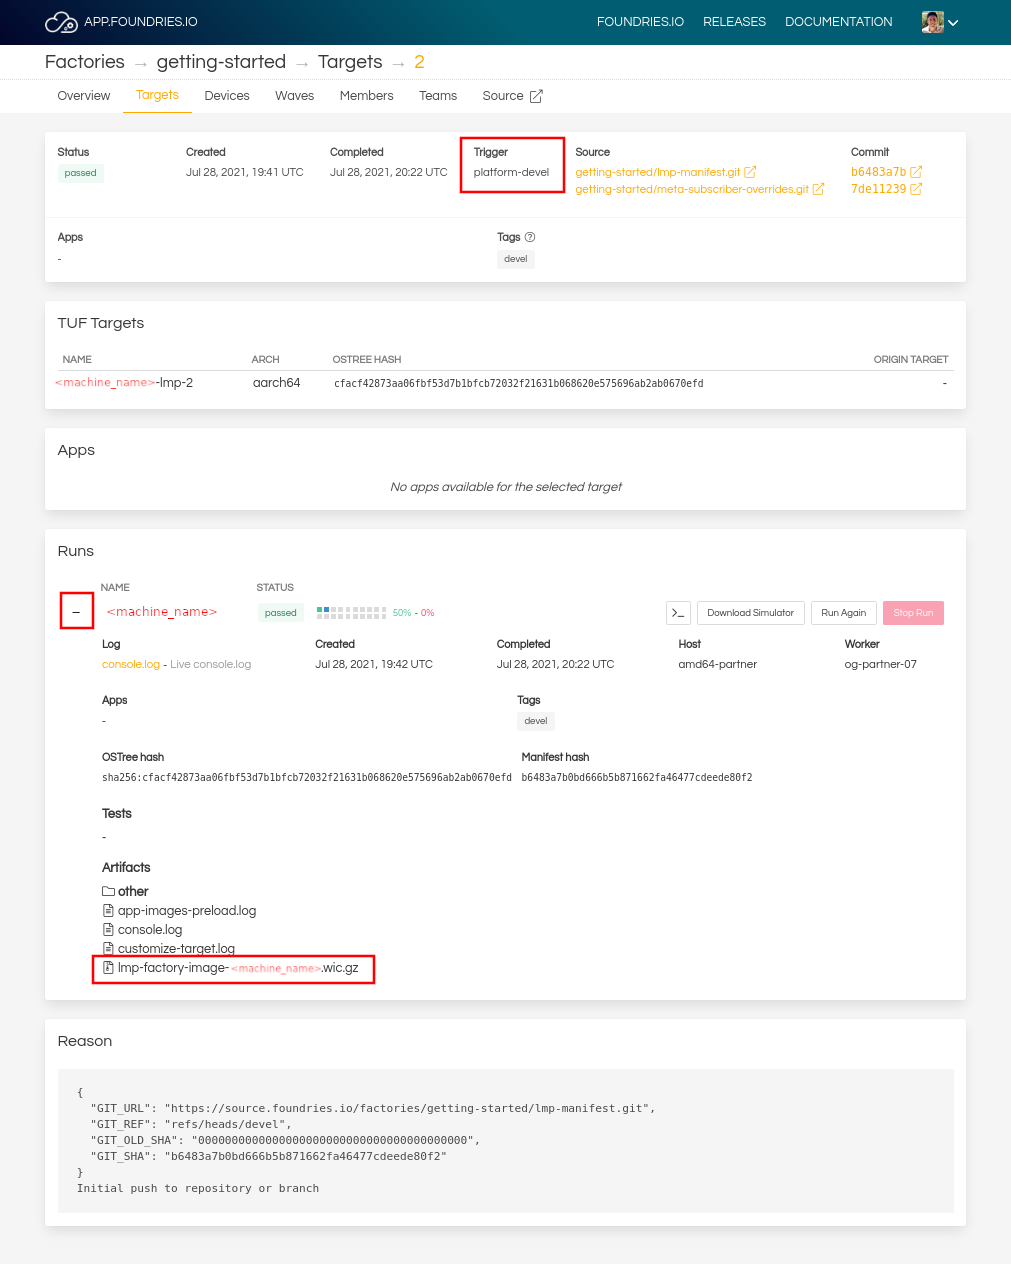
Download necessary files from
https://app.foundries.io/factories/<factory>/targetsExtract the file
lmp-factory-image-<machine_name>.wic.gz:gunzip lmp-factory-image-imx8ulp-lpddr4-evk.wic.gz
Download and extract the file
mfgtool-files-<machine_name>.tar.gz:tar -zxvf mfgtool-files-imx8ulp-lpddr4-evk.tar.gz
Organize all the files like the tree below:
├── lmp-factory-image-imx8ulp-lpddr4-evk.wic
├── u-boot-imx8ulp-lpddr4-evk.itb
├── imx-boot-imx8ulp-lpddr4-evk
└── mfgtool-files-imx8ulp-lpddr4-evk
     ├── bootloader.uuu
     ├── full_image.uuu
     ├── SPL-mfgtool
     ├── u-boot-mfgtool.itb
     ├── uuu
     └── uuu.exe
Hardware Preparation
Set up the board for updating using the manufacturing tools:
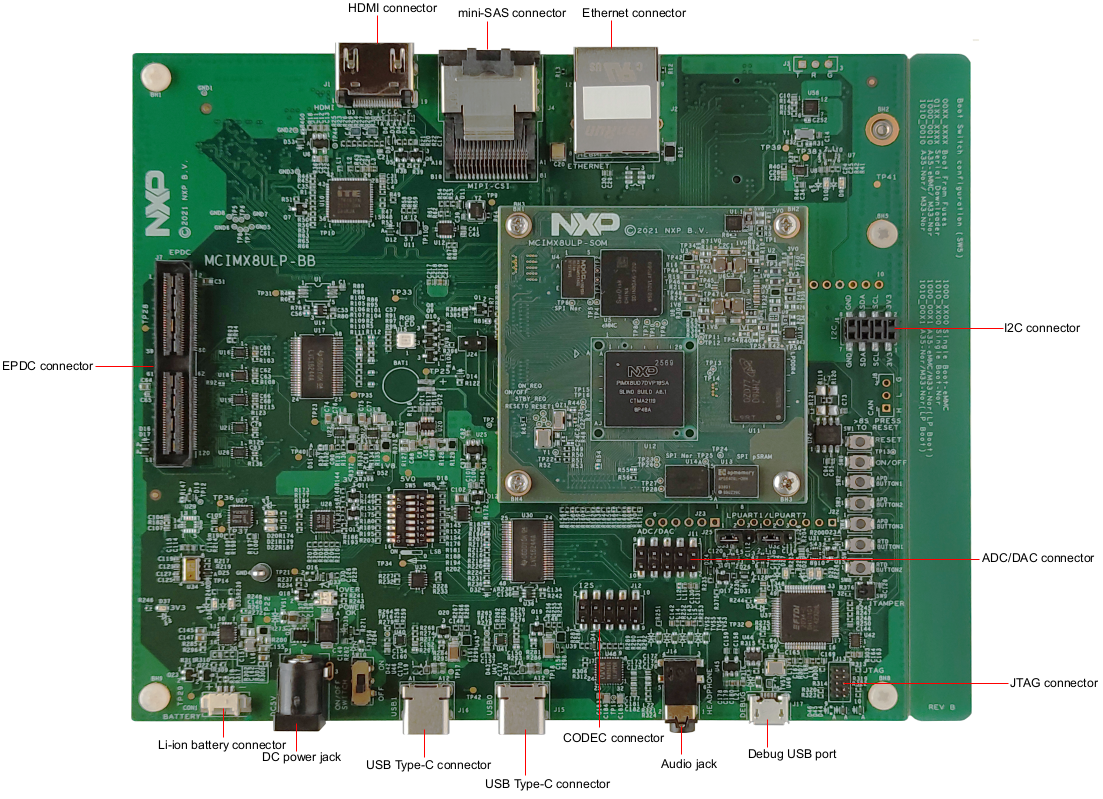
Top view of i.MX 8 ULP EVK
OPTIONAL—Only required if you have problems or want to see the boot console output.
Connect the micro-B end of the USB cable into debug port J17. Connect the other end of the cable to a PC acting as a host terminal. Three UART connections will appear on the PC. On a Linux host for example:
ls -l /dev/serial/by-id/
otal 0
rwxrwxrwx 1 root root 13 Feb 13 12:59 usb-0403_FT4232H_9266A2-if00-port0 -> ../../ttyUSB0
rwxrwxrwx 1 root root 13 Feb 13 12:59 usb-0403_FT4232H_9266A2-if02-port0 -> ../../ttyUSB2
rwxrwxrwx 1 root root 13 Feb 13 12:59 usb-0403_FT4232H_9266A2-if03-port0 -> ../../ttyUSB3
Using a serial terminal program like minicom, connect to the port with
if02in the name (in this examplettyUSB2) and apply the following configuration:- Baud rate: 115200
- Data bits: 8
- Stop bit: 1
- Parity: None
- Flow control: None
Ensure that the power is off (SW10)
Put the i.MX 8 ULP EVK into programing mode:
Connect your computer to the i.MX 8 ULP EVK board via the USB-C port 1
DownloadJ15 jack.Connect the USB-C power plug to the port 2
PowerSW10 jack.Power on the i.MX 8 ULP EVK board by sliding power switch SW10 to ON.
Flashing
Once in serial downloader mode and connected to your PC the evaluation board should show up as an NXP® USB device.
Follow the instructios below.
Verify target is present:
lsusb | grep NXP us 001 Device 023: ID 1fc9:012b NXP Semiconductors i.MX 8M Dual/8M QuadLite/8M Quad Serial Downloader
In this mode you will use the
uuutools to program the images to the eMMC. The USB ID may differ if a different SoC is used.Run the command below to program the LmP to the EMMC:
$ sudo mfgtool-files-imx8ulp-lpddr4-evk/uuu mfgtool-files-imx8ulp-lpddr4-evk/full_image.uuu
  uuu (Universal Update Utility) for nxp imx chips -- libuuu_1.4.243-0-ged48c51

  Success 1    Failure 0


  1:92     6/ 6 [Done                                  ] FB: done
Turn off the power.
Put the board into run mode
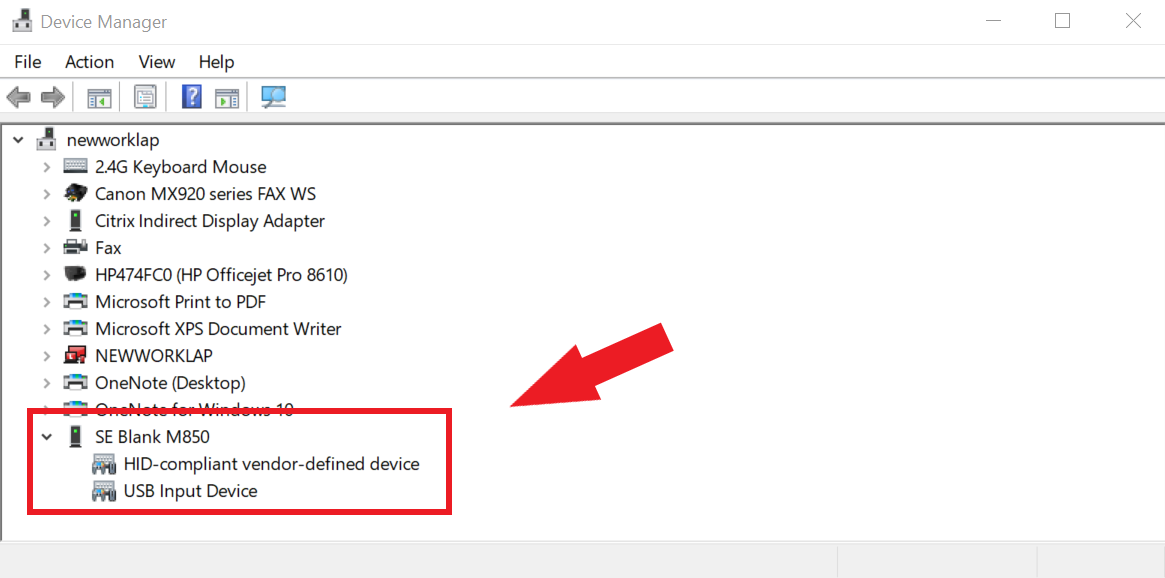
Start the
Device ManagerSelect
ViewSelect
Devices by containerRun the command below to program the LmP to the EMMC:
C:\Users\Someone> mfgtool-files-imx8ulp-lpddr4-evk\uuu.exe mfgtool-files-imx8ulp-lpddr4-evk\full_image.uuu
  uuu (Universal Update Utility) for nxp imx chips -- libuuu_1.4.243-0-ged48c51

  Success 1    Failure 0


  1:92     6/ 6 [Done                                  ] FB: done
Turn off the power.
Put the board into run mode
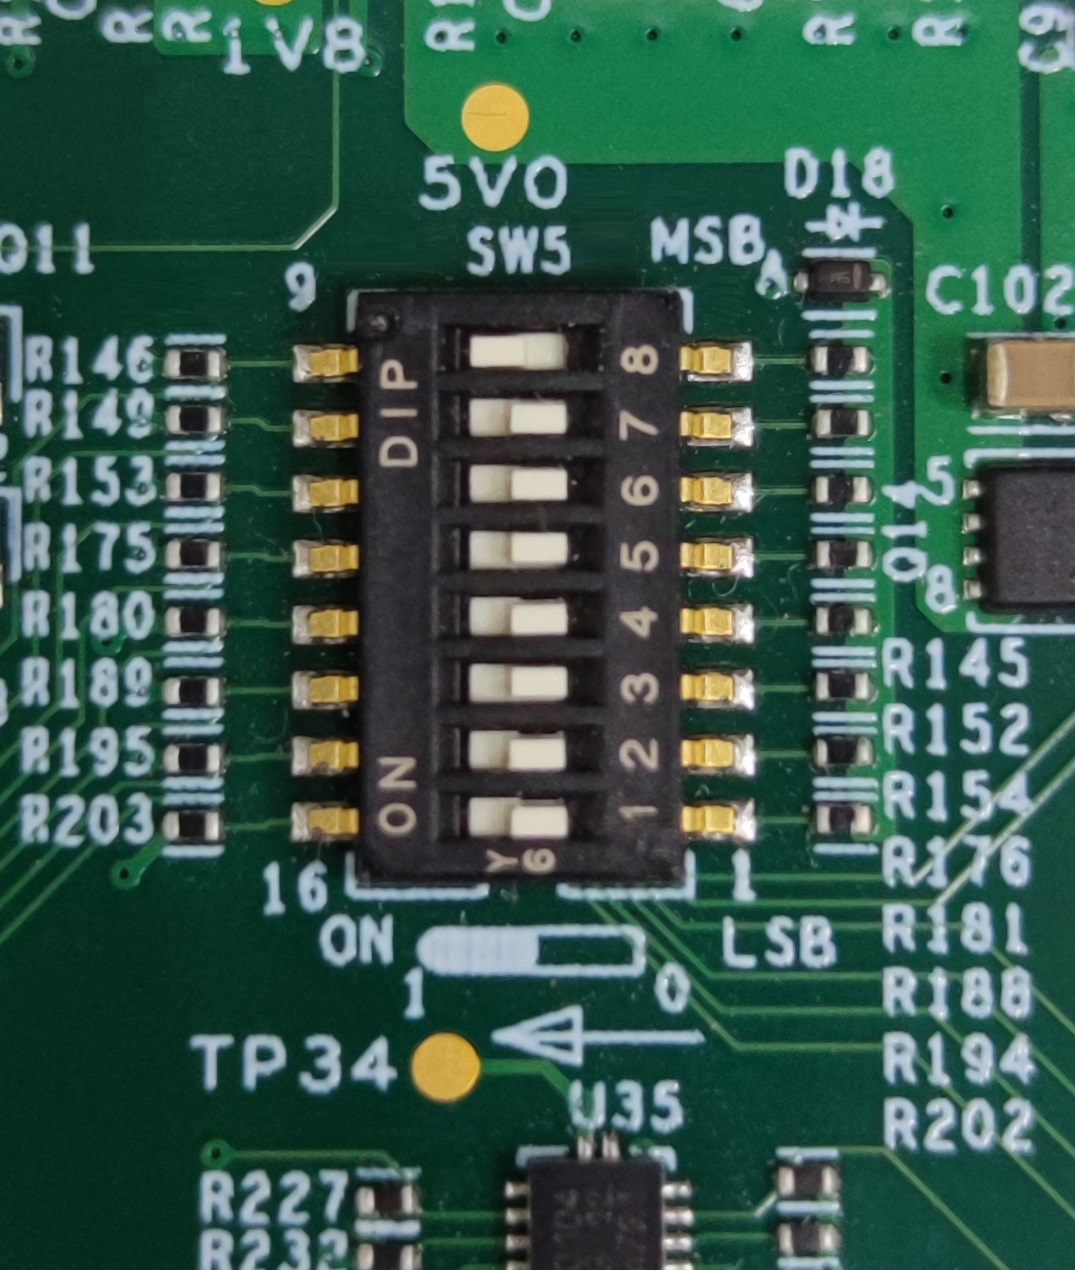
Put the i.MX 8 ULP EVK into run mode by switching SW5 to OFF, OFF, X, X, OFF, OFF, OFF, ON to set the board to boot from eMMC.
Power on the i.MX 8 ULP EVK board by sliding the power switch SW10 to ON.
