Working with Git Submodules
This section shows how to add a git submodule to your FoundriesFactory repository.
This is very helpful when you want to use an external private or public git repository, such as GitHub, connected to the FoundriesFactory repository as a submodule.
Submodules can be used to isolate two different application teams to work on separated repositories. In this case, each team works in their own repository and each repository is added as a submodule in the FoundriesFactory repository.
This section can be adapted for other git repository hosting services.
Create Github Repository
Go to GitHub and click on the button New in the upper left corner.
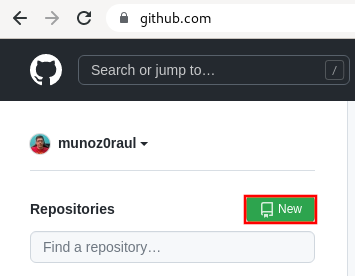
Fig. 35 GitHub New Repo
You can choose to use a private or a public repository.
Complete the Repository name with the name that works best for your repository.
Select Private and Create repository.
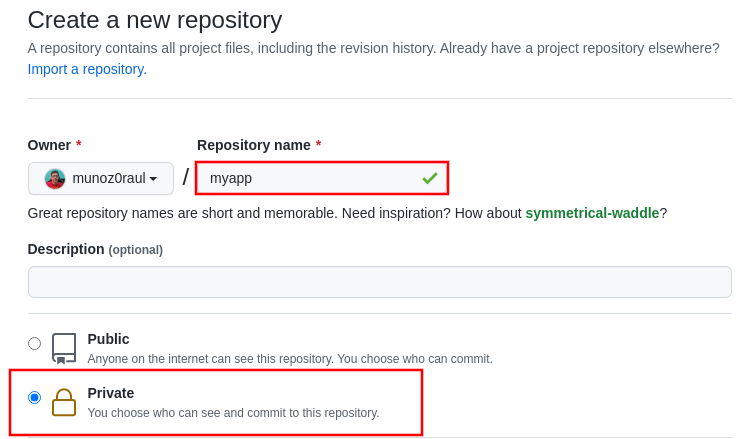
Fig. 36 New Private GitHub repository
The FoundriesFactory CI needs GitHub personal access token to download the submodule content during the build.
Go to GitHub and in the upper right corner, click on your avatar and Settings.

Fig. 37 GitHub Settings
In the left menu, click on the Developer settings.
Next, click on the Personal access tokens and click on the button Generate new token.
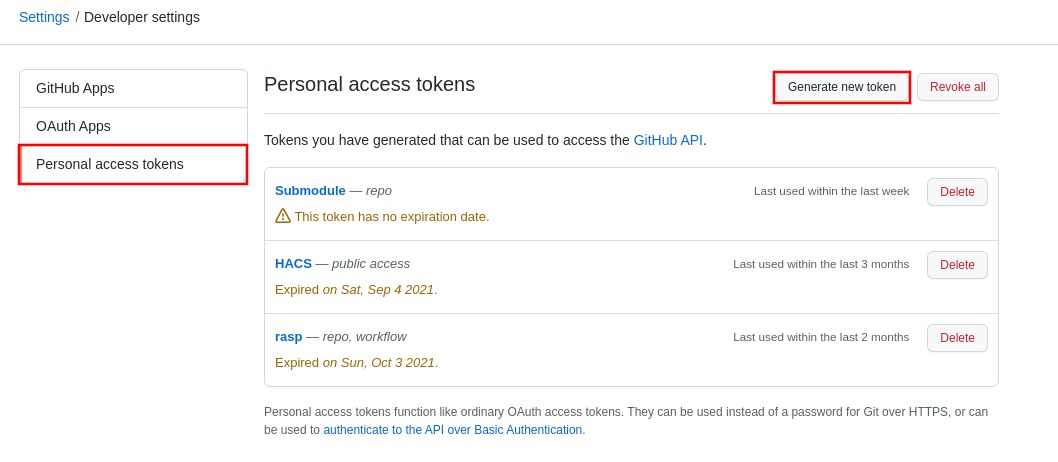
Fig. 38 Generate new token
Complete the Note and select the Expiration you like. Finally, select the repo scope and click on the Generate token.
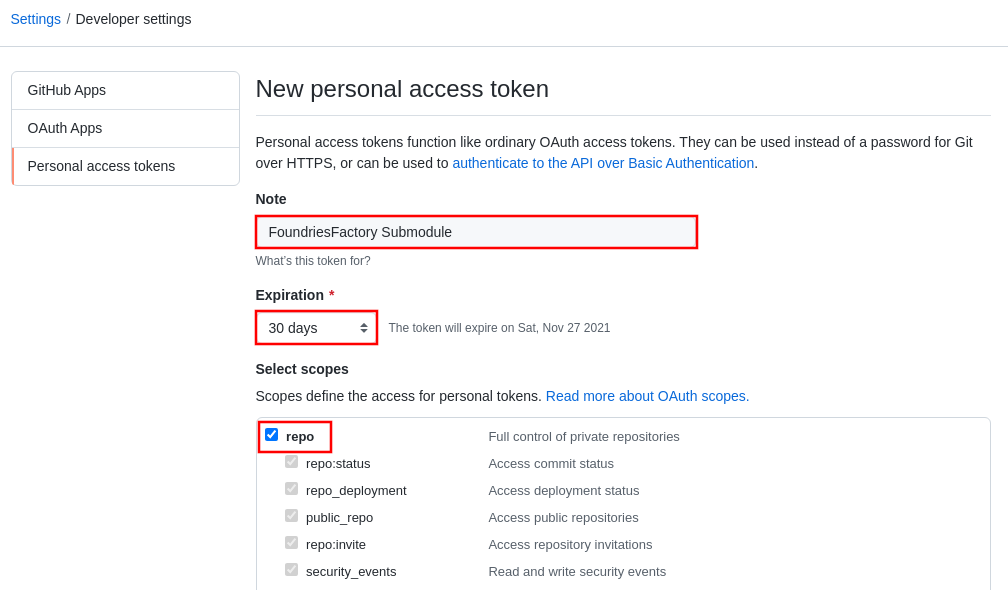
Fig. 39 Personal Token Scope
Make sure to copy your personal access token.

Fig. 40 Personal Token Scope
Configure your FoundriesFactory with the personal access token.
Use fioctl to configure the githubtok variable.
fioctl secrets update githubtok=<PERSONAL_TOKEN>
Complete the Repository name with the name work best for your repository.
Select Public and Create repository.
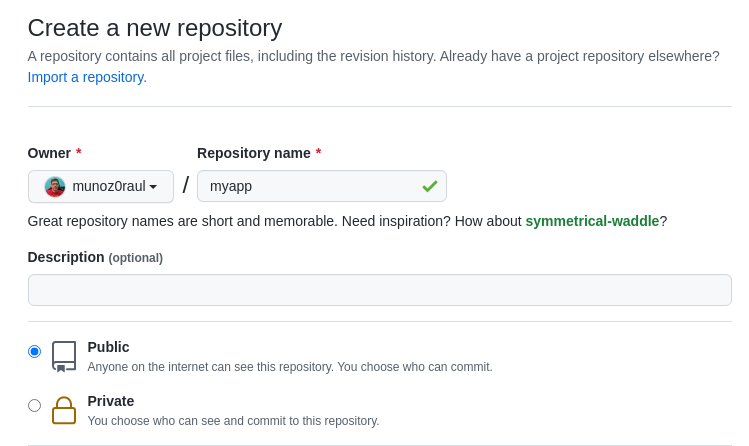
Fig. 41 New Public GitHub repository
Preparing GitHub Repository
The GitHub repository created will be used to specify a Docker Compose Application.
The requirements to the FoundriesFactory CI to build a Docker Image and create a
Docker Compose App with this image is to have a folder with a Dockerfile and a docker-compose.yml
If you are not familiar with the containers.git file structure, read the
section File Structure.
That being said, create a folder to initialize the GitHub repository.
mkdir myapp
cd myapp/
git init
git remote add origin [email protected]:munoz0raul/myapp.git
Add the shellhttpd files as reference:
git remote add fio https://github.com/foundriesio/extra-containers.git
git remote update
git checkout remotes/fio/tutorials -- shellhttpd
Your repository folder should be the folder containing the application files.
Move it from the shellhttpd folder to the repo root directory:
git mv shellhttpd/Dockerfile shellhttpd/docker-compose.yml shellhttpd/httpd.sh .
git rm -r shellhttpd/
Now you have the files required for a Docker Compose Application:
tree ../myapp/
Example output:
../myapp/
├── docker-compose.yml
├── Dockerfile
└── httpd.sh
Update the image url in the docker-compose.yml file with your repository name.
This example uses myapp:
vim docker-compose.yml
docker-compose.yml:
version: '3.2'

services:
  httpd:
    image: hub.foundries.io/${FACTORY}/myapp:latest
    build: .
    restart: always
    ports:
      - 8080:${PORT-8080}
    environment:
      MSG: "${MSG-Hello world}"
Add all new files, changes and commit and push:
git add docker-compose.yml Dockerfile httpd.sh
git commit -m "Adding App Structure"
git branch -M devel
git push --set-upstream origin devel
Adding Submodule
Clone your containers.git repo and enter its directory:
git clone -b devel https://source.foundries.io/factories/<factory>/containers.git
cd containers
Tip
If you followed the Tutorials, your containers.git might have the shellhttpd
app already. If that is the case, to avoid conflict with the submodule example remove
or move it to shellhttpd.disabled
Inside the containers adapt the command below to your GitHub repository:
git submodule add [email protected]:<user>/<repository>.git
Example:
git submodule add -b devel [email protected]:munoz0raul/myapp.git
cd myapp
git add myapp/
git commit -m "Adding myapp submodule"
git push
Go to the web app, select your Factory and click on Targets:
The latest Target named containers-devel should be the CI job you just created.
Click anywhere on the Target’s line in the list to see more details.
After the CI Job finishes, refresh the page and find your application in Apps:

Fig. 42 Submodule Application
In your Factory, click on Source and select the container.git repository:

Fig. 43 Containers Repository
Note the application submodule is available but it is not possible to inspect the application files.
Updating Submodule Manually
The submodule inside the containers.git is pinned to the latest GitHub repository commit.
As new commits are added to the GitHub repository, the containers.git must
be updated with the latest submodule changes.
It is possible to do it manually or using GitHub Actions.
To update it manually, go to your containers folder, inside the submodule and run:
cd containers/
git submodule update --remote ./myapp
git add myapp
git commit -m "Updating submodule hash"
git push
Updating Submodule Automatically
To automate the previous steps, you have to allow GitHub to access your FoundriesFactory repository. For that, you need to create a token.
Go to Tokens and create a new Api Token by clicking on + New Token.
Complete with a Description and the Expiration date and select next.
For GitHub, check the Use for source code access box and select your Factory.
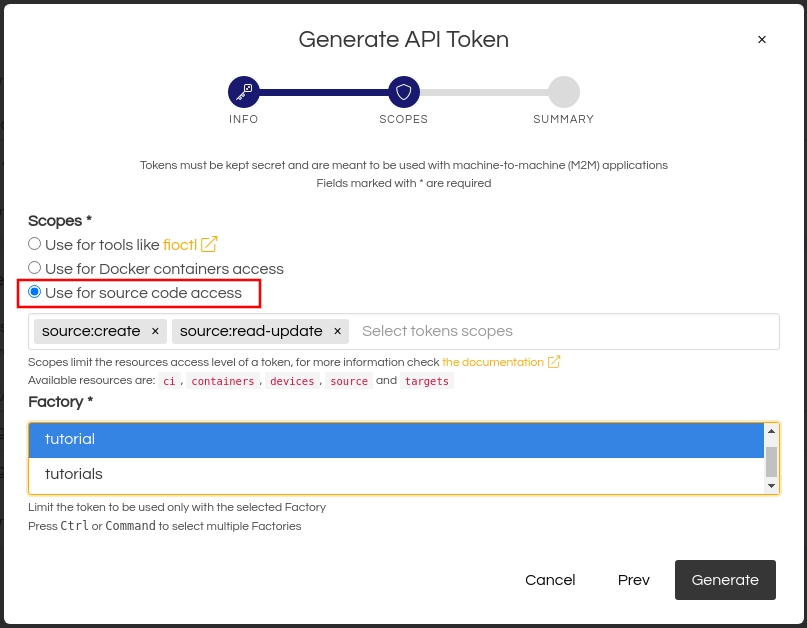
Fig. 44 Token for source code access
Copy the token, go to the Github repository and find the repository Settings.
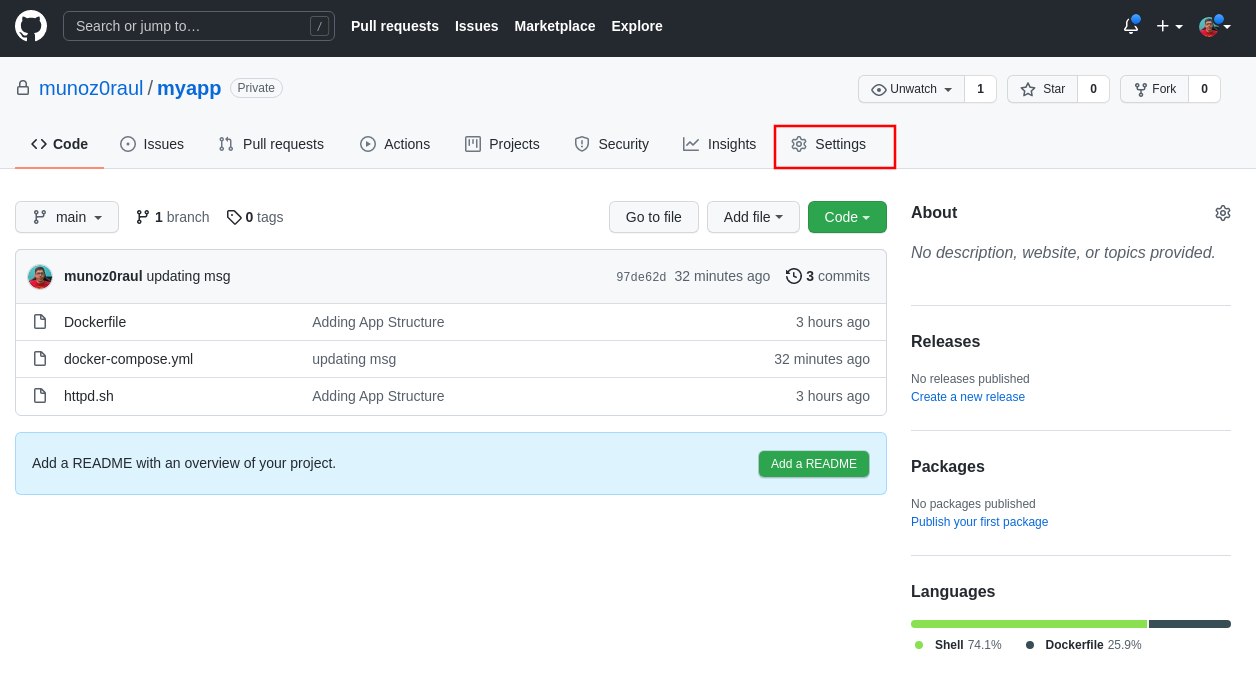
Fig. 45 Repository Settings
Select Secrets in the left menu and New repository secret.
Name it with FOUNDRIES_API_TOKEN, paste your <Token> on Value and click on Add Secret:
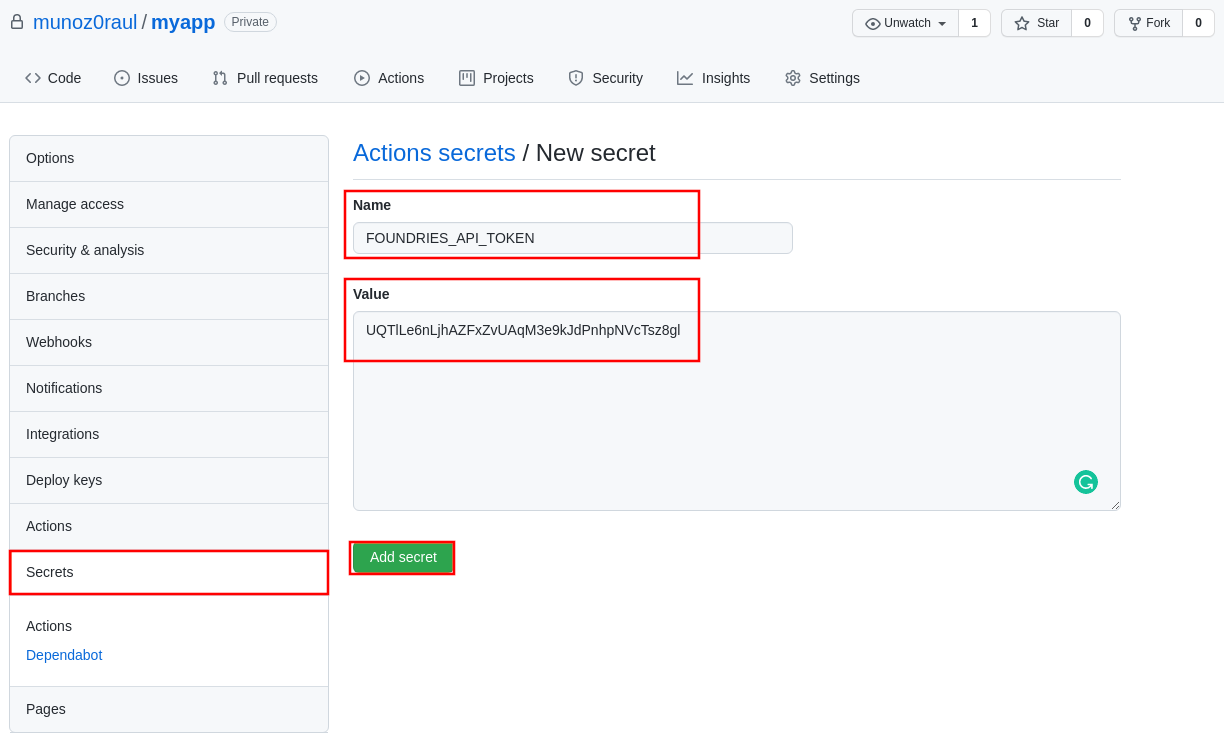
Fig. 46 Action Token
Create the file .github/workflows/source-fio-update.yml inside your GitHub
application repository. Follow the example below and make sure you update the
<FACTORY_NAME> to your Factory Name and <SUBMODULE_FOLDER> with your
submodule folder name.
cd myapp/
mkdir -p .github/workflows/
gedit .github/workflows/source-fio-update.yml
docker-compose.yml:
# .github/workflows/source-fio-update.yml

name: Update source.foundries.io

on:
  push:
    branches: [ devel ]

jobs:
  update:
    runs-on: ubuntu-latest
    steps:
    # Checks-out your repository under $GITHUB_WORKSPACE
    - uses: actions/checkout@v2
    - uses: doanac/gh-action-update-submodule@master
      with:
        remote-repo: https://source.foundries.io/factories/<FACTORY_NAME>/containers.git
        api-token: ${{ secrets.FOUNDRIES_API_TOKEN }}
        submodule-path: "./<SUBMODULE_FOLDER>"
        remote-branch: ${{ github.ref }}
Add and commit your GitHub Action:
git add .github/workflows/source-fio-update.yml
git commit -m "Adding Action"
git push
After this commit, the submodule should be automatically updated inside the
containers.git repository. As a result, it will automatically trigger a new
FoundriesFactory CI Job to build your application.