NXP i.MX 8QuadMax Multisensory Enablement Kit (MEK)
Preparation
Ensure you replace the <factory> placeholder below with the name of your
Factory.
Download necessary files from
https://app.foundries.io/factories/<factory>/targetsClick the latest Target with the
platform-develTrigger.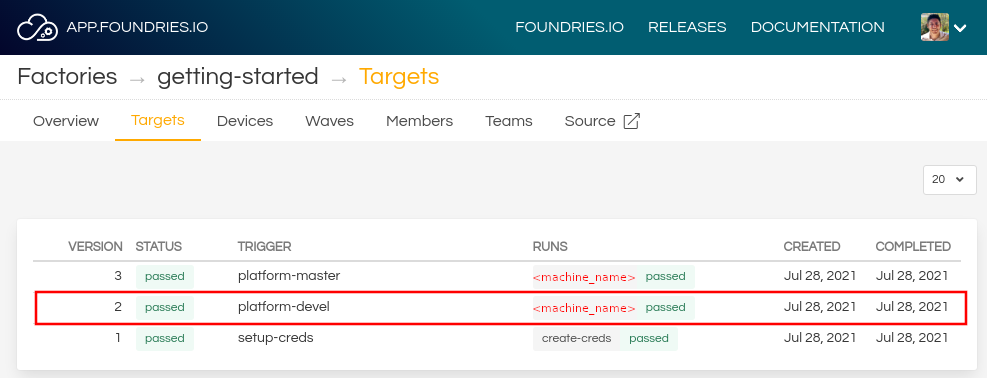
Expand the run in the Runs section which corresponds with the name of the board and download the Factory image for that machine.
E.g:lmp-factory-image-<machine-name>.wic.gzu-boot-<machine-name>.itbimx-boot-<machine-name>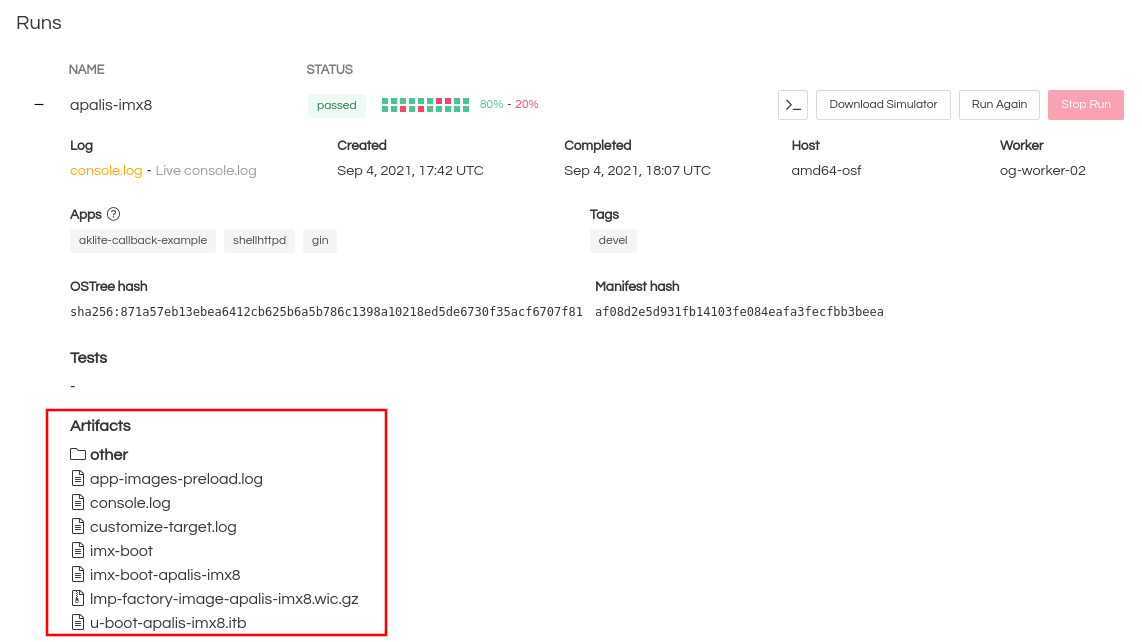
Extract the file
lmp-factory-image-<machine-name>.wic.gz:gunzip lmp-factory-image-<machine-name>.wic.gz
Expand the run in the Runs section which corresponds with the name of the board mfgtool-files and download the tools for that machine.
E.g:
mfgtool-files-<machine-name>.tar.gzDownload and extract the file
mfgtool-files-<machine-name>.tar.gz:tar -zxvf mfgtool-files-<machine-name>.tar.gz
Organize all the files like the tree below:
├── lmp-factory-image-<machine-name>.wic.gz
├── u-boot-<machine-name>.itb
├── imx-boot-<machine-name>
└── mfgtool-files-<machine-name>
    ├── bootloader.uuu
    ├── full_image.uuu
    ├── SPL-mfgtool
    ├── u-boot-mfgtool.itb
    ├── uuu
    └── uuu.exe
Hardware Preparation
Set up the board for updating using the manufacturing tools:
Connect the micro-B end of the supplied USB cable into Debug UART port J18. Connect the other end of the cable to a host computer.
Connect Type-C into USB Type-C port
J17. Connect the other end of the cable to a host computer.Use boot switch (
SW2) to configure to boot from SDP ([D1-D6]: 000100).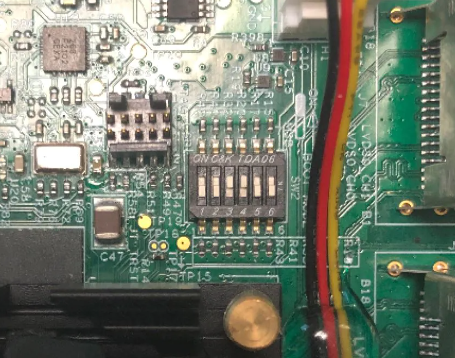
Fig. 84 Boot switches
Power the board by flipping the switch (
SW1).
Flashing
Once in serial downloader mode and connected to your PC, the evaluation board should show up as a Freescale USB device.
Note
Device names and IDs can slightly differ from the steps below.
Verify target is present:
$ lsusb | grep Freescale
Bus 002 Device 052: ID 15a2:0080 Freescale Semiconductor, Inc.
In this mode you will use the
uuutools to program the images to the eMMC.Run the command below to program the LmP to the EMMC:
$ sudo mfgtool-files-<machine-name>/uuu -pp 1 mfgtool-files-<machine-name>/full_image.uuu
uuu (Universal Update Utility) for nxp imx chips -- libuuu_1.4.43-0-ga9c099a

Success 1    Failure 0


1:31     3/ 3 [=================100%=================] SDPV: jump
2:31     8/ 8 [Done                                  ] FB: done
Turn off the power.
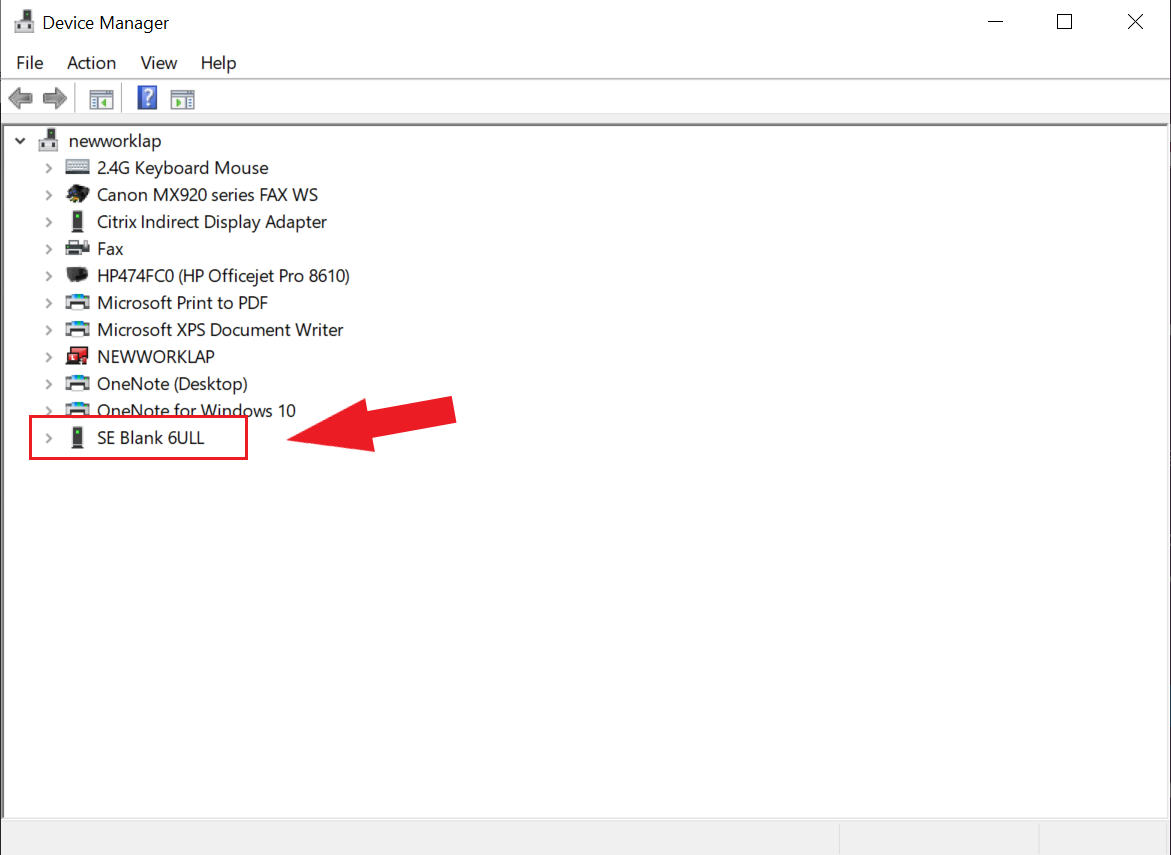
Put the board into run mode
- Start the
Device Manager - Select
View - Select
Devices by container - Verify a device like the following:
Run the command below to program the LmP to the EMMC:
C:\Users\Someone> mfgtool-files-<machine-name>\uuu.exe -pp 1 mfgtool-files-<machine-name>\full_image.uuu
uuu (Universal Update Utility) for nxp imx chips -- libuuu_1.4.43-0-ga9c099a

Success 1    Failure 0


1:31     3/ 3 [=================100%=================] SDPV: jump
2:31     8/ 8 [Done                                  ] FB: done
Turn off the power.
Put the board into run mode
Configure the boot switch (SW2) to boot from eMMC ([D1-D6]: 001000).
Power on the board to boot the new image.