Building SDK
The Yocto Project Standard SDK is a development environment composed by:
- toolchain
- debug tools
- sysroot (created based on the SDK image)
The SDK is used to replicate the tools and files from the target image, but without depending on BitBake. For details on what the SDK is and a complete description of how to work with it, visit Yocto Project Application Development and the Extensible Software Development Kit.
The LmP can be configured to
create an SDK install script of the same rootfs image
built by the CI.
The SDK install script is created by
bitbake <image> -c populate_sdk.
When the lmp:params:BUILD_SDK is set
and a new target is created,
the SDK install script is also built.
This configuration increases the build time, so enable the variable only when a new SDK install script is needed.
Change the file
ci-scripts/factory-config.yml
to include the variable BUILD_SDK: "1"
whenever a new SDK install script is needed,
as the following example.
lmp:
params:
BUILD_SDK: "1"
The SDK image is available under the SDK folder.
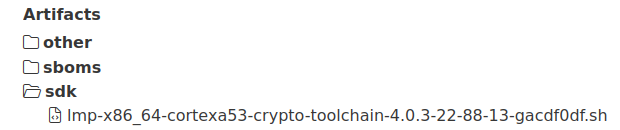
Fig. 99 Where to find the SDK install script
Installation
After downloading the SDK install script,
you can install it in any folder.
In this example, we use /usr/local/cortexa53-crypto.
$ ./lmp-x86_64-cortexa53-crypto-toolchain-4.0.3-22-88-13-gacdf0df.sh
Linux-microPlatform SDK installer version 4.0.3-22-88-13-gacdf0df
=================================================================
Enter target directory for SDK (default: /usr/local/lmp-x86_64): /usr/local/cortexa53-crypto
You are about to install the SDK to "/usr/local/cortexa53-crypto". Proceed [Y/n]? y
Extracting SDK.................................................................................................................................................................................................................................done
Setting it up...done
SDK has been successfully set up and is ready to be used.
Each time you wish to use the SDK in a new shell session, you need to source the environment setup script e.g.
After the installation, the resultant folder has the sysroots for the host and target architecture.
It also contains the script used to setup the environment to work with the SDK:
$ tree -L 2
.
├── environment-setup-cortexa53-crypto-lmp-linux
├── site-config-cortexa53-crypto-lmp-linux
├── sysroots
│   ├── cortexa53-crypto-lmp-linux
│   └── x86_64-oesdk-linux
└── version-cortexa53-crypto-lmp-linux

3 directories, 3 files
To use the toolchain and the sysroots from the newly installed SDK,
source the script as in the following instructions:
$ source /usr/local/cortexa53-crypto/environment-setup-cortexa53-crypto-lmp-linux
$ cd helloworld/
$ $CC helloworld.c -o helloworld
$ ./helloworld
  bash: ./helloworld: cannot execute binary file: Exec format error
$ file helloworld
  helloworld: ELF 64-bit LSB pie executable, ARM aarch64, version 1 (SYSV), dynamically linked, interpreter /lib/ld-linux-aarch64.so.1, BuildID[sha1]=80e241327bd3412b91c2035cbacb73e87797e0b5, for GNU/Linux 3.14.0, with debug_info, not stripped
With the exported environment variable,
it is possible to build using the toolchain
and, when needed, to use the header or other files from the sysroots.
In the example, we see that the generated file can not be executed on the host machine.
Using file, we learn this is because the binary is for ARM aarch64 architecture.
For more information regarding Standard SDK, follow the Yocto Project instructions.