i.MX 8M Quad Evaluation Kit with SE050ARD#
This page walks through walk installing a FoundriesFactory™ Platform image with SE050 hardware enabled onto the NXP® imx8mqevk,
connected to the NXP OM-SE050ARD development platform.
Note
An image created in the Factory with SE050 enabled will not boot on boards without the SE050 properly attached.
Attaching the SE050#
Using four male to male jumper wires (Arduino Compatible Pin size) connect the two boards as shown:
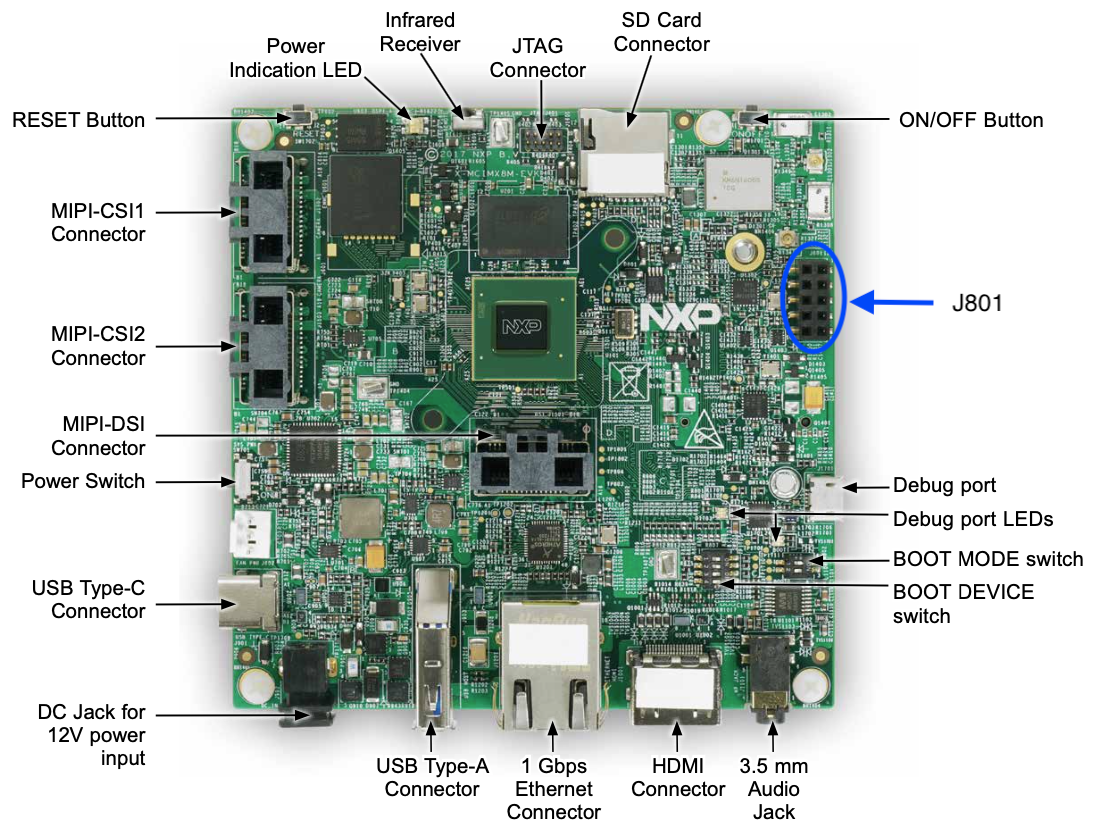
Fig. 31 imx8mqevk#
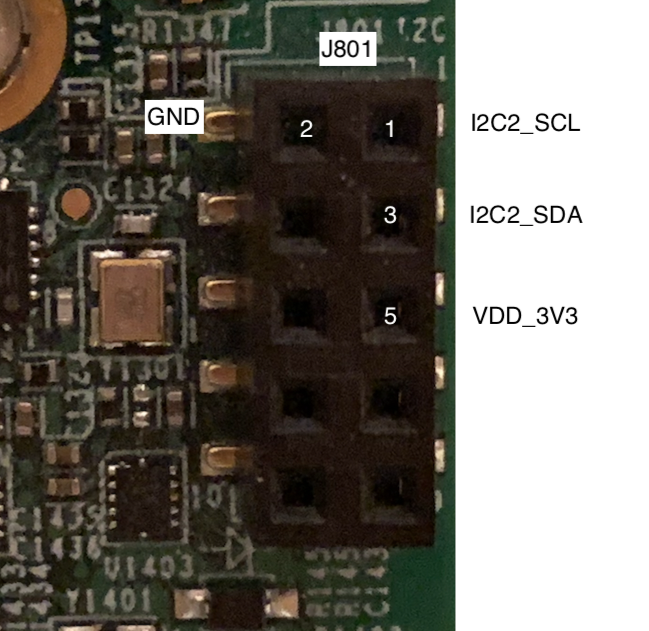
Fig. 32 imx8mqevk i2c pinout#
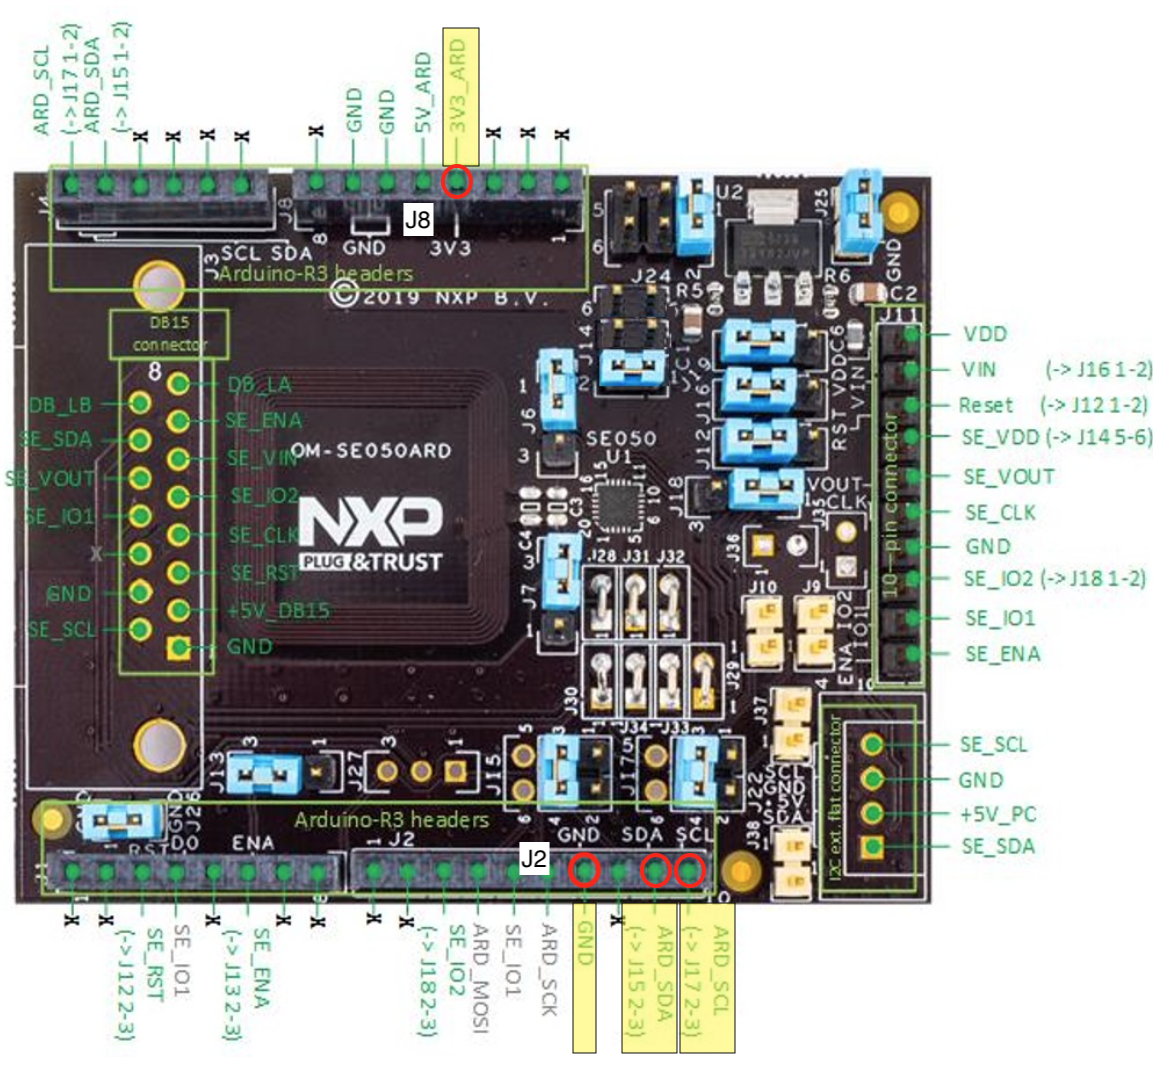
Fig. 33 SE050ARD#
Connect the signals as follows:
Signal |
imx8mqevk |
OM-SE050ARD |
|---|---|---|
SCL |
J801 pin 1 |
J2 pin 10 |
SDA |
J801 pin 3 |
J2 pin 9 |
VDD_3V3 |
J801 pin 5 |
J8 pin 4 |
GND |
J801 pin 2 |
J2 pin 7 |
Be sure that the jumpers on the SE050 evaluation board are set as shown:
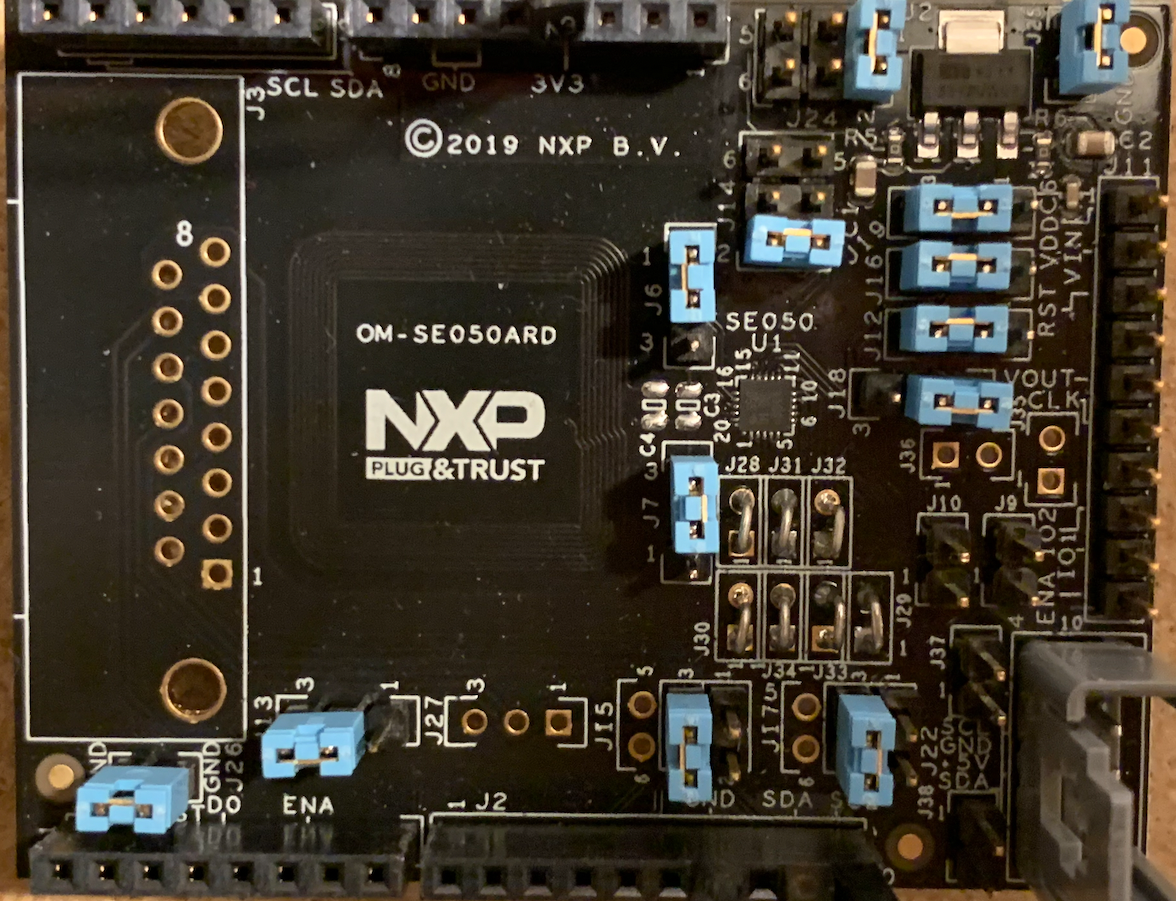
Fig. 34 SE050 Jumper Settings#
The connected boards should look like this:
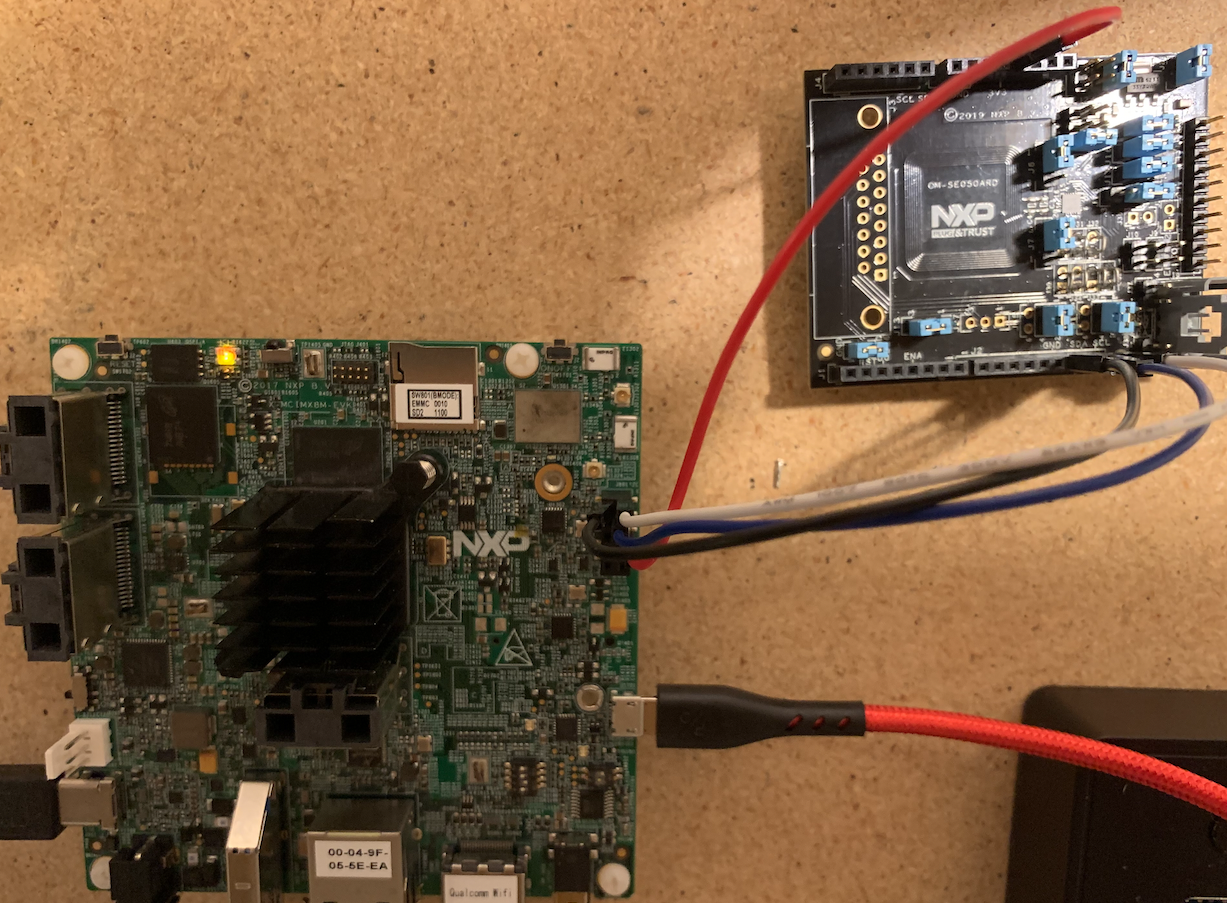
Fig. 35 Wire Connections Between Boards#
Installing the FoundriesFactory Image#
Download the images that have the SE050 enabled from the Factory. Following the instructions in i.MX 8M Quad Evaluation Kit.
Note
A reference on the needed changes to enable the SE050 middleware can be found in Enabling SE05X.