Copy the Configuration File using Dockerfile
Create the shellhttpd.conf file in your local container repository in the
shellhttpd folder, which holds your Dockerfile:
echo -e 'PORT=8080\nMSG="Hello from the file copied in the Dockerfile"' > shellhttpd/shellhttpd.conf
Verify the shellhttpd.conf file:
cat shellhttpd/shellhttpd.conf
Example Output:
PORT=8080
MSG="Hello from the file copied in the Dockerfile"
Edit the Dockerfile to create the shellhttpd folder and copy shellhttpd.conf to it:
gedit shellhttpd/Dockerfile
shellhttpd/Dockerfile:
FROM alpine

RUN mkdir /home/shellhttpd/

COPY shellhttpd.conf /home/shellhttpd/

COPY httpd.sh /usr/local/bin/

CMD ["/usr/local/bin/httpd.sh"]
Commit and push all changes done in the containers folder
git status
git add shellhttpd/shellhttpd.conf
git add shellhttpd/httpd.sh
git add shellhttpd/Dockerfile
git commit -m "Adding config file with Dockerfile"
git push
Wait for your FoundriesFactory CI job to finish and for your device to receive the new target as an over-the-air update:
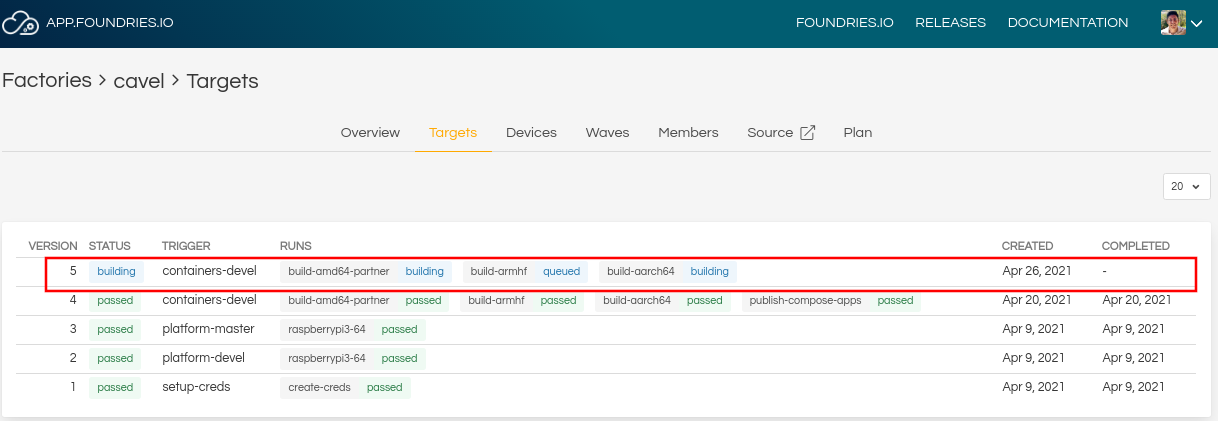
Fig. 16 FoundriesFactory CI Job running
In this example, the build version is 5. To check if your device is already
up-to-date, check Devices until you see -5 at the end of the Target name. For example raspberrypi3-64-lmp-5.
When the device is up-to-date, the Status icon will change to green.
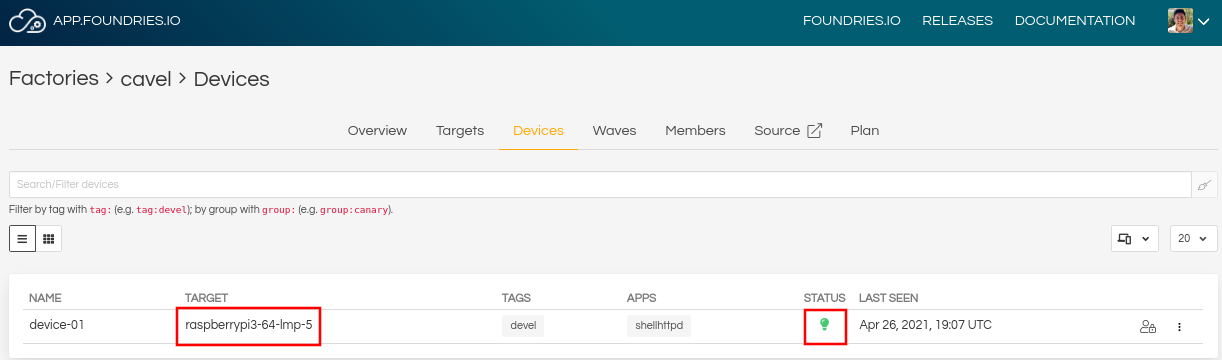
Fig. 17 Device list
Test the container from an external device connected to the same network (e.g. your host machine: the same computer you use to access your device with ssh).
curl <Device IP>:8080
Example Output:
Hello from the file copied in the Dockerfile