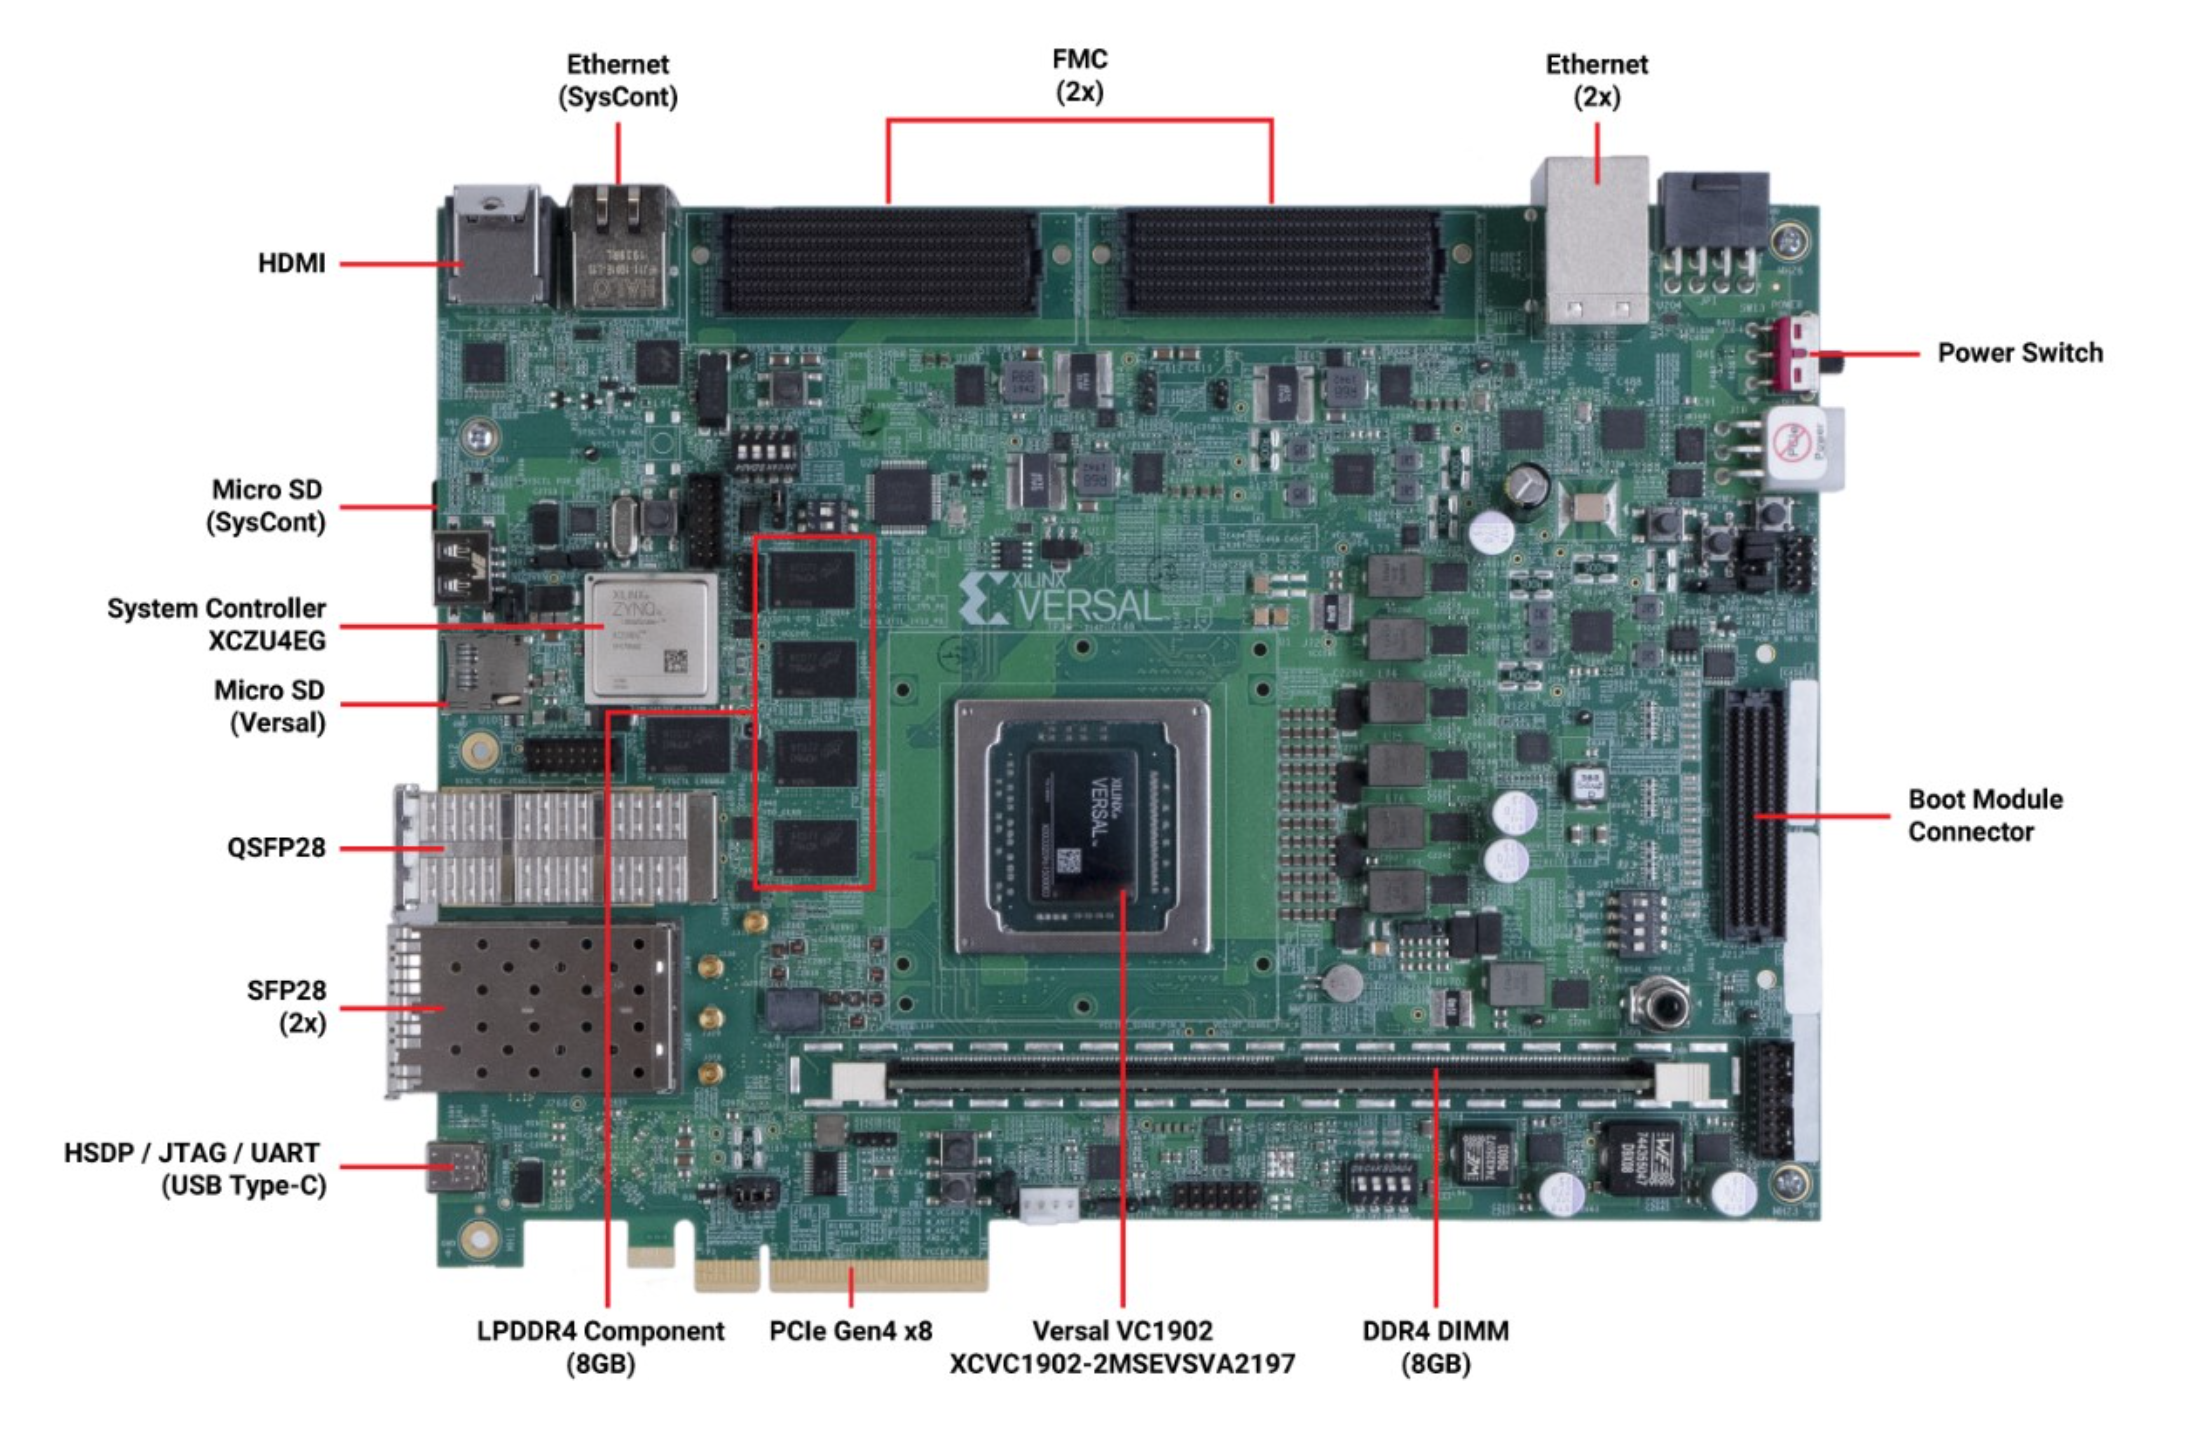
Versal AI Core Series VCK190 Evaluation Kit
Preparation
Attention
Replace the <factory> placeholder below with the name of your Factory.
Download the necessary files from
https://app.foundries.io/factories/<factory>/targets:Click the latest Target with the
platform-develTrigger.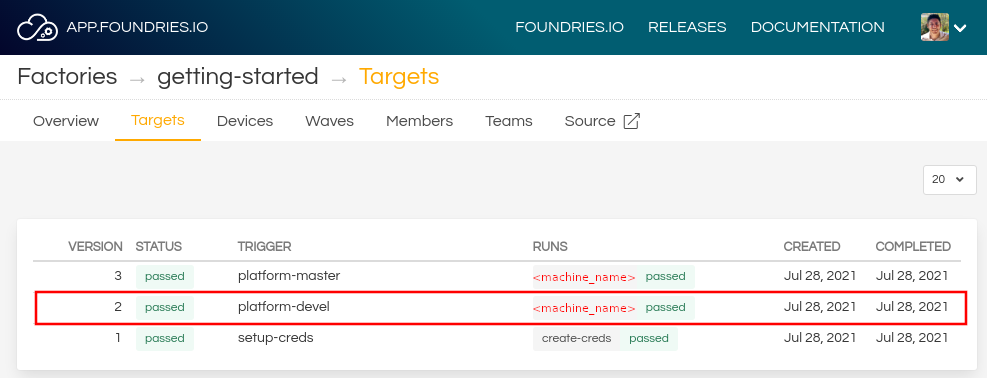
Expand the Runs section corresponding with the name of the board and download the Factory image. For reference on how to boot using the JTAG port, download
boot.binfrom the other folder:lmp-factory-image-<machine-name>.wic.gzboot.bin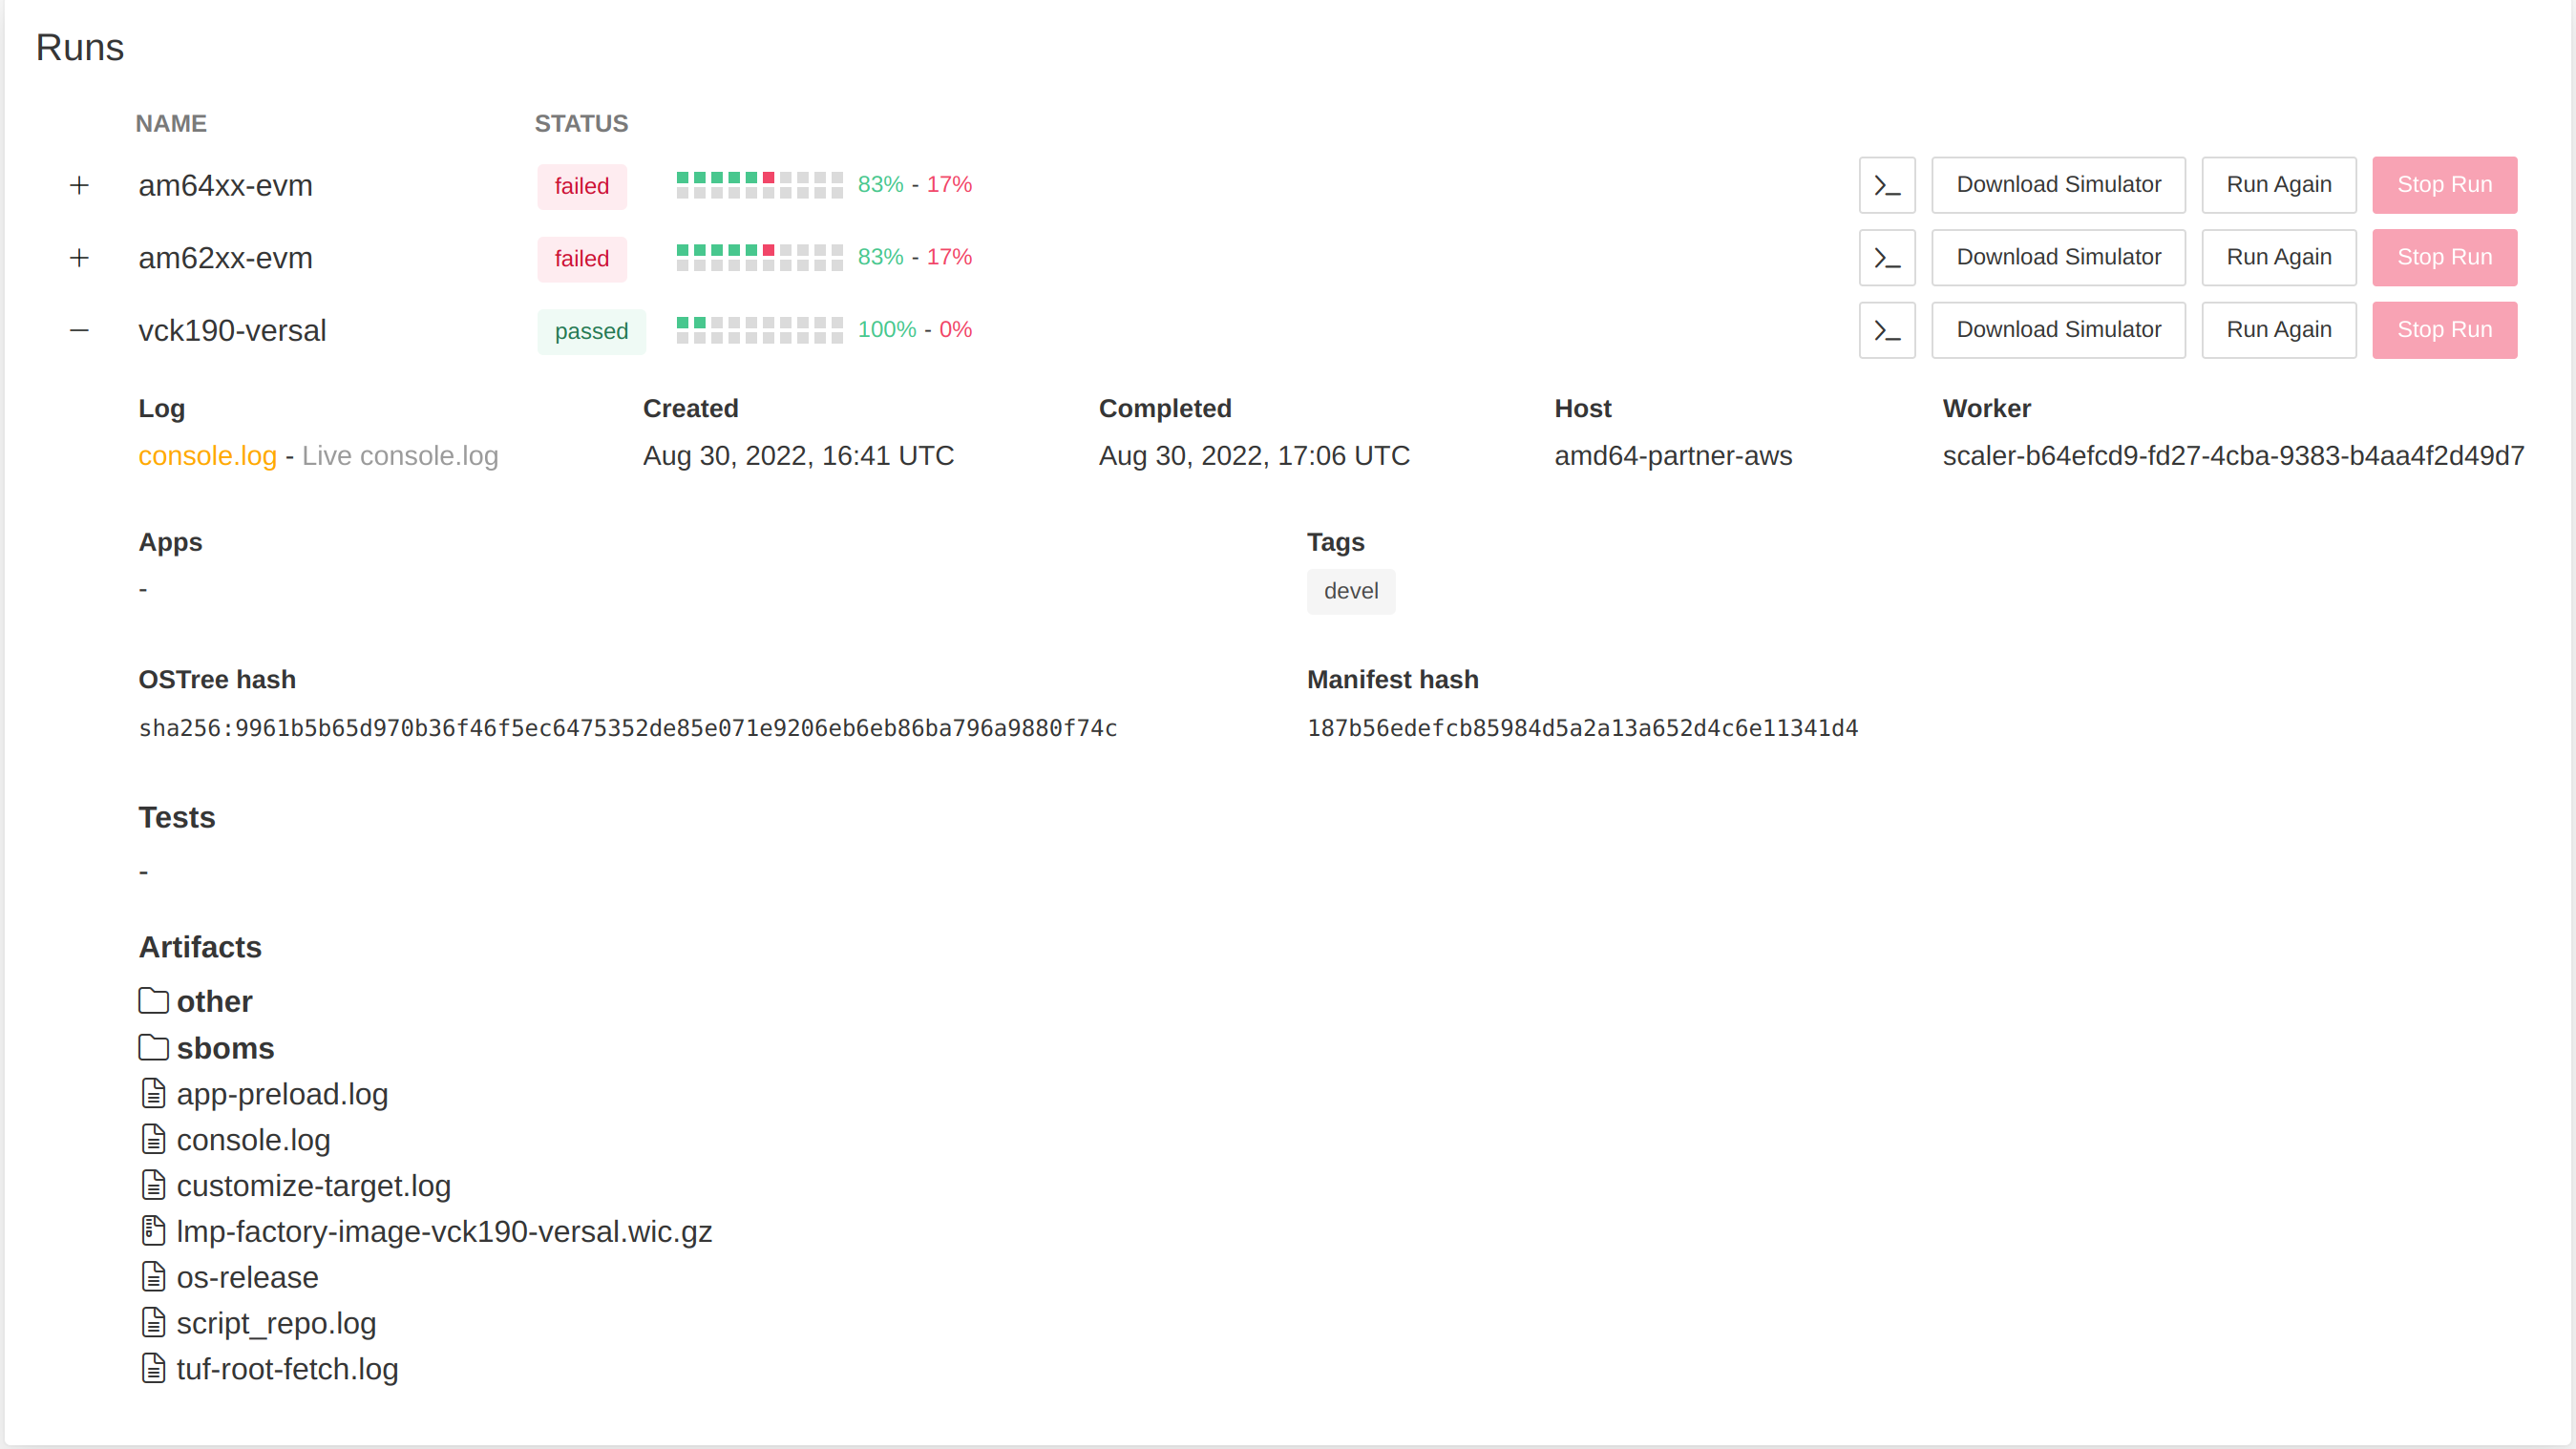
Extract the file
lmp-factory-image-<machine-name>.wic.gz:gunzip lmp-factory-image-<machine-name>.wic.gz
Write the file to an SD card:
dd if=lmp-factory-image-<machine-name>.wic of=/dev/xxx bs=1M status=progress
Plug the SD card in the Micro SD Versal slot.
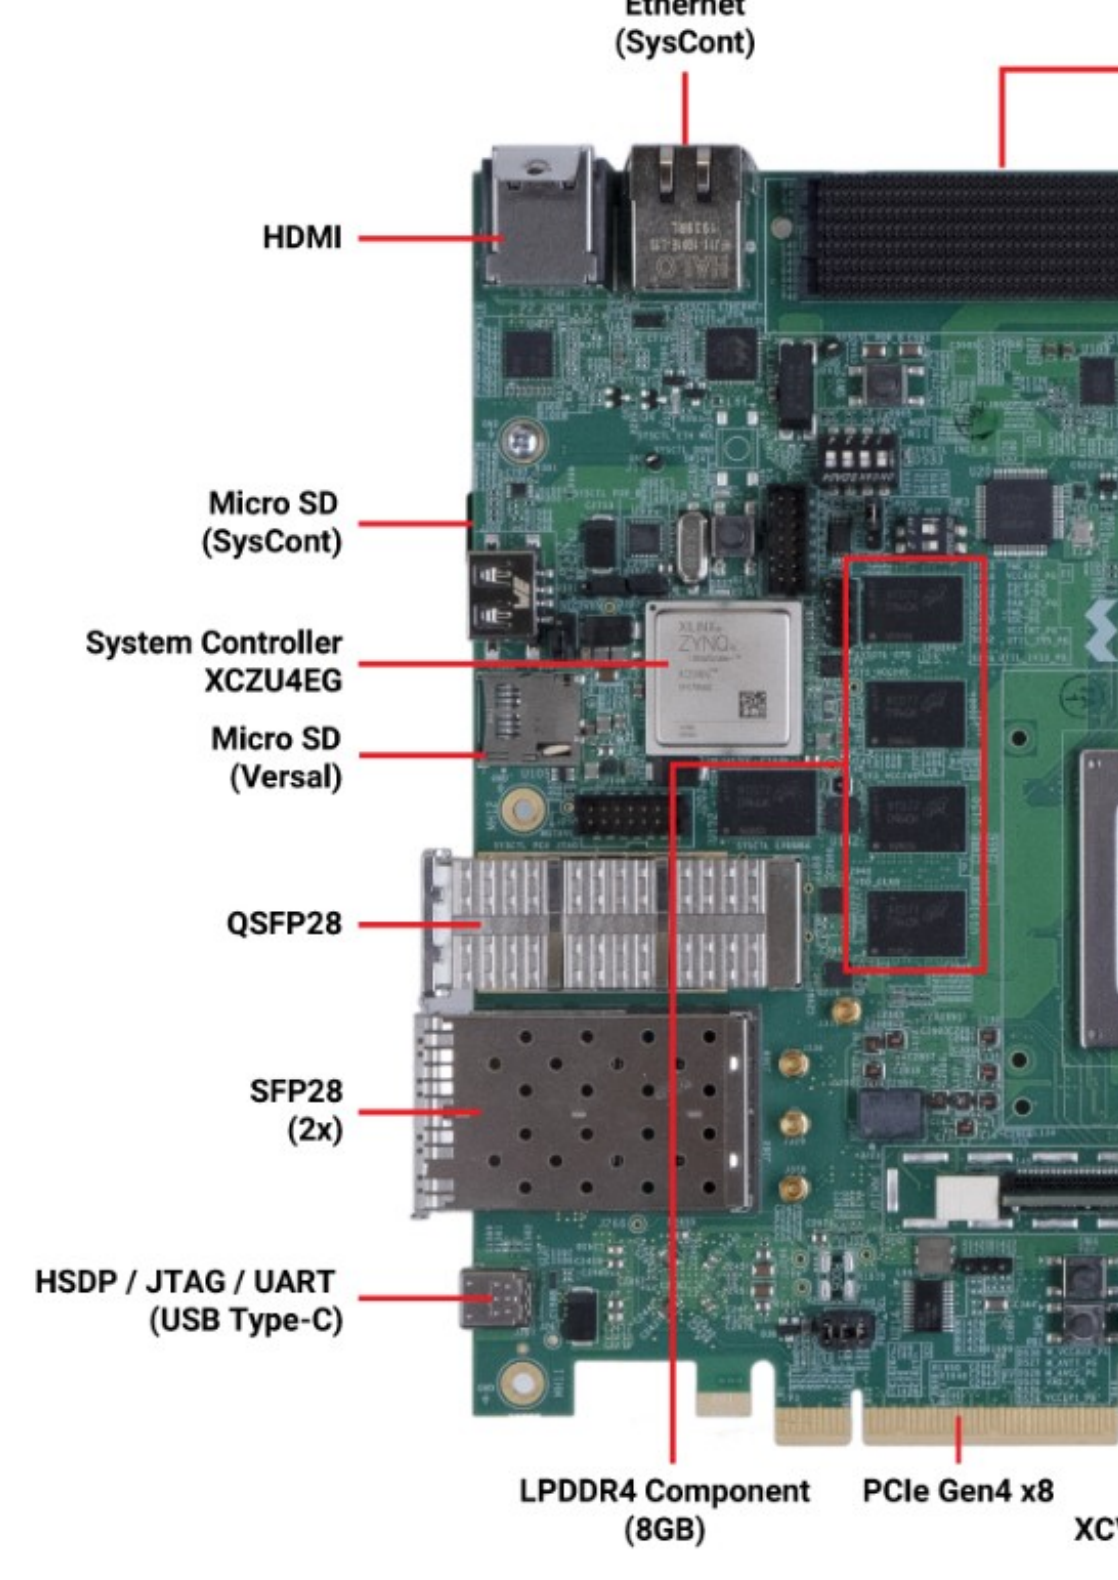
Set the boot switches to SD mode.
Power up the board.
Hardware Preparation: Console/JTAG
Set up the board for accessing the console or using the JTAG interface
Using a USB Type-C cable, connect the board to the PC host.
Four UART connections will appear on the PC: one of them is a JTAG interface, and another one is a console.
On a Linux host for example you will see:
usb 1-14.4.4.3: new high-speed USB device number 117 using xhci_hcd
usb 1-14.4.4.3: New USB device found, idVendor=0403, idProduct=6011, bcdDevice= 8.00
usb 1-14.4.4.3: New USB device strings: Mfr=1, Product=2, SerialNumber=3
usb 1-14.4.4.3: Product: VCK190
usb 1-14.4.4.3: Manufacturer: Xilinx
usb 1-14.4.4.3: SerialNumber: 532143136405
ftdi_sio 1-14.4.4.3:1.0: FTDI USB Serial Device converter detected
usb 1-14.4.4.3: Detected FT4232H
usb 1-14.4.4.3: FTDI USB Serial Device converter now attached to ttyUSB4
ftdi_sio 1-14.4.4.3:1.1: FTDI USB Serial Device converter detected
usb 1-14.4.4.3: Detected FT4232H
usb 1-14.4.4.3: FTDI USB Serial Device converter now attached to ttyUSB5
ftdi_sio 1-14.4.4.3:1.2: FTDI USB Serial Device converter detected
usb 1-14.4.4.3: Detected FT4232H
usb 1-14.4.4.3: FTDI USB Serial Device converter now attached to ttyUSB6
ftdi_sio 1-14.4.4.3:1.3: FTDI USB Serial Device converter detected
usb 1-14.4.4.3: Detected FT4232H
usb 1-14.4.4.3: FTDI USB Serial Device converter now attached to ttyUSB7
Inspection of these new devices will show:
$ ls -la /dev/serial/by-id/
total 0
lrwxrwxrwx 1 root root  13 sep  5 10:48 usb-Xilinx_VCK190_532143136405-if00-port0 -> ../../ttyUSB4
lrwxrwxrwx 1 root root  13 sep  5 10:48 usb-Xilinx_VCK190_532143136405-if01-port0 -> ../../ttyUSB5
lrwxrwxrwx 1 root root  13 sep  5 10:48 usb-Xilinx_VCK190_532143136405-if02-port0 -> ../../ttyUSB6
lrwxrwxrwx 1 root root  13 sep  5 10:48 usb-Xilinx_VCK190_532143136405-if03-port0 -> ../../ttyUSB7
Console Hardware Configuration
Power off the board.
Using a serial terminal program like minicom, connect to the port with
usb-Xilinx_VCK190_532143136405-if01-port0in the name (in this example ttyUSB5) and apply the following configuration:- Baud rate: 115200 - Data bits: 8 - Stop bit: 1 - Parity: None - Flow control: None
Power on the board.
You should see the Versal console printing out the boot sequence.
JTAG Hardware Preparation
Important
The following steps assume that the Xilinx Serial Software Comamnd-Line Tool is installed on the system.
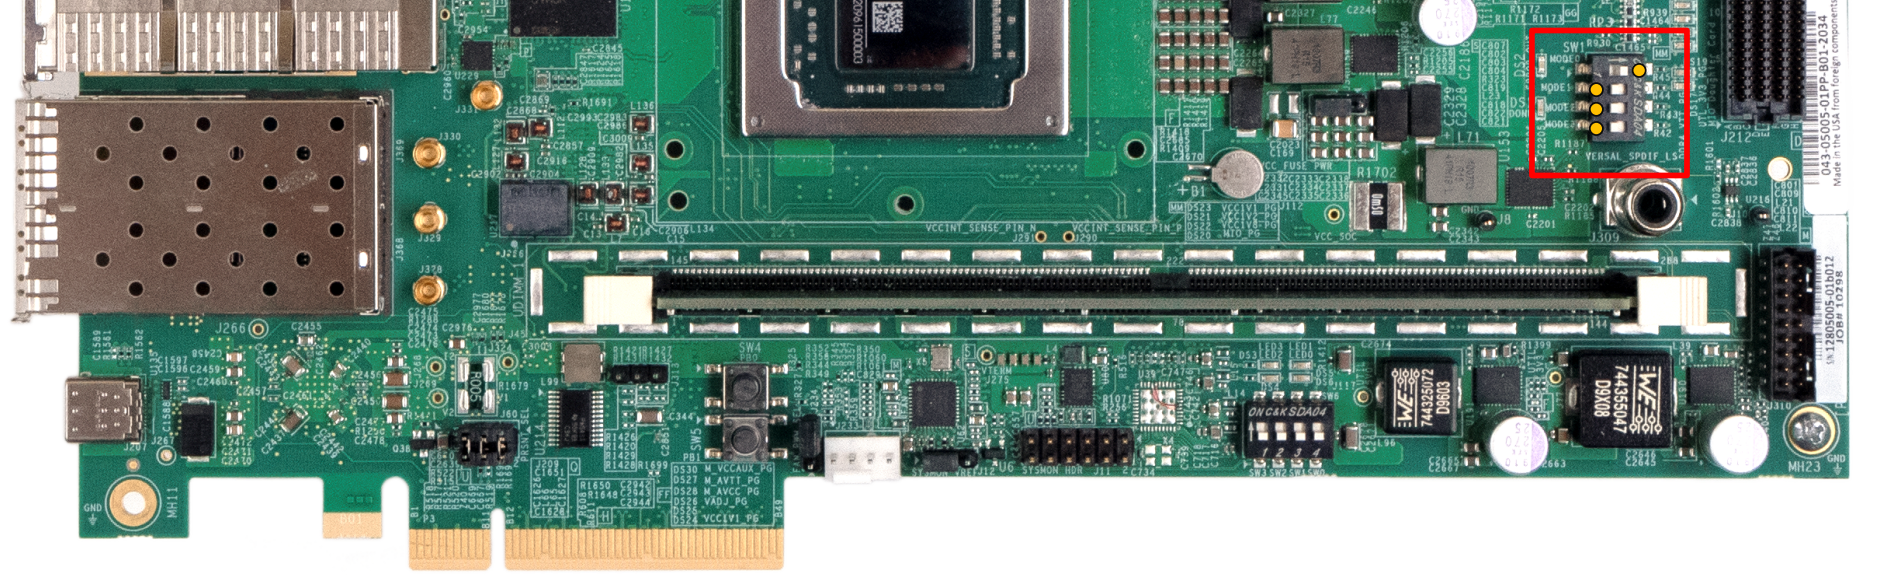
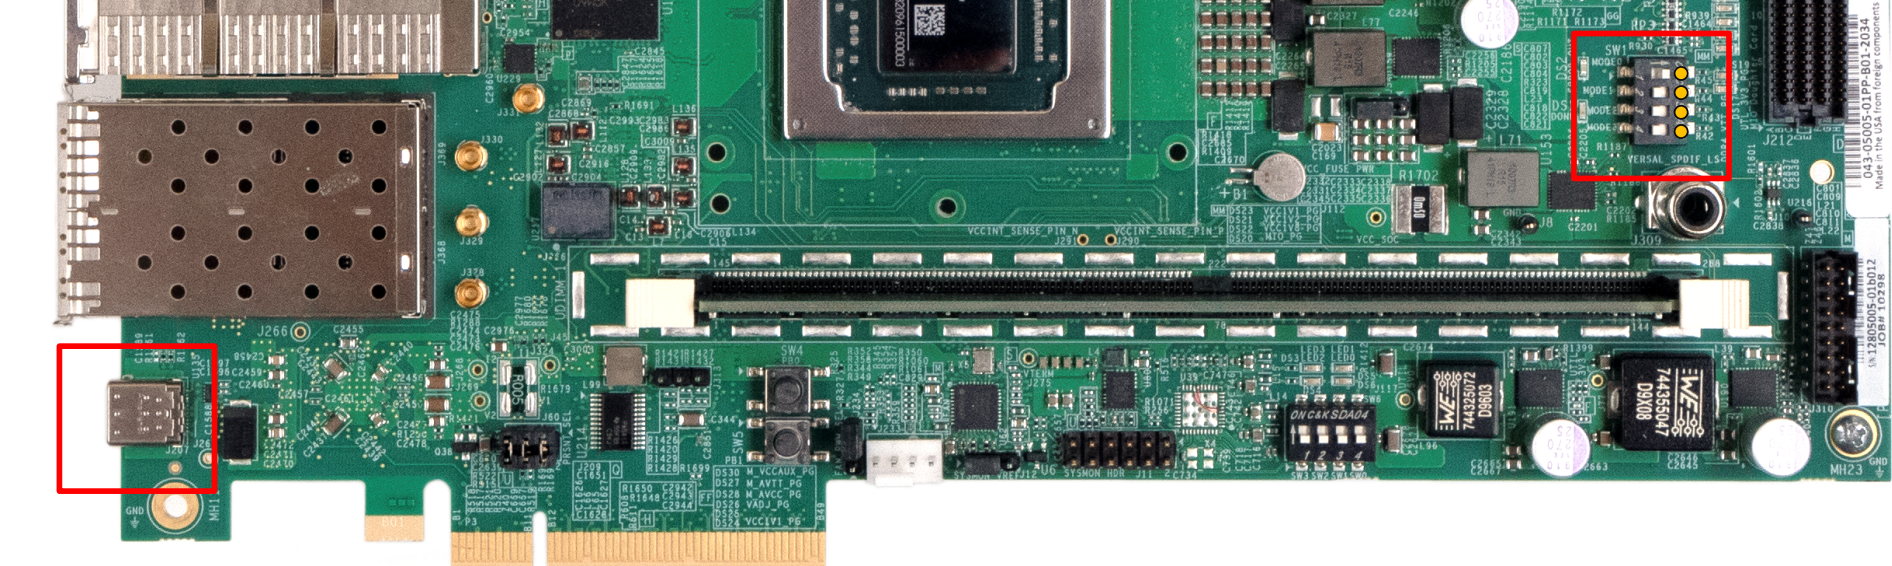
Configure the boot switches in the VCK190 for JTAG mode:
Prepare the boot script:
$ cat boot.tcl
connect
after 1000
target 1
rst
targets -set -nocase -filter {name =~ "*Versal*"}
device program "/tmp/boot.bin"
Power up the board.
Boot the image by executing the tcl script:
$ xsct boot.tcl
This will boot the system up to the U-boot shell.
Tip
If an LmP ready SD card is already in the Versal SD slot, you can continue booting the Linux kernel from it.