MQTT
In the world of IoT, MQTT is without question a well known protocol and it has gained a lot of popularity for device communication. By using a simple publishing and subscribing model, it makes it very easy to manage the message flow. In other words, a device can publish a message containing arbitrary data to a topic and all of the devices subscribed to that topic will receive the same message. In that way, IoT projects become easy to manage a lot of devices that are sending and receiving a large number of messages.
Let’s apply this concept to a real world application. Imagine that you have 5 temperature sensors, each in a different room. Each of these 5 sensors can publish its temperature data on a specific topic, which in most projects resembles a folder structure that you might make on your system for storing files:
sensor/thermostat/room1
sensor/thermostat/room2
sensor/thermostat/room3
sensor/thermostat/room4
sensor/thermostat/room5
Now that we know the temperature of each room, imagine we have some smart-heaters that are capable of reading the room temperature via MQTT. These heaters can then be placed in each room that has a temperature sensor of its own. The heaters can then subscribe to the thermostat topic for the room they’re in. It is now able to know the room temperature. In other words, the heater from room 1 subscribes or listens to the topic “sensor/thermostat/room1”.
Going even further, imagine that this house has a fire alarm system and the alarm system monitors all thermostats. The alarm system can subscribe to all the thermostat topics and every time the temperature changes, the alarm system will get an update.
For all of this to happen, the only service that you need to run and that devices need to discover is the MQTT Broker. There are many broker implementations, but the most popular is called “Mosquitto”. This is a daemon you can run on any networked device with the sole purpose of distributing these messages to any devices capable of MQTT such as our heaters that want to listen. Setting this service up is exactly what this tutorial will cover.
Although there are several tutorials on MQTT, Linux microPlatform uses containers to implement each application. This tutorial will show you how to enable a Mosquitto MQTT Broker to establish a communication between different containerized applications in your FoundriesFactory.
Using MQTT Broker to Establish a Communication Between Containers.
The use of containers in embedded systems is becoming increasingly popular. One of the main advantages of using containers is the isolation of different applications in their own containers. Although, along with the advantage comes the challenge of sharing data between them when necessary. The use of an MQTT broker can be an option to establish that communication.
To illustrate this architecture, imagine that you have a device with 4 different containers isolated from each other:
Container 1: Reading 2 digital inputs and writing 2 digital outputs.
Container 2: Database
Container 3: Communication with the cloud
Container 4: MQTT Broker
In this case, all containers can connect to the MQTT broker from container 4.
Container 1 can publish changes to the digital inputs on two different topics:
container1/input/input1
container1/input/input2
Container 1 can also subscribe to output channels to change their status according to messages coming from other containers:
container1/output/output1
container1/output/output2
In the same way, container 3 can publish and subscribe to the same channels in order to read the inputs and control the outputs.
Finally, without any additional effort, container 2 can subscribe to all topics and save all changes in the local database.
FoundriesFactory
Cloning your Repository
There are many application examples in the extra-containers repository but each FoundriesFactory user can decide which application to enable.
Download your container.git repository with the commands below. Make sure you replace <your factory> with your factory name:
# Ubuntu Host Machine
$ mkdir getstartedvideo
$ cd getstartevideo
$ git clone https://source.foundries.io/factories/<your factory>/containers.git/
$ cd containers
Follow the commands to copy the Mosquitto app from extra-containers:
# Ubuntu Host Machine
$ git remote add fio https://github.com/foundriesio/extra-containers.git
$ git remote update
$ git checkout remotes/fio/master -- mosquitto
The mosquitto folder was added with three files:
# Ubuntu Host Machine
$ tree mosquitto/
mosquitto/
├── docker-compose.yml
├── mosquitto.conf
└── run.sh
The only files necessary to build the docker composer app are docker-compose.yml and run.sh. The mosquitto.conf file will be used next to change the default mosquitto configuration.
Add the changes to your Factory and wait for it to finish compiling your app:
# Ubuntu Host Machine
$ git add mosquitto/docker-compose.yml
$ git add mosquitto/run.sh
$ git commit -m "Adding new mosquitto app"
$ git push
Enabling the App on your Device
In the following steps we assume you have your Raspberry Pi 3 with Foundries.io’s LmP running and correctly registered to your Factory.
With fioctl, we will enable the application “mosquitto” on your device registered with the name raspberrypi3. For more information about how to register and enable application, check the page Configuring Devices:
# Ubuntu Host Machine
# Configure the device to run the "mosquitto" app
$ fioctl devices config updates raspberrypi3 --apps mosquitto --tags master
It may take a while for the application to be installed on the device. By default, it can take 5 to 10 minutes.
Debugging the Mosquitto Container APP
On your device, you can check the running container and use the container name to see the logs:
#Raspberry Pi 3 Target Machine
 $ docker ps
CONTAINER ID        IMAGE                                   COMMAND                  CREATED             STATUS                   PORTS                    NAMES
751a0be6433c        hub.foundries.io/munoz0raul/mosquitto   "/start.sh"              4 hours ago         Up 4 hours               0.0.0.0:1883->1883/tcp   mosquitto_mosquitto_1
$ docker logs mosquitto_mosquitto_1
1600219959: Running Default config
1600219959: mosquitto version 1.6.3 starting
1600219959: Config loaded from /etc/mosquitto/conf.d/mosquitto.conf.
1600219959: Opening ipv4 listen socket on port 1883.
1600219959: Opening ipv6 listen socket on port 1883.
As you can see, mosquitto app is using the default configuration file.
Use fioctl to safely send a custom configuration files to the device:
# Ubuntu Host Machine
$ cd mosquitto
$ ls
docker-compose.yml  mosquitto.conf  run.sh
$ fioctl devices config set raspberrypi3 mosquitto.conf="$(cat mosquitto.conf)"
After some time, the files will be copied to the folder /var/run/secrets on your device:
# Raspberry Pi 3 Target Machine as root
$ fio@raspberrypi3:~$ sudo su
$ root@raspberrypi3:/home/prjs/google/config# ls /var/run/secrets/
mosquitto.conf
The mosquitto container will automatically recognize the new config file and will restart the application:
#Raspberry Pi 3 Target Machine
 $ docker ps
CONTAINER ID        IMAGE                                   COMMAND                  CREATED             STATUS                   PORTS                    NAMES
751a0be6433c        hub.foundries.io/munoz0raul/mosquitto   "/start.sh"              4 hours ago         Up 4 hours               0.0.0.0:1883->1883/tcp   mosquitto_mosquitto_1
$ docker logs mosquitto_mosquitto_1
1600219959: Running Default config
1600219959: mosquitto version 1.6.12 starting
1600219959: Config loaded from /mosquitto/config/mosquitto.conf.
1600219959: Opening ipv4 listen socket on port 1883.
1600219959: Opening ipv6 listen socket on port 1883.
1600219959: mosquitto version 1.6.12 running
1600219959: Running Custom config
1600220591: mosquitto version 1.6.12 terminating
1600220592: mosquitto version 1.6.12 starting
1600220592: Config loaded from /mosquitto/secrets/mosquitto.conf.
1600220592: Opening ipv4 listen socket on port 1883.
1600220592: Opening ipv6 listen socket on port 1883.
1600220592: mosquitto version 1.6.12 running
Now we need to connect and start to send messages between containers.
Testing the Container
In order to test the Mosquitto MQTT broker, you can connect an external device which supports MQTT to your device IP on port 1883. Another way, is to run two different containers and communicate between them.
In this tutorial we will cover the communication between containers. We will run two different containers to test it.
Using two different terminals, run the command below to access your raspberry pi:
# Ubuntu Host Machine
$ ssh [email protected]
After it, on terminal 1, start the first container based on Alpine Linux and install the package “mosquitto-clients”:
# Raspberry Pi 3 Target Machine
$ docker run --network host -it --name container1 alpine /bin/sh
/ #  apk add --no-cache mosquitto-clients
Repeat the same steps on the second terminal changing the container name to “container2”:
# Raspberry Pi 3 Target Machine
$ docker run --network host -it --name container2 alpine /bin/sh
/ #  apk add --no-cache mosquitto-clients

Alpine Container
On Container 1, subscribe to the topic “container/message” and wait until we send message from Container 2:
/ # mosquitto_sub -h localhost -t "container/message"
On Container 2, publish the message “temp: XX” to the topic “container/message”:
mosquitto_pub -h localhost -t "container/message" -m "temp: 30"
mosquitto_pub -h localhost -t "container/message" -m "temp: 32"
mosquitto_pub -h localhost -t "container/message" -m "temp: 34"No Terminal 2, publique uma mensagem no mesmo tópico:
mosquitto_pub -h localhost -t "container/message" -m "temp: 30"
mosquitto_pub -h localhost -t "container/message" -m "temp: 32"
mosquitto_pub -h localhost -t "container/message" -m "temp: 34"
As you can see, Container 1 will receive all messages from Container 2:
/ #  mosquitto_sub -h localhost -t "container/message"
temp: 30
temp: 32
temp: 34

Communication
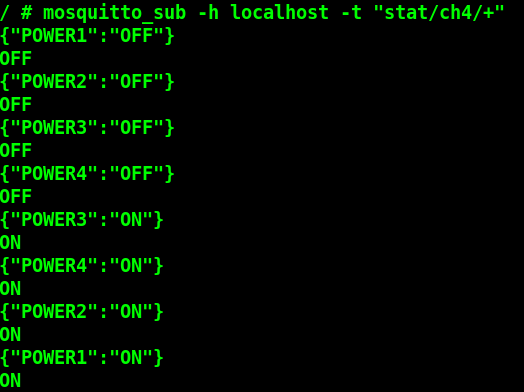
It is also possible to connect external devices. As an example, I connected my MQTT light controller and by turning on and off my lights I can see the status changes:
/ # mosquitto_sub -h localhost -t "stat/ch4/+"
{"POWER1":"OFF"}
OFF
{"POWER2":"OFF"}
OFF
{"POWER3":"OFF"}
OFF
{"POWER4":"OFF"}
OFF
{"POWER3":"ON"}
ON
{"POWER4":"ON"}
ON
{"POWER2":"ON"}
ON
{"POWER1":"ON"}
ON
External Device
The Mosquitto broker could be used not just to communicate between different containers but it can also be used by external devices such as the smart-heaters mentioned earlier in the tutorial. Everything depends on how you structure your topics and who publishes/subscribes to each topic.