AWS IoT
In this tutorial you will be guided through the process of setting up your device. In this case a Raspberry Pi 3 - to AWS IoT Core. By using the AWS IoT container available on the extra-containers repo, together with your FoundriesFactory, you will learn how to connect your device to the cloud with just a few simple commands. Before you know it, data - like CPU and RAM usage - will be flowing through the AWS IoT Core, allowing you to easily integrate your device data with any AWS Service - including Dashboard.
This tutorial will additionally cover how to create and deploy AWS’s just-in-time provisioning (JITP), which is the infrastructure needed for your device to be provisioned correctly the first time it attempts to connect to AWS IoT Core. After that, your container will automatically provision the device and send important system information to AWS IoT.
In this tutorial we’re assuming that you already have an AWS Account, your Raspberry Pi 3 is already connected to your FoundriesFactory and a Linux machine to configure and generate all the certificates and keys. In this tutorial we have used a Ubuntu Docker Container as “Host Machine” although other distributions could be used with some adaptation on the commands.
AWS Configuration
For the purposes of this tutorial we will begin by completing the necessary steps to configure AWS. Then we will create the certificates and keys on your host machine. And finally, we will configure and enable the AWS IoT container using FoundriesFactory.
User
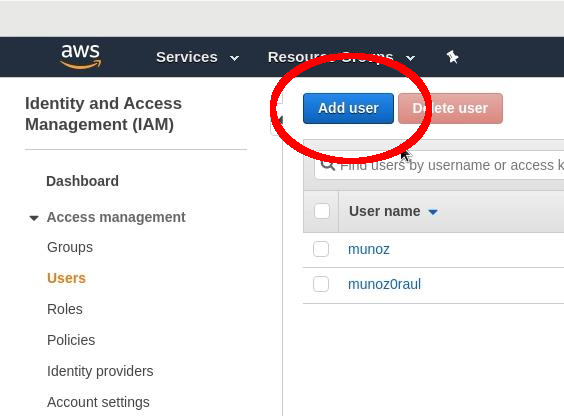
First, we need to create a “User” and assign them the correct rights.
Go to: “AWS Management Console” > “Services” > “IAM”.
Select: “Users” > “Add user”.
Add user
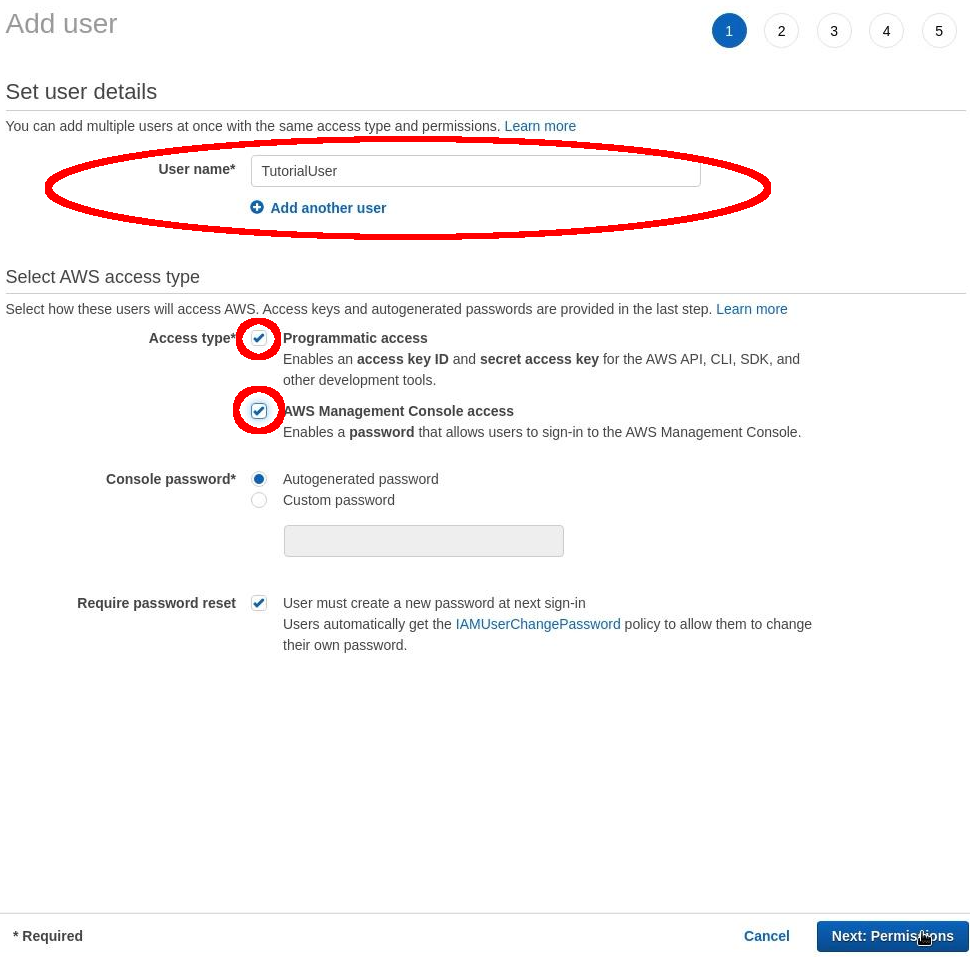
Input the following text into the prompted options: User name: TutorialUser On “Select AWS access Type”: Select: “Programmatic access” and “AWS Management Console access”. Then select: “Next”.
Add user name
Select: “Attach existing policies directly” and “AdministratorAccess”. Then, select: “Next”.

Add user permission
Select: “Next again” > “Create User”.
Finally, copy the “Access Key ID” and “Secret Access Key” to an annotation text file.
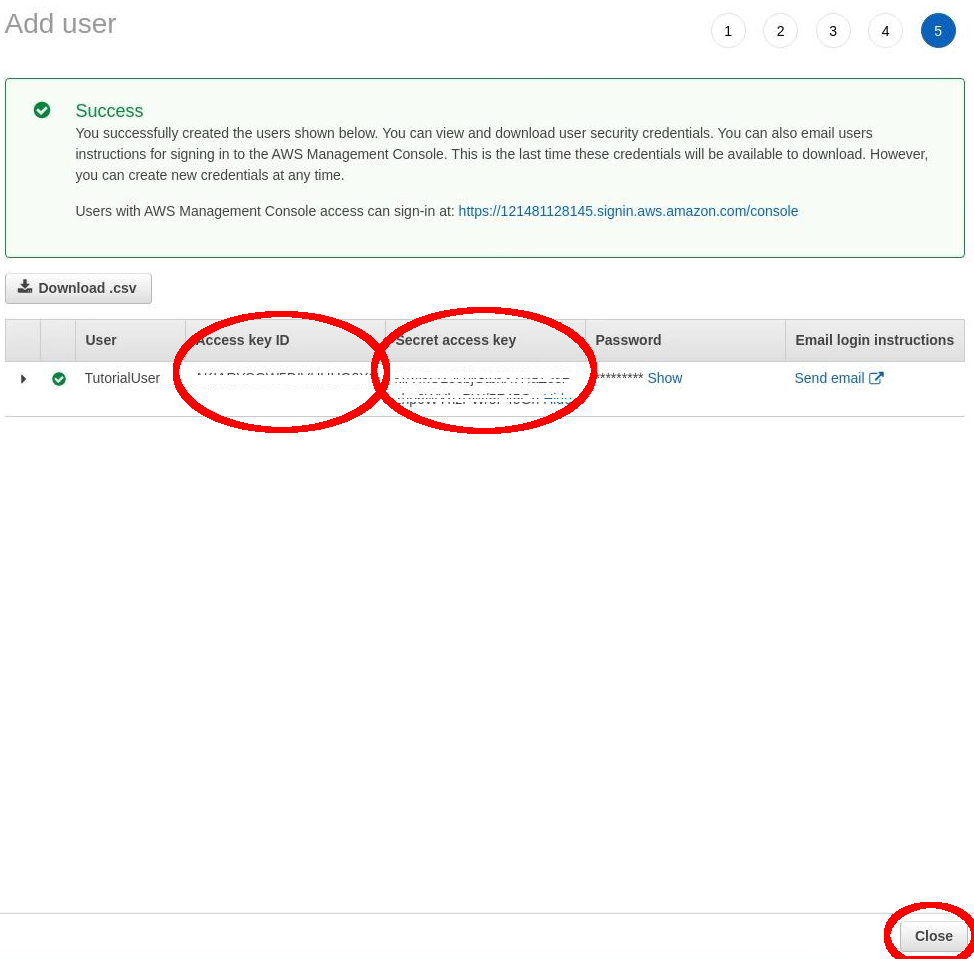
Access Key ID
Then: “Close”.
Role
Now we need to create a Role. This is because JITP needs the correct permissions to call AWS IoT Core APIs. Once we create this role it will be attached to the CA Certificate.
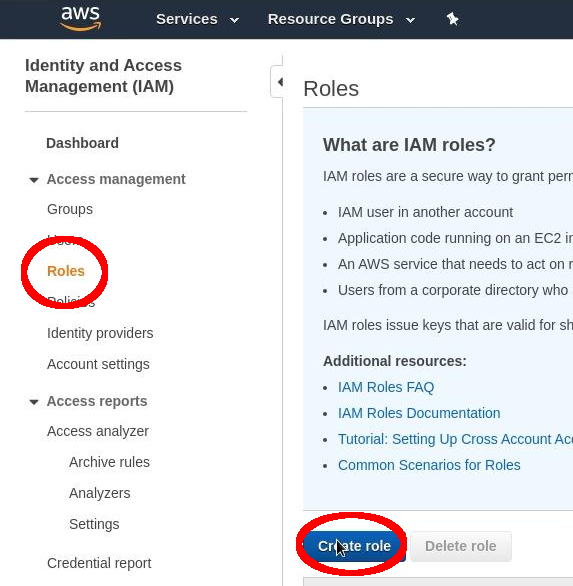
First, navigate to: “AWS Management Console” > “Services” > “IAM”.
Select: “Roles” > “Create Roles”.
Create Roles
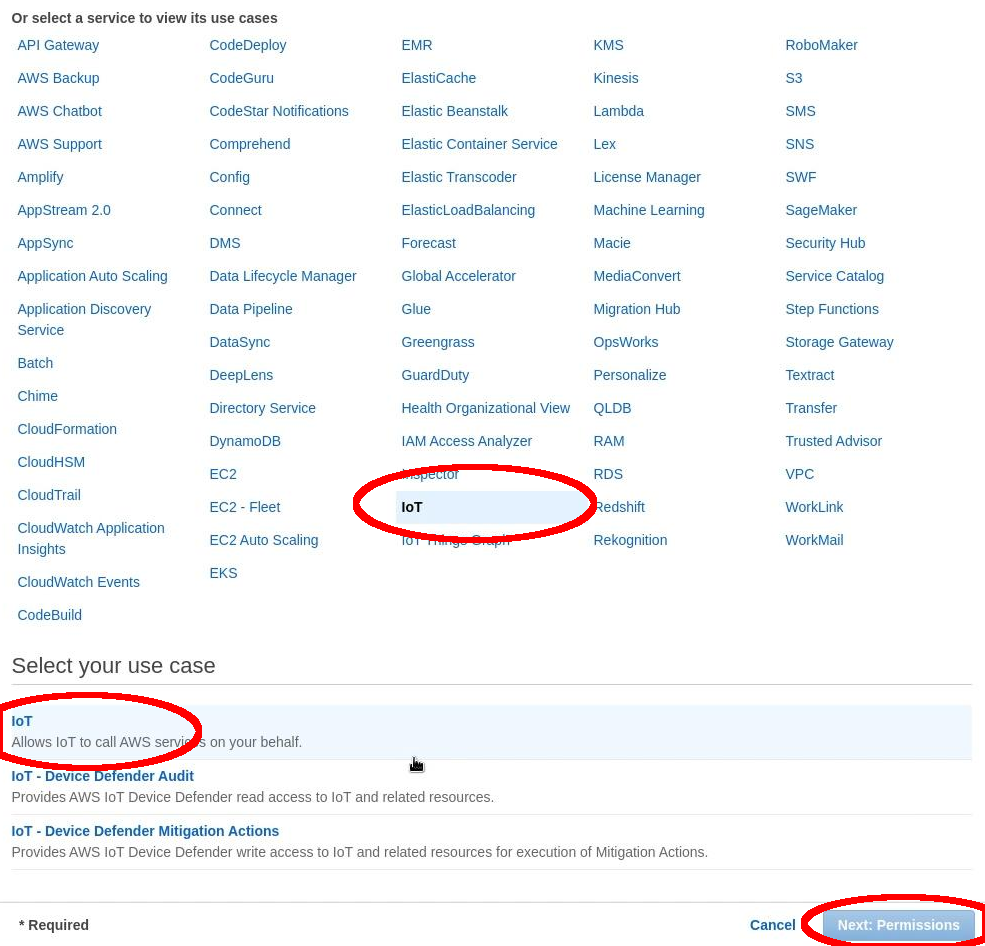
Select: “AWS Service” > “IoT”. Now select the use case: “IoT”. Finally, select: “Next”.
Select a service
Select: “Next”.
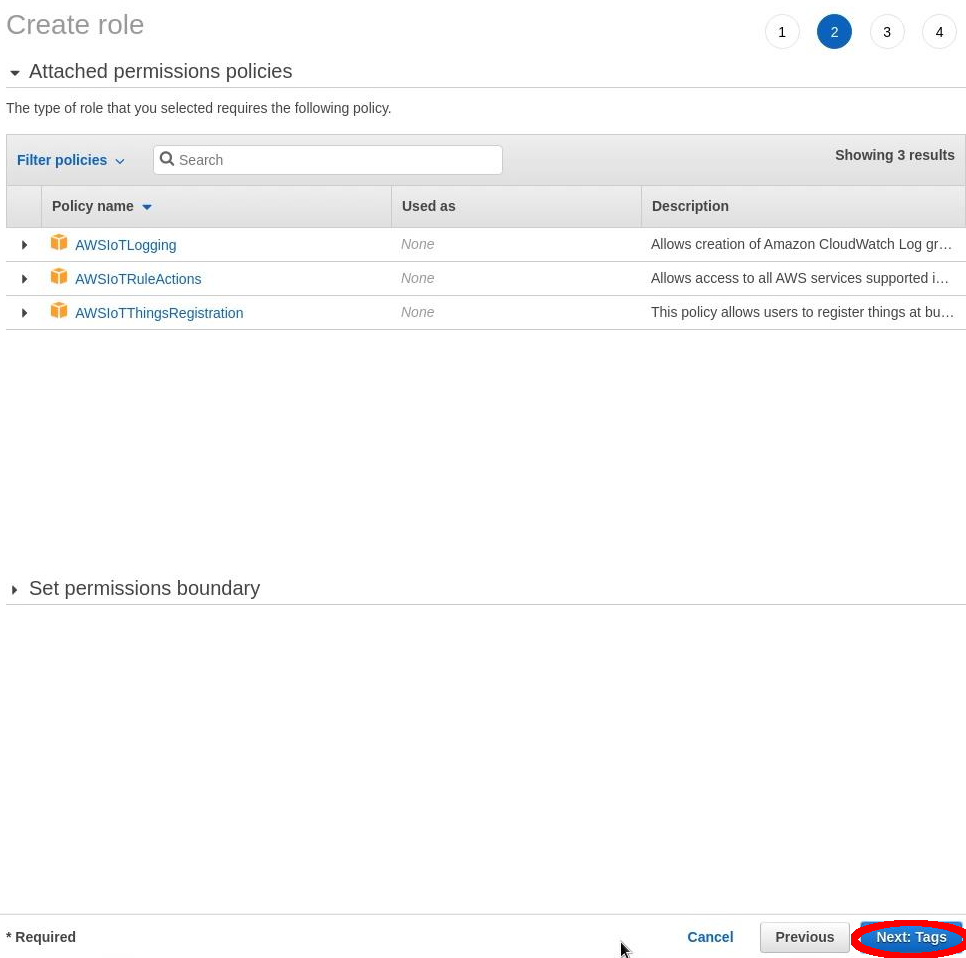
Attached permission policies
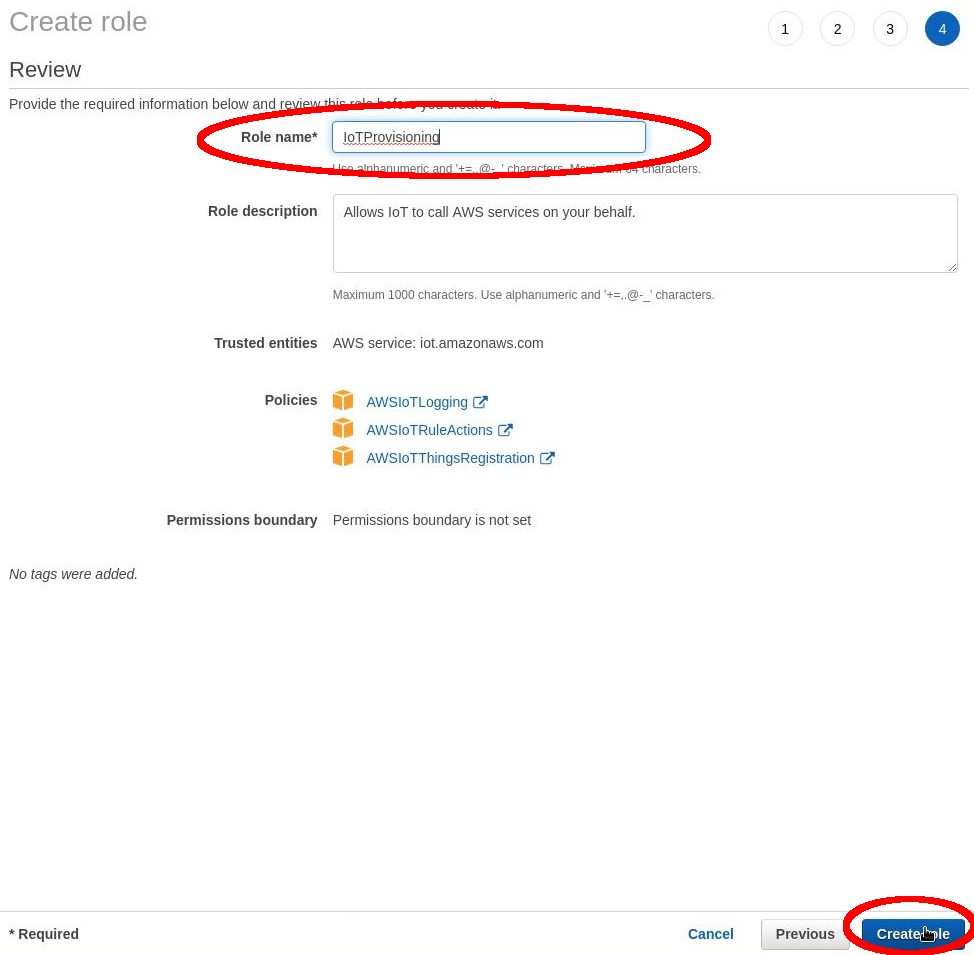
Select: “Next” a final time. Complete “Role Name”: IoTProvisioning Now select: “Create Role”.
Create role
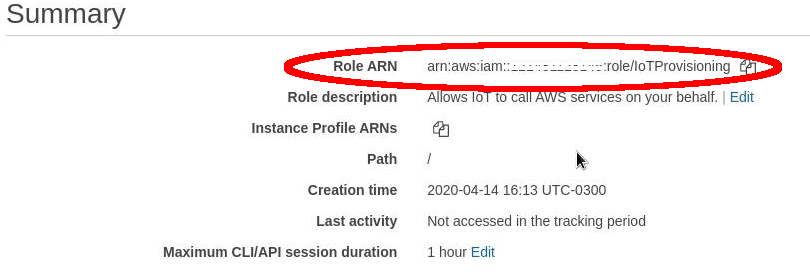
Select the Role that we just created by clicking on the role name:
IoTProvisioning
Copy the “Role ARN”: arn:aws:iam::xxxxxxxxxxxx:role/IoTProvisioning
Role ARN
Policy
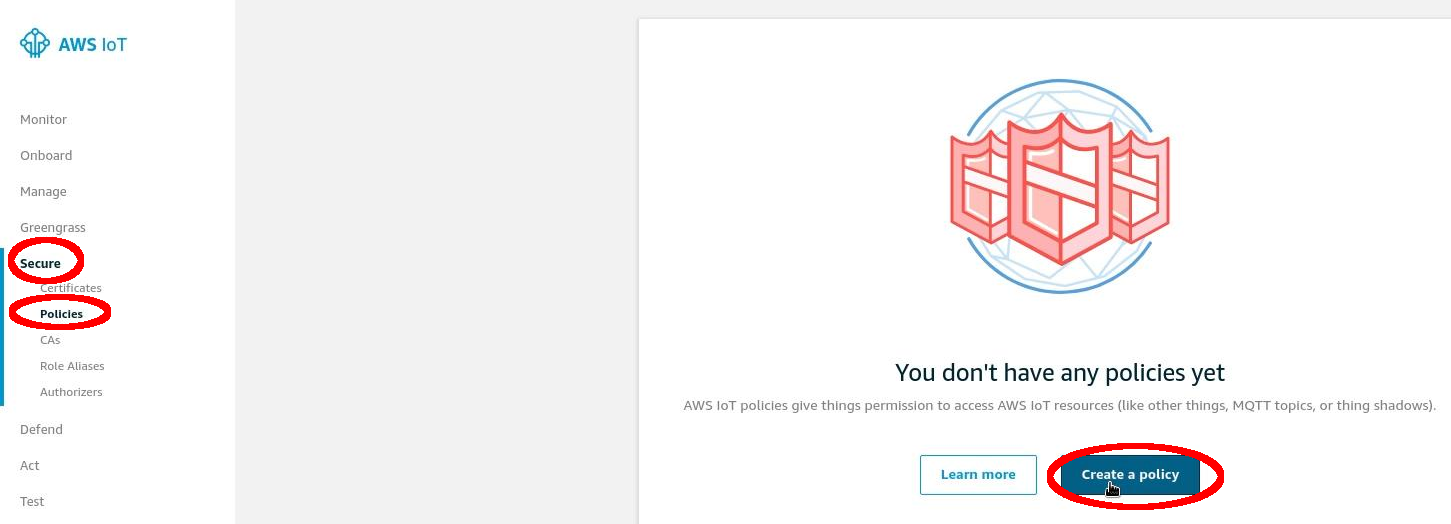
Now we need to create a policy that will be applied to all our devices. Navigate to: “AWS Management Console” > “Services” > “IoT Core”.
Select: “Secure” > “Policies” > “Create Policy”.
Create Policy
Name: IoTAccess
Copy the policy below to “Advanced mode”:
{
  "Version": "2012-10-17",
  "Statement": [
      {
      "Effect": "Allow",
       "Action": [
       "iot:Connect",
       "iot:Receive",
       "iot:Subscribe",
        "iot:Publish",
        "iot:UpdateThingShadow",
        "iot:GetThingShadow"
      ],
      "Resource": [
        "*"
      ]
    }
  ]
}
Create
In this step we are adding a very open policy - feel free to explore policy customization to better understand how policies work. Always try what is best for you and your unique use case.
- EndPoint
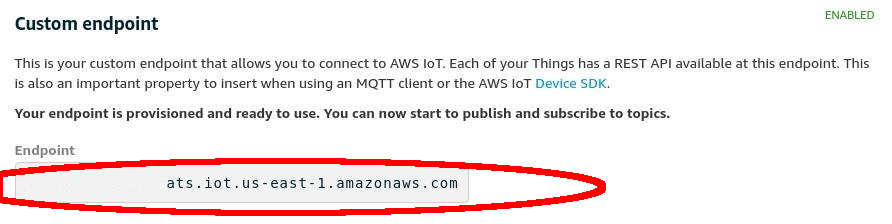
Next we’ll need to find the endpoint URL. This is the address used by all your devices to connect to AWS.
Go to: “AWS Management Console” > “Services” > “IoT Core”.
Select: “Settings” > “Endpoint”:
xxxxxxxxxxxxxx-ats.iot.us-east-1.amazonaws.com
Endpoint
Creating Keys and Certificate on the Host Machine
Host machine pre-requirements software
Make sure you have Curl, Unzip, Vim, Git and Less installed in your device:
# Ubuntu Host Machine
$ apt-get update
$ apt-get install curl unzip vim git
$ apt-get install -yy less
AWS Command Line Interface
Download and install the AWS Command Line Interface (CLI):
# Ubuntu Host Machine
$ mkdir aws
$ cd aws
$ curl "https://awscli.amazonaws.com/awscli-exe-linux-x86_64.zip" -o "awscliv2.zip"
$ unzip awscliv2.zip
$ ./aws/install
$ aws --version
aws-cli/2.0.7 Python/3.7.3 Linux/5.3.11-100.fc29.x86_64 botocore/2.0.0dev11
Configure AWS CLI
Configure the AWS CLI to connect to your AWS account by adding the information we saved during the previews steps:
# Ubuntu Host Machine
$ aws configure
AWS Access Key ID [None]: xxxxxxxxxxxxxxxxx
AWS Secret Access Key [None]: xxxxxxxxxxxxxxxxxxxxxxxxxxxxxxxxxxxxxxxxxxxxxxx
Default region name [None]: us-east-1
Default output format [None]: json
Creating Certificates
With the AWS CLI configured, we’re now ready to create the keys and certificates needed to Just-in-Time Provisioning your device own AWS IoT Core.
Creating root certificates
Start by creating a folder for your certificates. In this folder we will generate a key pair for your root certificate:
# Ubuntu Host Machine
$ mkdir certificate
$ cd certificate
$ openssl genrsa -out root.ca.key 2048
Use the private key from the key pair to generate a CA certificate. You may leave the questions empty if you want:
# Ubuntu Host Machine
$ openssl req -x509 -new -nodes -key root.ca.key -sha256 -days 1024 -out root.ca.pem
Country Name (2 letter code) [XX]:
State or Province Name (full name) []:
Locality Name (e.g., city) [Default City]:
Organization Name (e.g., company) [Default Company Ltd]:
Organisational Unit Name (e.g., section) []:
Common Name (e.g., your name or your server's hostname) []:
Email Address []:
Verification code
We will need a verification code to use during the process of generating the verification certificate. To do this run the following commands:
# Ubuntu Host Machine
$ aws iot get-registration-code
$ REGISTRATRION_CODE=xxxxxxxxxxxxxxxxxxxxxxxxxxxxxxxxxxxxxxxxxxxxxxxxxxxxxxxxxxxxxxxx
$ cd certificate
$ openssl genrsa -out root.ca.key 2048
Verification certificate
Now we need to create a key pair for the private key verification certificate:
# Ubuntu Host Machine
$ openssl genrsa -out verificationCert.key 2048
Create a CSR for the private key verification certificate. During this command make sure you add your registration code to the Common Name:
# Ubuntu Host Machine
$ openssl req -new -key verificationCert.key -out verificationCert.csr -subj "/CN=${REGISTRATRION_CODE}"
Next, create a certificate from the CSR:
# Ubuntu Host Machine
$ openssl x509 -req -in verificationCert.csr -CA root.ca.pem -CAkey root.ca.key -CAcreateserial -out verificationCert.pem -days 500 -sha256
Register the CA certificate with AWS IoT
Before we register the certificate on AWS we have to create a provisioning template. To do so, create the file: provisioning-templete.json Make sure your roleArn and the PolicyName match:
# Ubuntu Host Machine
$ vim provisioning-template.json
provisioning-template.json:
{
"templateBody": "{ \"Parameters\" : { \"AWS::IoT::Certificate::CommonName\": { \"Type\": \"String\" }, \"AWS::IoT::Certificate::SerialNumber\": {  \"Type\": \"String\" }, \"AWS::IoT::Certificate::Id\": { \"Type\": \"String\" } }, \"Resources\": { \"thing\": { \"Type\": \"AWS::IoT::Thing\", \"Properties\": { \"ThingName\": {\"Ref\": \"AWS::IoT::Certificate::CommonName\"  }, \"AttributePayload\": {} }}, \"certificate\": { \"Type\": \"AWS::IoT::Certificate\", \"Properties\": { \"CertificateId\": {\"Ref\": \"AWS::IoT::Certificate::Id\" }, \"Status\": \"ACTIVE\" }}, \"policy\": { \"Type\": \"AWS::IoT::Policy\", \"Properties\": { \"PolicyName\": \"IoTAccess\" } }}}",
        "roleArn": "arn:aws:iam::xxxxxxxxxxxx:role/IoTProvisioning"
}
Register the CA certificate with AWS IoT by using the certificate you just created:
# Ubuntu Host Machine
$ aws iot register-ca-certificate --ca-certificate file://root.ca.pem --verification-cert file://verificationCert.pem --set-as-active --allow-auto-registration --registration-config file://provisioning-template.json
{
    "certificateArn": "arn:aws:iot:us-east-1:xxxxxxxxxxxx:cacert/xxxxxxxxxxxxxxxxxxxxxxxxxxxxxxxxxxxxxxxxxxxxxxxxxxxxxxxxxxxxxxxx",
    "certificateId": "xxxxxxxxxxxxxxxxxxxxxxxxxxxxxxxxxxxxxxxxxxxxxxxxxxxxxxxxxxxxxxxx"
}
Save the ID in a environment variable and check the CA status with the command:
# Ubuntu Host Machine
$ CA_CERTIFICATE_ID=xxxxxxxxxxxxxxxxxxxxxxxxxxxxxxxxxxxxxxxxxxxxxxxxxxxxxxxxxxxxxxxx
$ aws iot describe-ca-certificate --certificate-id $CA_CERTIFICATE_ID
Verify CA in the AWS IoT Core website
Now we are able to check the CA on the AWS website.
Navigate to “AWS Management Console” > “Services” > “IoT Core”.
Select “Secure” > “CAs” > “Create Policy”

Create Policy
FoundriesFactory
Cloning your repository
To interact with your FoundriesFactory you’ll first need to download the necessary repositories, change the code and send it back to the server.
First, navigate to Foundries App, find your Factory and the source code.

Source code
Open the container repository and clone it on your host machine:
# Ubuntu Host Machine
$ mkdir getstartedvideo
$ cd getstartevideo
$ git clone https://source.foundries.io/factories/getstartedvideo/containers.git/
$ cd containers
In order to enable AWS IoT app we will need to clone some files from our reference repository:
# Ubuntu Host Machine
$ git remote add fio https://github.com/foundriesio/extra-containers.git
$ git remote update
$ git checkout remotes/fio/master -- aws-iotsdk
$ mv aws-iotsdk/aws-iotsdk.dockerapp .
Edit the dockerapp file and update the Factory name and endpoint URL:
# Ubuntu Host Machine
$ vim aws-iotsdk.dockerapp
aws-iotsdk.dockerapp:
version: 0.1.0
name: aws-iotsdk_test
description: AWS IoT SDK software stack

---

version: '3.7'

services:
  awsiotsdk:
    image: hub.foundries.io/getstartedvideo/aws-iotsdk_test:latest
    tmpfs:
      - /run
      - /var/lock
      - /var/log
    volumes:
      - type: volume
        source: provdata
        target: /prov
        volume:
          nocopy: true
    environment:
      - AWS_ENDPOINT=${AWS_ENDPOINT}
      - AWS_PROV_LOC=${AWS_PROV_LOC}
    command: "--endpoint ${AWS_ENDPOINT} --provision-location ${AWS_PROV_LOC}"
    tty: true
    network_mode: "host"
    privileged: true
    restart: always

volumes:
  provdata:

---

AWS_ENDPOINT: a1t4x7prc2fq29-ats.iot.us-east-1.amazonaws.com
AWS_PROV_LOC: /prov
Copy the created key and certificate to the folder aws_iotsdk/cert:
# Ubuntu Host Machine
$ cp ../../root.ca.key aws-iotsdk_test/certs/
$ cp ../../root.ca.pem aws-iotsdk_test/certs/
Add the changes to your Factory and wait for it to finish compiling your app:
# Ubuntu Host Machine
$ git add aws-iotsdk.dockerapp aws-iotsdk/
$ git commit "Adding new aws-iotsdk app"
$ git push

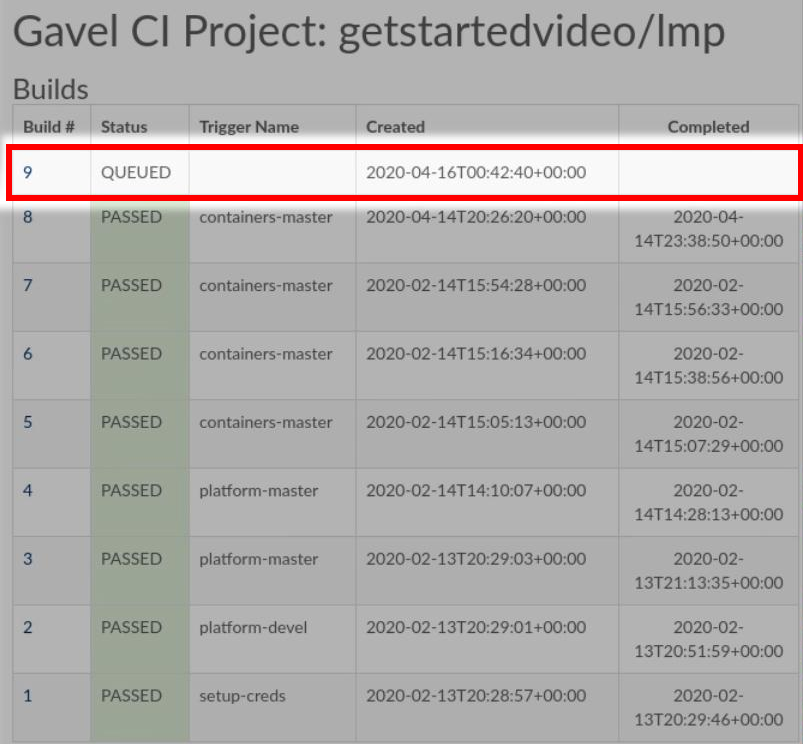
FoundriesFactory Build
Enabling the App on your Device
In the following steps we assume you have your Raspberry Pi 3 with Foundries.io’s LmP running and correctly registered to your Factory.
With fioctl, we will enable the application “aws-iotsdk” on your device registered with the name raspberrypi3. For more information about how to register and enable application, check the page Configuring Devices:
# Ubuntu Host Machine
# Configure the device to run the "aws-iotsdk" app
$ fioctl devices config updates raspberrypi3 --apps aws-iotsdk --tags master
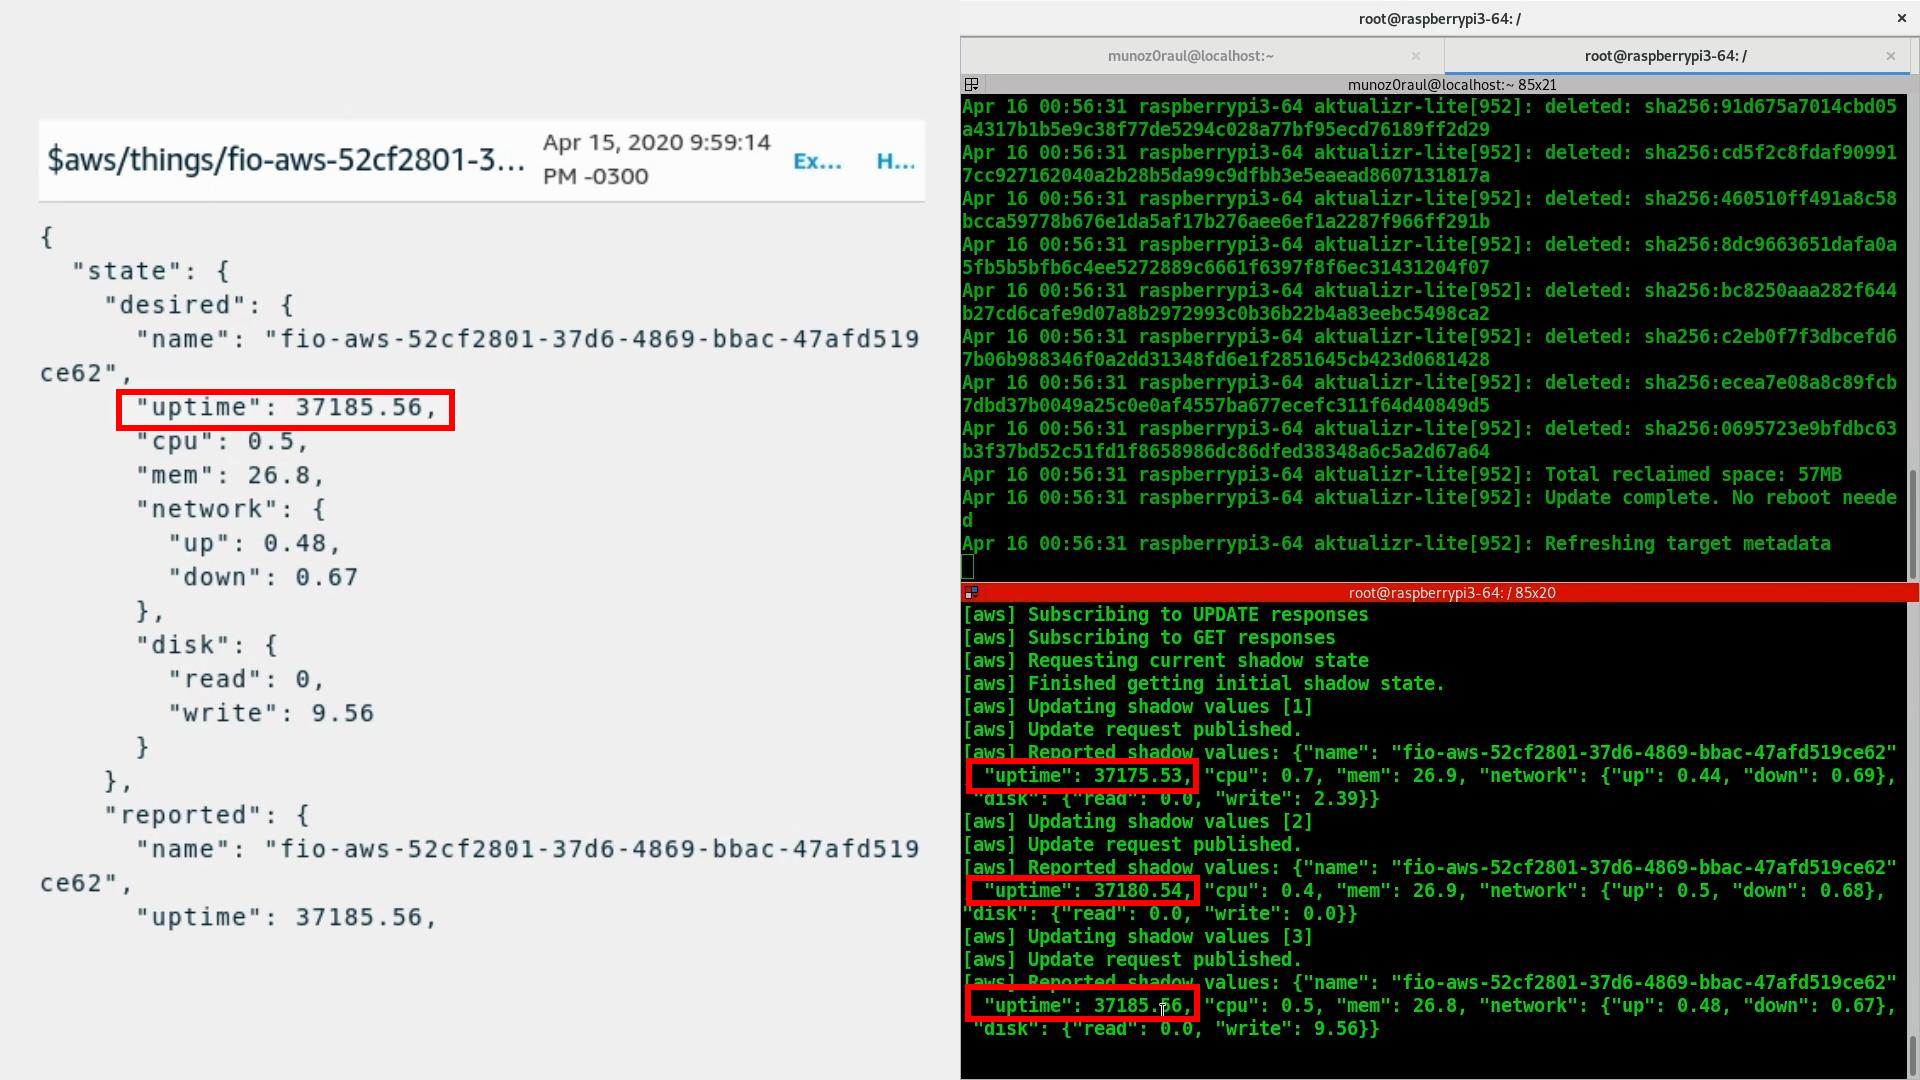
On your Raspberry Pi, you should receive the update soon. You can watch the logs by running the following commands:
# Ubuntu Host Machine
$ ssh [email protected]
# Raspberry Pi 3 Target Machine
$ sudo journalctl -f -u aktualizr-lite
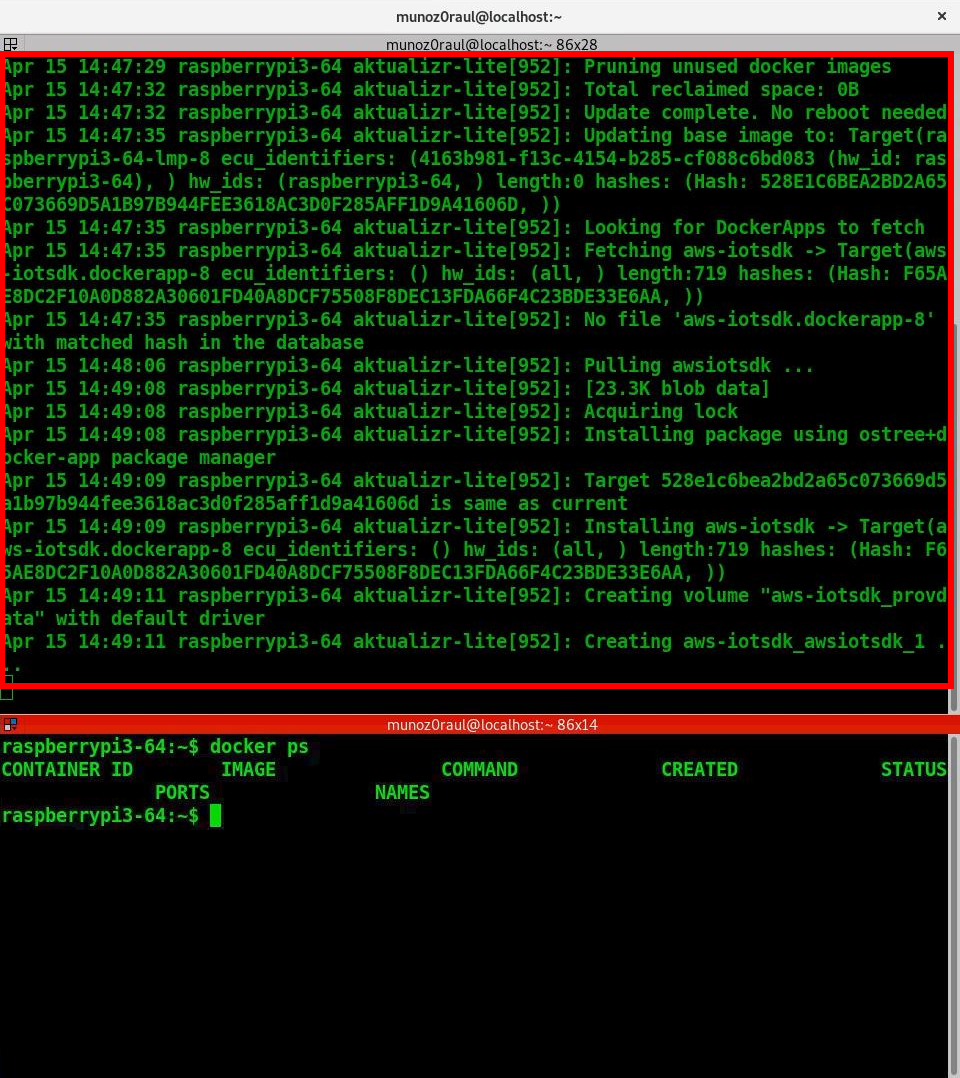
Terminal Updating
Debugging the AWS Container APP
In your Raspberry Pi 3 you can check the running container and with the container ID, check the container logs:
# Raspberry Pi 3 Target Machine
$ docker ps
$ docker logs -f fa2a1e5620f0
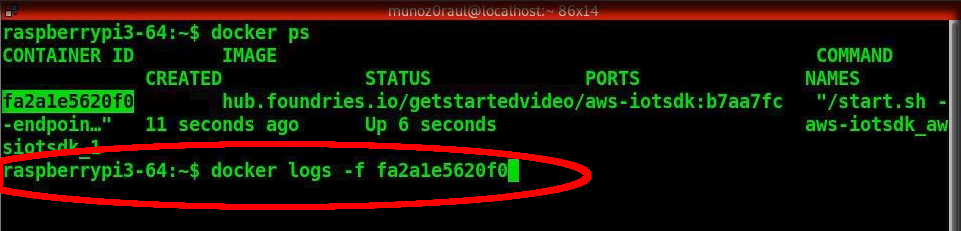
Docker logs
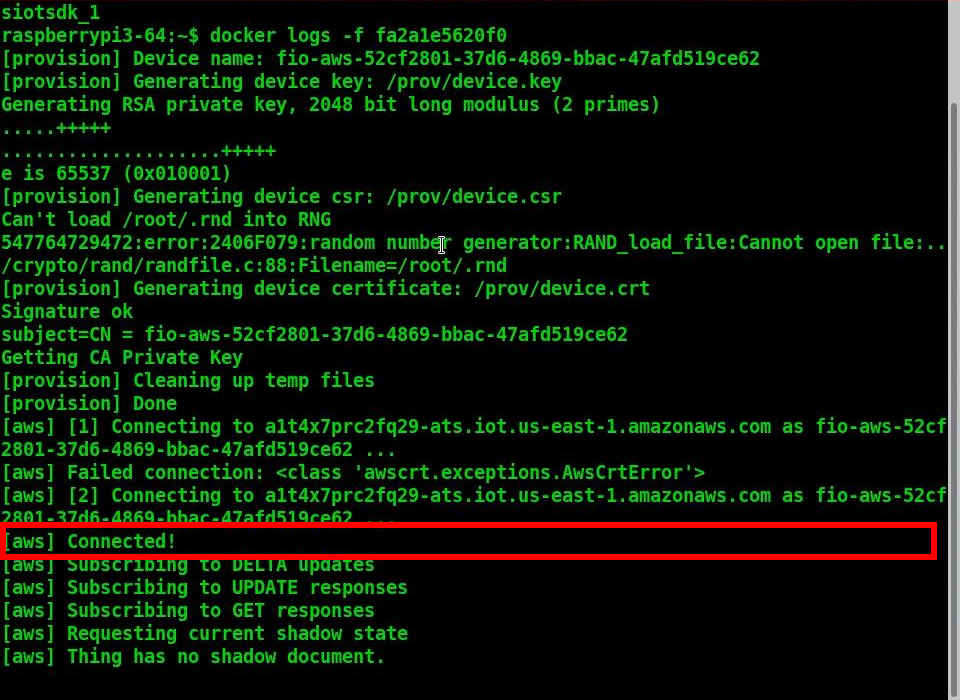
Connected to AWS
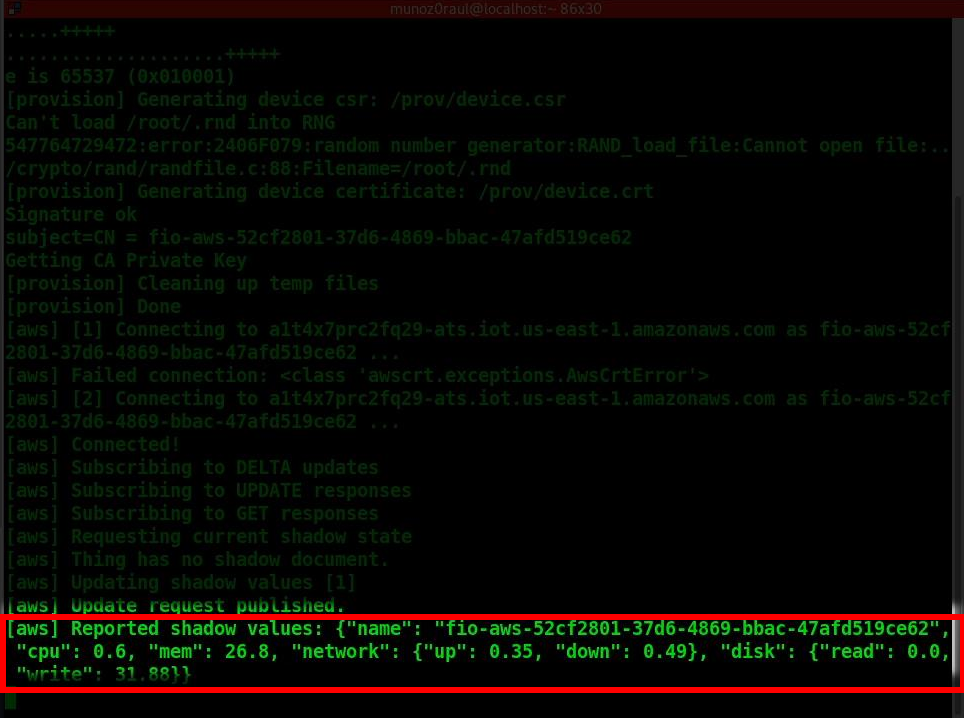
Start sending data to AWS
Receiving data on AWS IoT core
You’ll need to wait a few minutes while aktualizr-lite downloads and runs your aws-iotsdk app. (Aktualizr-lite is configured to update the device every 5 minutes. In case it takes longer than that, check our documentation for more information about aktualizr-lite for instructions.
Once this step is complete you will be able to receive data inside your AWS IoT Core Portal.
You can verify this process is working by navigating to the AWS IoT Core Portal > Test.
AWS IoT Core Test Portal
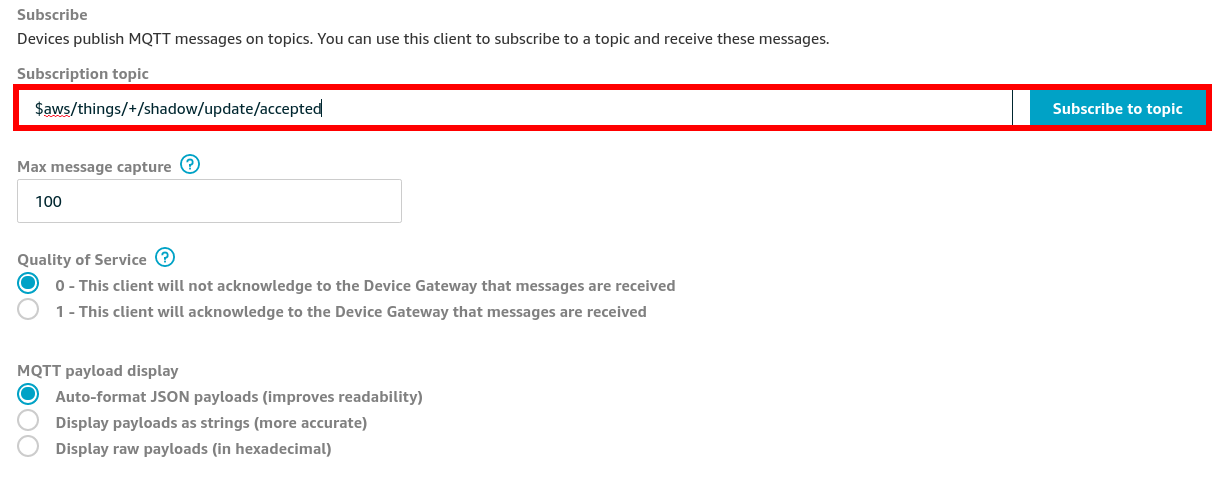
Subscribe to the topic:
#Subscription Topic
$aws/things/+/shadow/update/accepted

Subscription Topic
How to change the Docker App
In the container folder you can change the file by adding the line uptime and sending it back to the server:
# Ubuntu Host Machine
$ cd aws-iotsdk
$ vim service.py
service.py:
def toJSON(self):
     after_ts = time.time()
     ioAfter = psutil.net_io_counters()
     diskAfter = psutil.disk_io_counters()
     # Calculate the time taken between IO checks
     duration = after_ts - self.before_ts
     data = {
         "name": self.thing_name,
         "uptime": round(time.time() - psutil.boot_time(), 2),
         "cpu": psutil.cpu_percent(percpu=False),
         "mem": psutil.virtual_memory().percent,
         "network": {
             "up": round((ioAfter.bytes_sent - self.ioBefore.bytes_sent) / (duration * 1024), 2),
             "down": round((ioAfter.bytes_recv - self.ioBefore.bytes_recv) / (duration * 1024), 2),
         },
         "disk": {
             "read": round((diskAfter.read_bytes - self.diskBefore.read_bytes) / (duration * 1024), 2),
             "write": round((diskAfter.write_bytes - self.diskBefore.write_bytes) / (duration * 1024), 2),
         },
     }
Back to the terminal:
$ git add service.py
$ git commit "Adding uptime"
$ git push
After your push is complete a new build will be started. After the build is finished your device will be automatically updated.