Google IoT
In this tutorial you will be guided through the process of setting up your device - in this case a Raspberry Pi 3 - to Google IoT. By using the Google IoT container available on the extra-containers repo, together with your FoundriesFactory, you will learn how to connect your device to the cloud with just a few simple commands. Before you know it, data - like CPU and RAM usage - will be flowing through the Google IoT, allowing you to easily integrate your device data with any Google Service.
This tutorial will additionally cover how to auto provision your device. In this way you don’t need to manually copy your public key and copy it to the Google IoT console. Once you install your app, you just load two config files over fioctl and the device will start to send important system information to Google IoT. In this tutorial we’re assuming that you already have an Google Cloud IoT Core Account and your Raspberry Pi 3 is already connected to your FoundriesFactory.
Google Configuration
For the purposes of this tutorial we will begin by completing the necessary steps to configure Google IoT and next we will configure and enable the Google IoT container using FoundriesFactory.
Create your Project
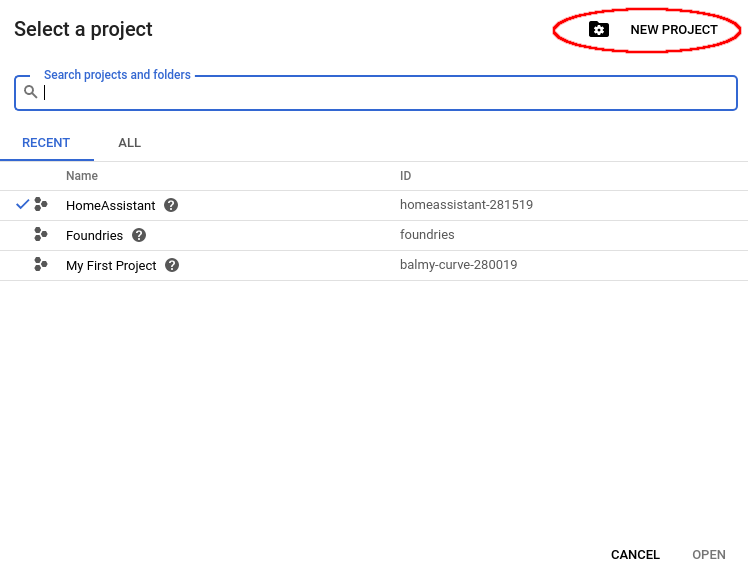
First, we need to create a “Project”.
Go to: “Google Cloud IoT Core” page.
Beside Google Cloud Platform, click in the current project:

Select Your Project
The project dialog will show up and then click on “NEW PROJECT”
New Project
Complete the “Project name” with your project name. In my case I will use:
Foundries
Click on “Create”

Project Name
On top menu, click on the current project:
Select current project
The project dialog will show up. Select your project and “OPEN”.
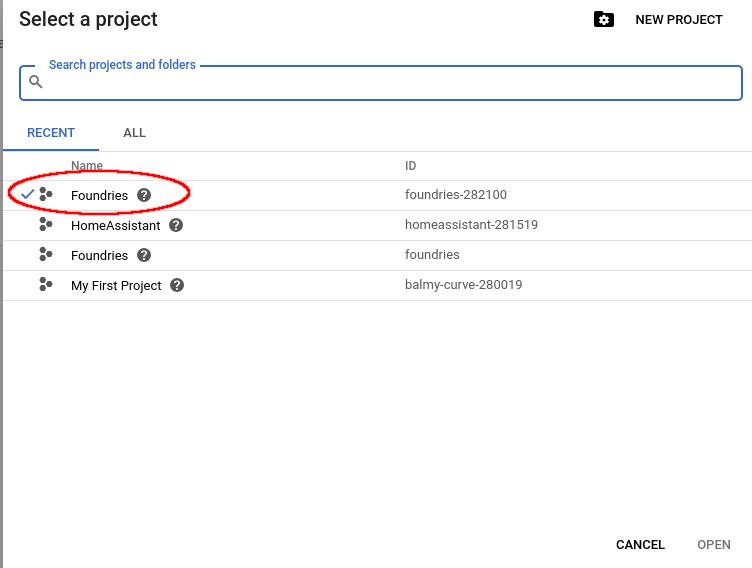
Select your project
Enable Google Cloud IoT API
After finishing your project, by selecting Google IoT in the menu, it will automatically show that Google Cloud IoT API needs to be enabled.
Click on “ENABLE” to enable the API.

Enable API
Create a device registry
First, we need to create a “Registry”.
Go to: “Google Cloud IoT Core” page. > “CREATE REGISTRY”

Create Registry
Complete the “Registry ID” with the name you like. In my case I will use:
foundries-registry
Complete the “Region” with your preferred region: In my case I will use:
us-central1

Create Registry
Select MQTT for the Protocol.

Select MQTT
In the “Cloud Pub/Sub topics” dropdown list, select “CREATE A TOPIC”:

Create a Topic
In the “Create a topic” dialog, enter your “Topic ID”. In my case I will use:
foundries-events
Click “Create Topic” to finish.
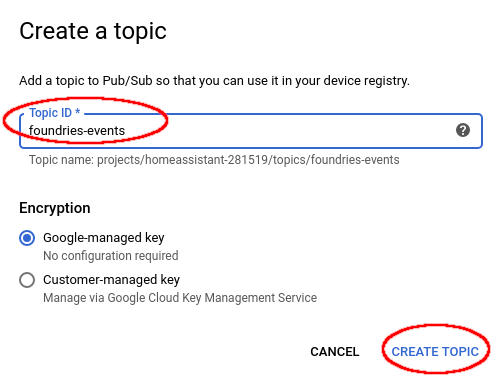
Topic ID
Leave “Device state topic” and “CA certificate” blank.
Finally click on “CREATE”

Topic ID
Necessary Informations
Now we will get the information you need to configure your device.
Go to: “Google Cloud IoT Core” page.
Make sure you selected your project:

Select your project
Copy your Registry ID:
REGISTRY_ID=foundries-registry
Click on your “Registry ID”:
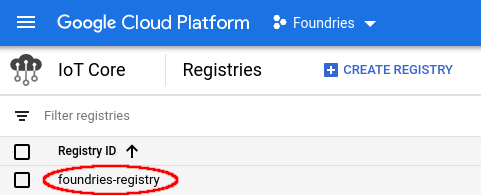
Select your registry
Base on the “Topic Name” copy the project ID:
PROJECT_ID=foundries-282100

Copy project ID
Device Rights
In order to avoid copying and pasting each device public key, we will generate a credential file that will allow the device to send the public key over the python script.
Go to “Create Service Account Key” page:
From the “Service account” list, select “New service account”
In the “Service account name” field, enter a name. In my case:
Device
From the “Role” list, select “Project > Owner”
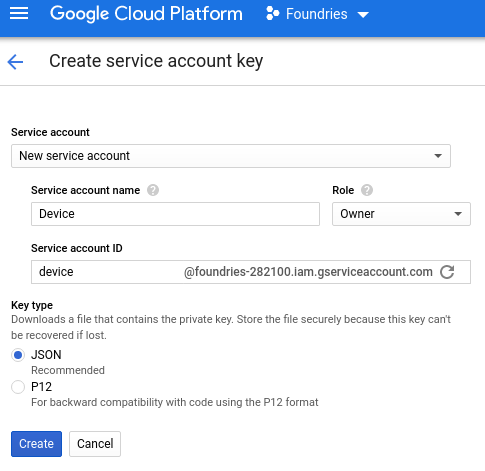
Create Service Account Key
FoundriesFactory
Cloning your repository
To interact with your FoundriesFactory you’ll first need to download the necessary repositories, change the code and send it back to the server.
First, navigate to Foundries App, find your Factory and the source code.

Device activation page
Open the container repository and clone it on your host machine:
# Ubuntu Host Machine
$ mkdir getstartedvideo
$ cd getstartevideo
$ git clone https://source.foundries.io/factories/getstartedvideo/containers.git/
$ cd containers
In order to enable Google IoT app we will need to clone some files from our reference repository:
# Ubuntu Host Machine
$ git remote add fio https://github.com/foundriesio/extra-containers.git
$ git remote update
$ git checkout remotes/fio/master -- google-iotsdk
Edit the docker compose app file and update the Factory name:
# Ubuntu Host Machine
$ vim google-iotsdk/docker-compose.yml
google-iotsdk/docker-compose.yml:
# google-iotsdk/docker-compose.yml
version: "3"
services:
  google-iotsdk:
    image: hub.foundries.io/<FACTORY_NAME>/google-iotsdk:latest
    tmpfs:
        - /run
        - /var/lock
        - /var/log
    volumes:
        - /home/prjs/google/config:/config
    environment:
        - GOOGLE_APPLICATION_CREDENTIALS=/config/google.json
    tty: true
    network_mode: "host"
    privileged: true
    restart: always
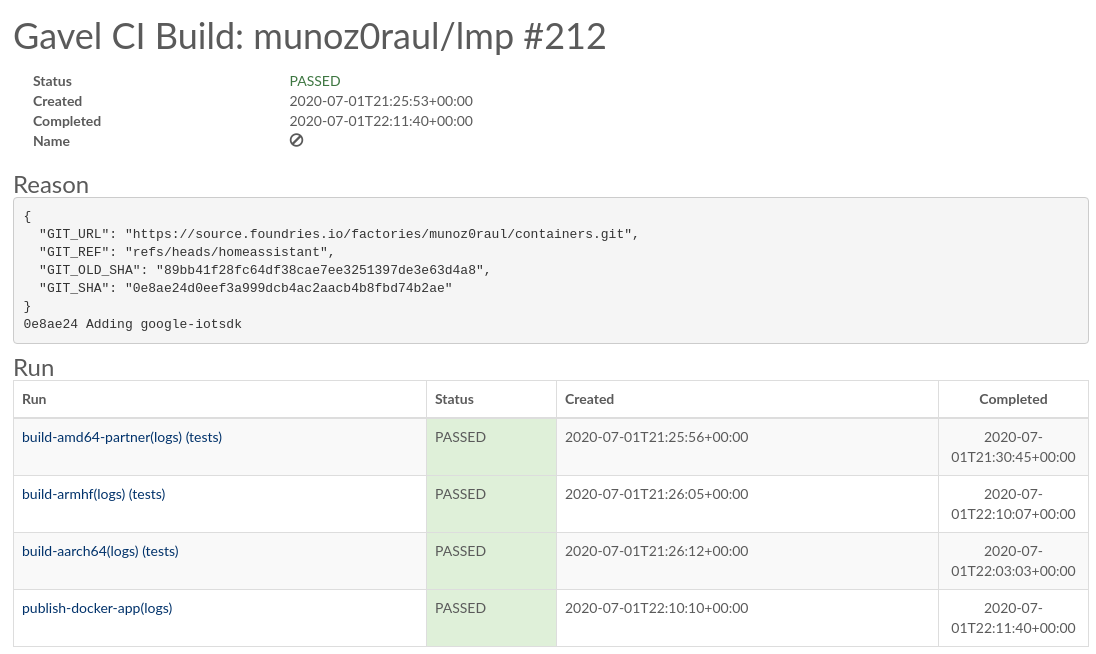
Add the changes to your Factory and wait for it to finish compiling your app:
# Ubuntu Host Machine
$ git add google-iotsdk/
$ git commit "Adding new google-iotsdk app"
$ git push
Building App
Enabling the App on your Device
In the following steps we assume you have your Raspberry Pi 3 with Foundries.io’s LmP running and correctly registered to your Factory.
With fioctl, we will enable the application “google-iotsdk” on your device registered with the name raspberrypi3. For more information about how to register and enable application, check the page Configuring Devices:
# Ubuntu Host Machine
# Configure the device to run the "google-iotsdk" app
$ fioctl devices config updates raspberrypi3 --apps google-iotsdk --tags master
On your Raspberry Pi, you should receive the update soon. You can watch the logs by running the following commands:
# Ubuntu Host Machine
$ ssh [email protected]
# Raspberry Pi 3 Target Machine
$ sudo journalctl -f -u aktualizr-lite
Debugging the Google IoT Container APP
In your Raspberry Pi 3 you can check the running container and copy the container ID:
# Raspberry Pi 3 Target Machine
$ docker ps

docker ps
With the container ID check the container logs:
# Raspberry Pi 3 Target Machine
$ docker logs -f 7b5e71952e01
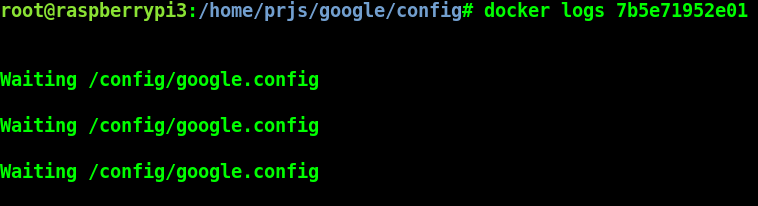
docker log
As you can see, Google IoT app is waiting for config files to connect and start sending data to the cloud.
Config files
We need to send two files to the device. The first one will be the “.json” file we just downloaded from Google. The second one we will create with some variables needed on the application.
Copy the credential file with the name “google.json” to your current folder:
# Ubuntu Host Machine
$ mkdir config
$ cd config
$ cp /home/munoz0raul/Foundries-f4b125154b80.json google.json
In the same folder, create a file “google.config” and copy the “PROJECT_ID” and “REGISTRY_ID”:
# Ubuntu Host Machine
$ vim google.config
google.config:
PROJECT_ID=foundries-282100
REGISTRY_ID=foundries-registry
Use fioctl to send the files to the device safely:
# Ubuntu Host Machine
$ fioctl devices config set homeassistant32 google.config="$(cat google.config)" google.json="$(cat google.json)"
After some time, the files will be copied to the folder “/var/run/secrets” on your device:
# Raspberry Pi 3 Target Machine
$ root@raspberrypi3:/home/prjs/google/config# ls /var/run/secrets/
google.config  google.json
Connect and send data to Google IoT
As soon as the container finds the “google.json” and “google.config” files, it will automatically create a random device name, private key, public key, register the device and start sending data to the Google IoT Cloud.
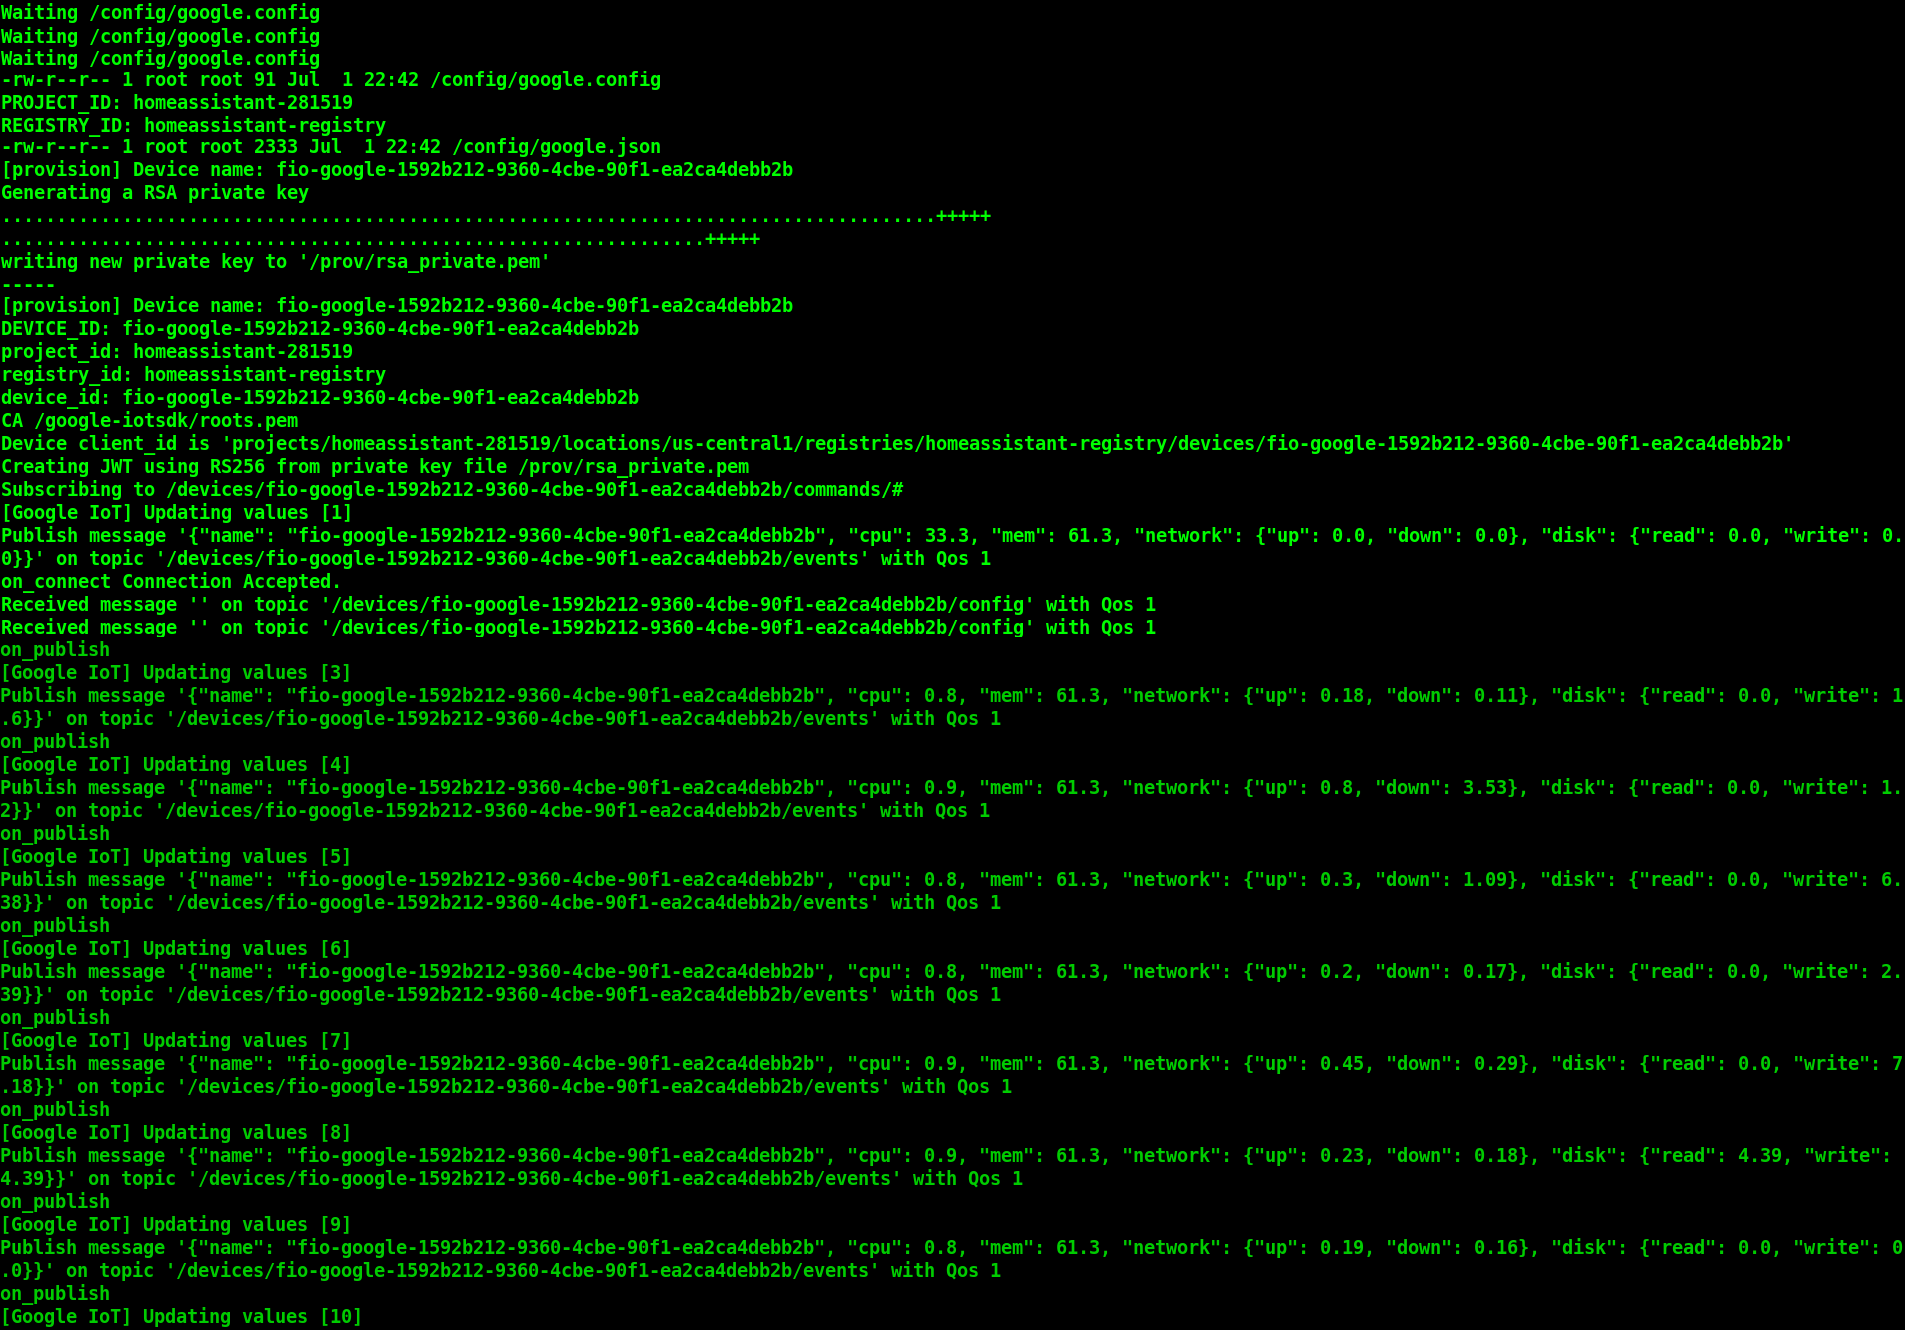
Connecting with Google IoT
Receiving data on Google IoT core
Once the previews steps are complete you will be able to receive data inside your Google pub/sub Portal.
You can verify this process is working by navigating to the “Google Pub/Sub”
Select your Topic:

Pub/Sub Topic
Click on “View Messages”

View Messages
Select your “Cloud Pub/Sub subscription” and Click on “Pull”
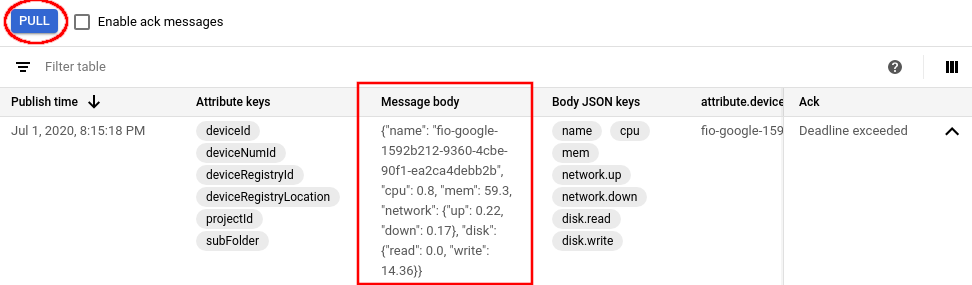
Messages