Install Linux microPlatform
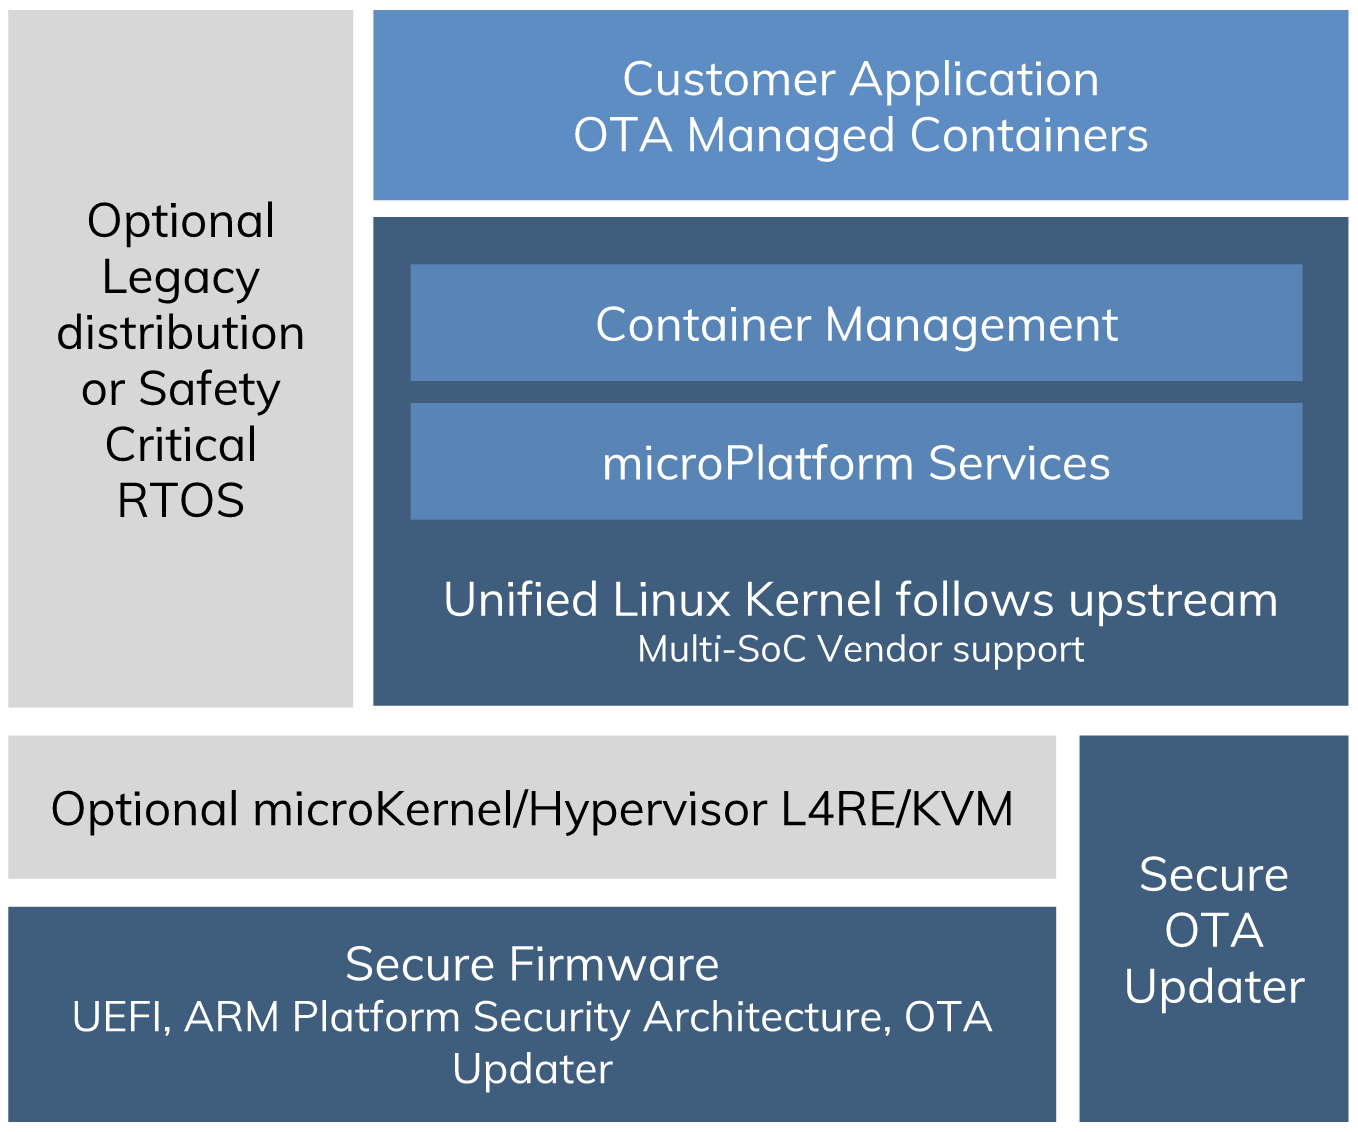
The Linux microPlatform is split into two parts:
- A base system, which is built using OpenEmbedded / Yocto. It provides a minimal runtime for application development which is over the air updatable.
- Applications, which are developed and deployed as containers running on the base system. Application updates are accomplished by running updated containers. Currently, Docker containers are supported.
Linux microPlatform
This document describes how to:
- Install the base system onto your device, connect it to the network, and connect to its console.
- Run the nginx web server in a container on the device, demonstrating application deployment.
Important
Make sure you’ve obtained dependencies as described in Dependencies before continuing.
Install Base microPlatform
You’ll start by installing the base microPlatform and connecting to your device’s console.
Instructions for officially supported boards are listed here. Currently, this is limited to the Raspberry Pi 3 Models B and B+.
If you’re using another board or want to build from source, see Additional Linux microPlatform Targets and Building the Linux microPlatform in the reference manual.
Get Prebuilt Image
Update 42 can be downloaded here:
Flash Image To SD Card
The Raspberry Pi foundation recommends using the the cross-platform Etcher tool to flash images onto the SD card you’ll use to boot your Raspberry Pi 3.
After you’ve installed Etcher on your system:
- Attach an SD card onto your host computer. Refer to this Embedded Linux wiki guide for a list of SD cards compatible with Raspberry Pi 3.
- Run Etcher, and select the pre-built Linux microPlatform image you downloaded on your file system.
- Select the SD card you mounted from Etcher, and flash it.
Additional, more advanced guides are available for macOS, Windows, and Linux.
Boot Raspberry Pi 3 and Connect to the Network
Choose a method:
Ethernet (Recommended)
Ethernet works out of the box if a DHCP server is available on the local network.
- Connect an Ethernet cable to the Raspberry Pi 3.
- Remove the SD card from your computer, and insert it into the Raspberry Pi 3.
- Apply power to the Raspberry Pi 3.
Your board will connect to the network via Ethernet. The board should be ready to connect within a minute or two of booting.
WiFi
If you don’t have Ethernet connectivity, you can connect to a WiFi network by temporarily enabling the UART console on your Raspberry Pi 3 and running a command to connect to your WiFi network.
Note
While a hardware serial port is available, enabling it unfortunately requires this device to run at significantly reduced speeds, and causes serious Bluetooth instability. Make sure to disable the console and reboot before proceeding.
You’ll need a 3.3 volt USB to TTL serial adapter, such as this SparkFun FTDI Basic Breakout 3.3V.
Mount the micro SD card containing the SD image you flashed on your workstation PC.
Edit the
config.txtfile on the VFAT partition, adding a new line with the following content:enable_uart=1
Safely unmount the micro SD card, remove it from your workstation, and insert it into the Raspberry Pi 3.
Connect the adapter to your Raspberry Pi 3’s UART and to your workstation computer via USB, e.g. by following this AdaFruit guide.
Connect a serial console program on your workstation to the adapter, and power on the Raspberry Pi 3.
When prompted, log in via the console. The default username is
osf, and the default password isosf. You should change the password before connecting to the network.Connect to the network using the following command:
sudo nmcli device wifi connect NETWORK_SSID password NETWORK_PASSWORD
Where
NETWORK_SSIDis your WiFi network’s SSID, andNETWORK_PASSWORDis the password.Safely shut down the Raspberry Pi 3, re-mount the SD card on your host workstation, and delete the line you added to
config.txt.Unmount the SD card from your workstation, insert it into the Raspberry Pi 3, and reboot it.
Warning
Do not skip the final steps. Functionality with the serial console enabled is severely degraded.
Your board will connect to the network you’ve saved after rebooting. You can now log in using SSH.
Log in via SSH
Use osf as the username and raspberrypi3-64.local as the
hostname:
The default password is osf; we recommend changing it now if you
haven’t already. For this to work, your local network needs to support
Zeroconf[1] and the hostname must be otherwise unclaimed.
If that doesn’t work, you can also log in by IP address. See Troubleshooting below for advice.
Finish Installation
Once you have an SSH console connection, finish your installation by setting up application containers. Follow instructions in Deploy nginx Container for a demonstration.
Troubleshooting
If the above methods to connect your Raspberry Pi 3 to the network don’t work, try one of the following.
Temporarily enable and connect to the UART (see directions above in the WiFi section) and determine available IP addresses with:
# Ethernet
ip addr show eth0 scope global

# WiFi
ip addr show wlan0 scope global
Then connect by IP address:
List connected devices and their local IP addresses on your network router’s administrative interface, and log in by IP address as above.
Test Your Connection
Test your Linux microPlatform device’s network connection any way you would like. For example:
ping -c 3 foundries.io
Deploy nginx Container
You’ll now finish installing the Linux microPlatform by deploying an example containerized application on your device which provides an nginx web server.
Important
Run these commands on your Linux microPlatform device, not your workstation.
Run update 42 of the container:
docker run --name nginx-demo -p 80:80 hub.foundries.io/nginx:42
After the image is downloaded, the running container will stay connected to your terminal.
Connect to nginx
Check that nginx is running by connecting to http://your-device-hostname.local (for example, http://raspberrypi3-64.local) or http://your-device-ip-address/ in your Web browser. You will see a splash page:
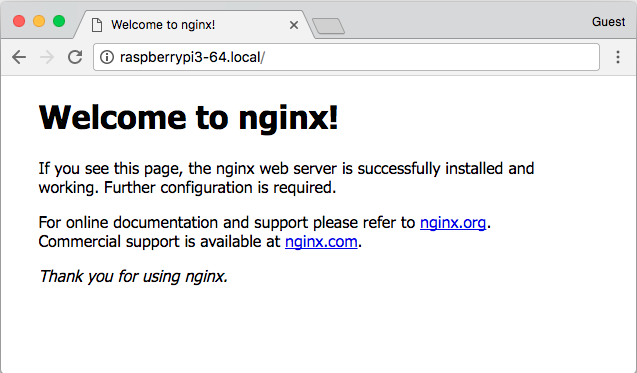
nginx splash page
Log messages will also appear in the terminal where you typed docker
run, like so:
10.0.0.111 - - [09/Jan/2018:21:07:21 +0000] "GET / HTTP/1.1" 200 612 "-" "Mozilla/5.0 (X11; Linux x86_64) AppleWebKit/537.36 (KHTML, like Gecko) Chrome/63.0.3239.132 Safari/537.36" "-"
2018/01/09 21:07:22 [error] 7#7: *1 open() "/usr/share/nginx/html/favicon.ico" failed (2: No such file or directory), client: 10.0.0.111, server: localhost, request: "GET /favicon.ico HTTP/1.1", host: "raspberrypi3-64.local", referrer: "http://raspberrypi3-64.local/"
10.0.0.111 - - [09/Jan/2018:21:07:22 +0000] "GET /favicon.ico HTTP/1.1" 404 571 "http://raspberrypi3-64.local/" "Mozilla/5.0 (X11; Linux x86_64) AppleWebKit/537.36 (KHTML, like Gecko) Chrome/63.0.3239.132 Safari/537.36" "-"
Press Control-C to stop the container, then remove it using:
docker rm nginx-demo
The Linux microPlatform is now successfully deployed on your device.
Next Steps
You can either continue the tutorial at Install Zephyr microPlatform, or learn more about the Linux microPlatform in HOWTOs and the Linux microPlatform Reference Manual.
Reporting Issues
Please report any issues to the Foundries.io Support Portal.
Footnotes
| [1] | Zeroconf is a set of technologies that allows automatic discovery
of systems and services available on a local area network. It helps
by assigning a local address name (e.g. Avahi, a free Zeroconf implementation, is available by default on the Linux microPlatform, making it easy for other Zeroconf-compatible hosts to locate the IP address assigned to the board. To use Zeroconf, simply use |